
If you’ve got your record player or turntable set up, have started enjoying your music, but are now wondering how to skip songs and jump to whichever track you want to hear, this post has you covered.
Playing and handling records is a delicate business, as we’ve covered in a few other posts such as our Complete Guide to Handling Vinyl Records (With Pictures) and How Vinyl Records Get Scratched, And How You Can Avoid It.
As outlined in those posts, the way records are treated is key to their longevity, and the way in which you change songs on a record player is another important factor in keeping your records in top shape.
To change songs on a record player, lift the tonearm while the record is still spinning, by using the cueing lever. Count the clearly marked rings on the record surface, which correspond to the track numbers. Now lower the tonearm onto the record surface where the track you want to play starts.
It’s a simple enough process, but one which is easy to get wrong, so I’ve outlined a guide below to show the best way to change a song on a record player.
It’s a step-by-step process accompanied by pictures to make it as helpful as possible.
Why It’s Good to Change Songs in the Correct Way on a Record Player
Before we dive into how to change a song on a record player, it’s important to understand why it needs to be done correctly, so here’s a brief overview of what we’re aiming to achieve – and avoid – by implementing the right method.
Any time you place the stylus (the record player’s needle) on the record surface and any time you take it off, the record is exposed to potential damage. This is due to the impact of the stylus, which is often constructed of diamond and is therefore much harder than the record’s playing surface.
The weight and pressure that the stylus applies to the record’s grooves is calculated very specifically by the manufacturer, but the inevitable result of repeatedly placing a hard component such as diamond onto a softer material such as a vinyl record constructed of PVC is wear to the record.
That’s just the nature of the beast. This wear is minimal with every use, but over time it builds up, and if the proper care and attention isn’t taken then a record will degrade much faster.
Changing songs on a record involves the repetition of the application and removal of the stylus, so it requires a careful approach. Despite taking great care, it’s still very easy to accidentally drag the stylus across the record surface, unintentionally make it drop or hop in or out of a groove, or inflict any other kind of impact on the record.
So, let’s jump into our simple but effective step-by-step guide to changing songs on a record, which will help protect your vinyl…
Step 1: Identify Where the Song You Want to Play is on The Record
Before playing any record, always give it a clean. It helps keep the record in good shape for longer, and also improves the quality of your listening experience.
If you’re looking for a decent, affordable cleaning kit I can highly recommend this KAIU one. I have it at home and it comes with two different brushes, cleaning solution for records and also a small brush and cleaning solution for the stylus.
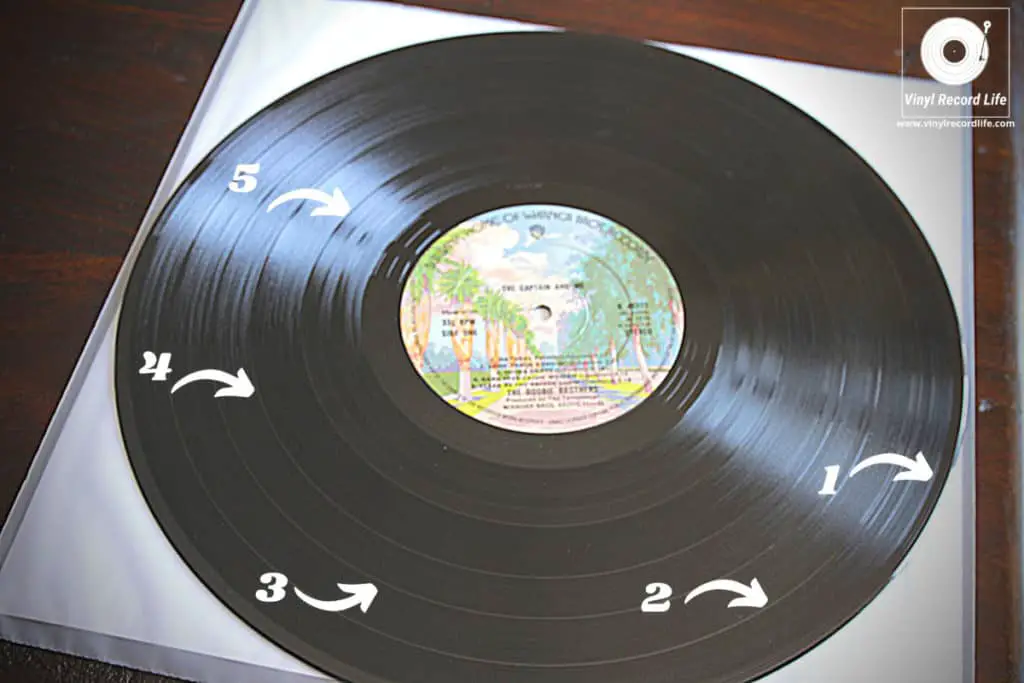
The start of each song is easily identifiable on a record’s surface by a separating gap between each track.
Take a look at this photo for a clear indication of how to figure out where a song starts on a vinyl record:
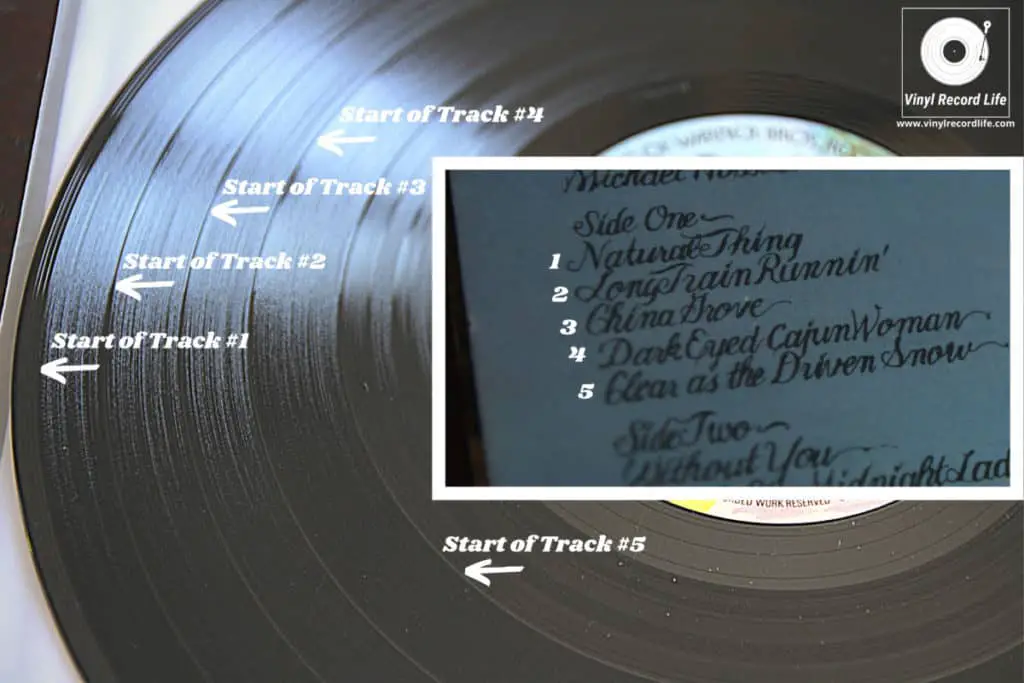
By checking the track listing on your record sleeve, and counting the rings on the record surface, you can quickly and easily work out exactly where you need to place the stylus to start at the song you want to hear.
Having a lamp beside your record player will often help to make spotting the tracks a lot easier, and some turntables will even have a small light built in that shines across the record’s surface.
Now that you’ve identified where you want to listen from, how do you change the music on the record?
Step 2: Lifting the Tonearm
You need to remove the stylus from the record’s playing surface while the record is still spinning, and if your turntable or record player has a cueing lever, you need to use this any time you’re lifting or lowering the tonearm.
One of the main reasons it’s important to lift the stylus while the record is spinning is because by stopping the record with the stylus in the groove, the record is exposed to the heat build-up in the stylus.
As the stylus is running through the record’s grooves while playing, it generates heat, and this can be detrimental to the record if left in the groove.
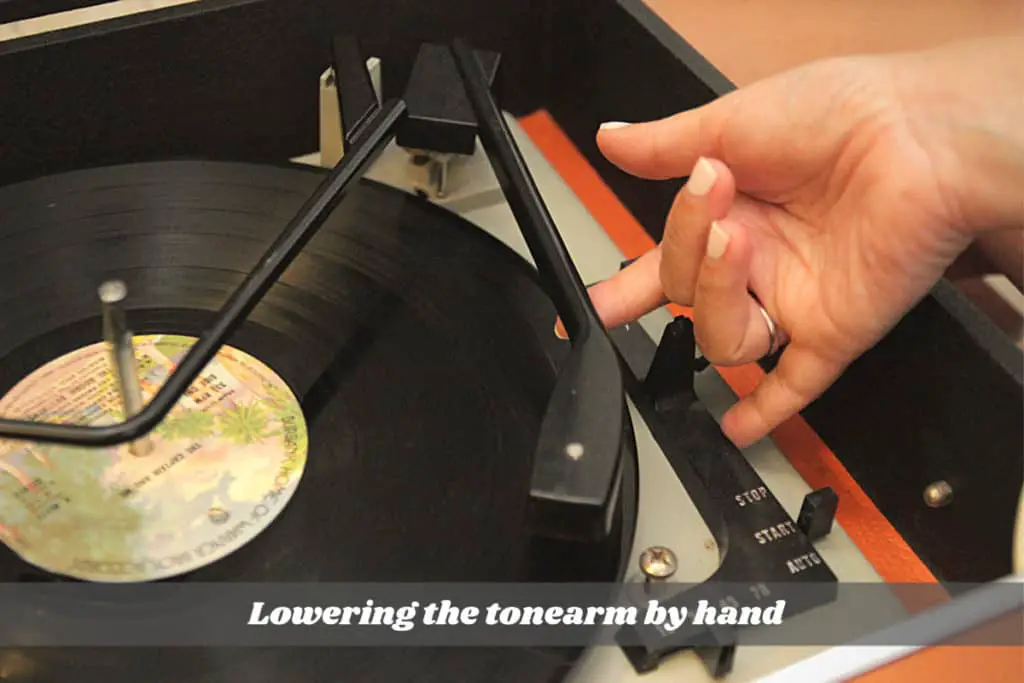
If your record player doesn’t have a cueing lever, then you’ll need to lift the tonearm by hand. Resting your hand or your pinkie finger on something steady beside the platter will allow you to raise the tonearm as steadily as possible. See this photo for guidance:
Step 3: Moving the Tonearm to the Desired Track
The next step is moving the tonearm in line with the desired track, and preparing it to be lowered so that the stylus comes into contact with the record at the start of the selected song.
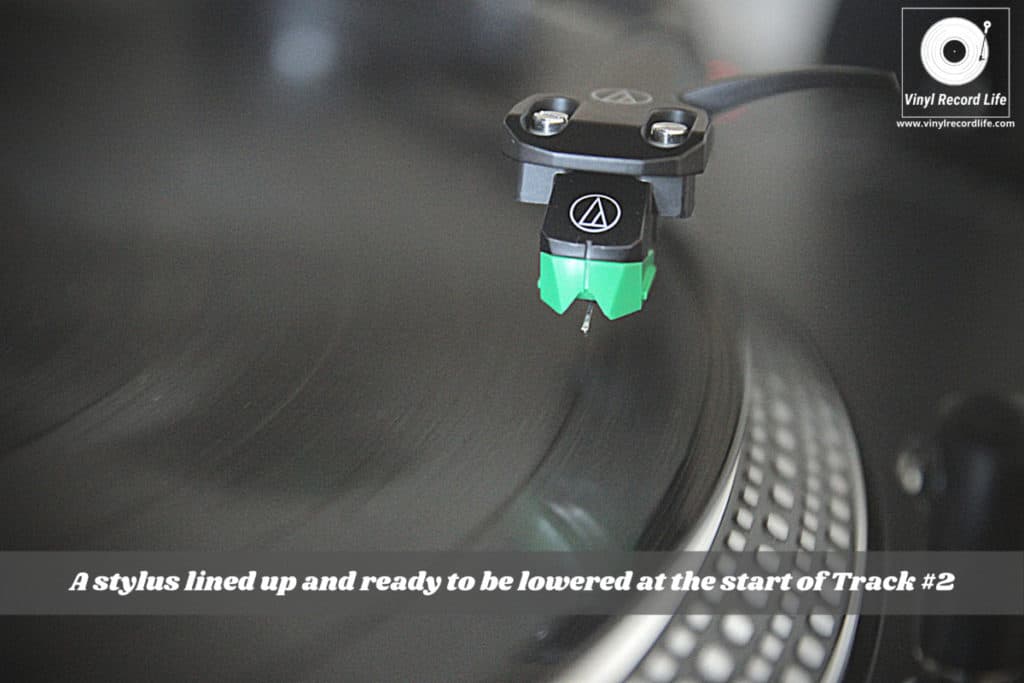
Moving the tonearm to the exact spot takes a little practice and is something you’ll improve on (quickly!). Once the tonearm is in place and the stylus is lined up, you’re ready to lower the tonearm.
Here’s a stylus all lined up and ready to be lowered:
Step 4: Lowering the Tonearm
Using the cueing lever, or using a steady hand, you can now lower the tonearm slowly so that the stylus comes into contact with the spinning record at the right place.
If you’ve lined it all up perfectly, you’ll place the stylus exactly in the ring between songs and the track you wanted to go to will start almost immediately.
Lining up the stylus perfectly isn’t something many people get right first time, so you may catch the end of the previous song or already be a few seconds into your desired track when the stylus finds the record groove.
This is something you’ll figure out with time, and the most important thing at this stage is that you’re lowering the stylus into the record groove carefully and in the correct manner.