
Taking great care of your records is one of the most important factors in ensuring you’re always getting the best possible sound out of your collection, and keeping your records clean and in the best possible condition is one way to achieve this.
We all know records are delicate and need to be handled with care, so how do you clean vinyl records at home effectively, while also making sure you’re not damaging them?
To clean a vinyl record, remove dust and debris with an anti-static record brush. Apply a specialized cleaning solution and wipe the record surface in a circular motion – following the record grooves – with a clean, lint-free microfiber cloth. Then use a dry microfiber cloth to remove any residue.
Once you’ve removed any excess cleaning solution, it’s important to then allow the record surface to dry completely before you play or store the record.
This is the simplest, fastest way to clean a vinyl record, but there are a few different ways to go about it and I’ll discuss them below, from the basic and cheap through to the affordable but more rigorous, right up to the “luxury” option, which is far costlier.
Most people will be looking for something simple, cost-effective and safe, and this is what the below step-by-step guide I’ve laid out with accompanying photos further down this article focuses on.
Why It’s Important to Clean Your Records
Keeping your records clean has numerous benefits, key amongst them ensuring the longevity of your records, protecting your equipment and getting the best sound and listening experience.
Records collect dirt, dust and all manner of other debris even when they are well cared for, so removing as much of this as possible on a regular basis is essential. A dirty record is one of the main reasons why you may be experiencing a sub-optimal listening experience – read more on the main causes of bad-sounding records, and how you can remedy them, here.
If records aren’t cleaned frequently, all that unsavory material that builds up becomes embedded in the grooves of the record and gets harder to remove with the passage of time.
This in turn can lead to damage such as scratches, undesired crackle on records, and is a major cause of bad sounding playback on records. That’s just to name a few of the possible problems you’ll encounter if your records aren’t cleaned regularly.
Dirty records will also impact on your equipment, affecting the lifespan of your turntable stylus (as well as its performance).
How Often Should I Clean My Vinyl Records?
To keep vinyl records in optimum shape, you should give them a dry clean before and after each play with an anti-static record brush. This only takes a few seconds, but it will help to remove superficial dirt regularly, and prevent that debris from becoming embedded in the record’s grooves on a more permanent basis.
When it comes to a deeper clean, there are a couple of specific scenarios in which I give my records a more thorough clean with a dedicated cleaning solution, and these are:
- Before a record’s first play. Regardless of whether it’s a brand-new disc fresh out of the sealed packaging or a second-hand purchase, it’s important to remove whatever may have made its way into the record’s grooves. Even new records pick up debris during the packing process.
In many cases a deep clean prior to first play will be the only time you ever need to really give the record such a detailed clean – if you then store the record correctly and give it a clean with an anti-static brush before and after each play, the need for a deep clean will be far less necessary.
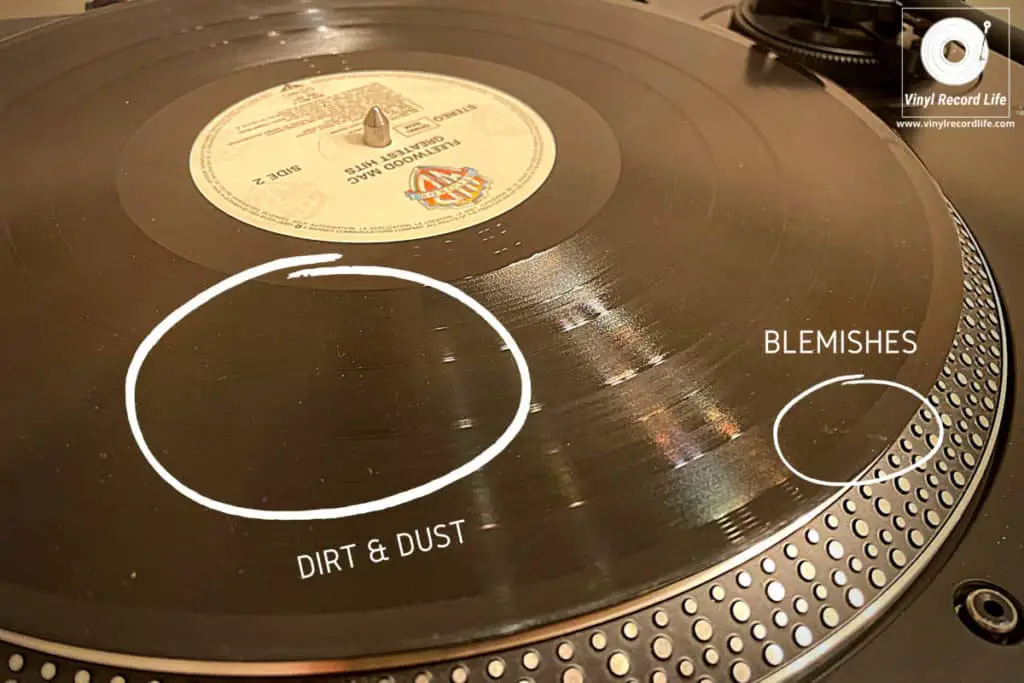
- When the record doesn’t sound (or look) good. Oftentimes you can hear when there’s more than just some superficial crackle on a record whilst playing, and there always comes a time when the dirt in the grooves gets too stubborn for the quick pre- and post-play brush to take care of. Sometimes you’ll also just be able to see that a record needs a good clean due to the state of the record’s playing surface.
Cleaning Your Records with Care: Important Things to Remember
Cleaning your vinyl records is only one part of the process in keeping them dirt-free and in top shape. There are a few other things you can do that, in tandem with a good cleaning routine, will help to keep them spotless and damage free.
Always Handle Vinyl Records with Great Care
Never touching the record’s playing surface is an audiophile mantra! Read more on how to handle records properly, and why it’s so important to keeping your collection preserved in our Complete Guide to Handling Vinyl Records (With Pictures).
Store Records Correctly and in Dedicated Inner and Outer Sleeves
Our guide to handling records touches on this, and it’s a definite piece in the puzzle of keeping records clean when not in use. First up, you can buy a set of anti-static inner sleeves as these help minimize static and keep records clean, and tend to be much better than the inners that records come in.
An outer sleeve will not only help keep the record jacket/artwork in great condition, but will also provide another layer of protection against dust, dirt etc when records are not in use.
And of course, storing records upright (never stacked!), in a low humidity environment that’s well ventilated, clean and away from direct sunlight helps them live longer and stay clean. Read more on storing records here.
Keep Your Record Playing Equipment Clean to Help Keep Your Records Clean
Ensuring your stylus, slip-mat and general record-playing equipment is clean is another way to help keep your records clean. A stylus will gather dirt over time, as it collects whatever debris may remain in records’ grooves, and it’ll then drag that through the grooves of other records and damage them.
Avoid Cleaning Records with Household Products
One final thing to always keep in mind when cleaning vinyl records is to avoid using anything corrosive or potentially damaging. That may seem like a no-brainer, but there’s a lot of information out there on the web about vinyl record cleaning “hacks” etc, some of which suggest using products such as Windex, vinegar, alcohol, wood glue and a whole host of other stuff. Do not use any of these!
Alcohol is used in some record cleaning solutions which are sold specifically for this purpose, but the concentration is low and it’s highly advisable to not try and mix up your own alcohol-based potion at home. Read more on the use of alcohol for cleaning vinyl records here.
Straight up soap and water is also touted by many as a cheap and fast way to clean records, and while this is probably the least harmful method compared to some of the more abrasive ones outlined as being a no-no above, it’s advisable to avoid as well.
Cleaning Vinyl Records: The Different Methods
The most effective, but also the costliest way of cleaning vinyl records is to use a vacuum cleaner. This is top-level record cleaning kit, but obviously get the very best results.
It’s all relative – if you have a large collection in which you’ve invested some serious time and money, then spending around $500 on a Pro-Ject – VC-E Record Cleaning Machine is a wise investment.
There are more affordable options, such as the Record Doctor vacuum cleaner, which at half the price is less fancy, but does a great job.
Vacuum cleaners will be a few levels above what a lot of people are prepared to invest in though, both in terms of money but also cleaning time.
Record washers are less expensive and don’t utilize as much technology as vacuum cleaners, but the price is much more palatable and the results are good. For well under $100 the Record Washer System by Spin-Clean will give records a deep-groove clean that makes a difference.
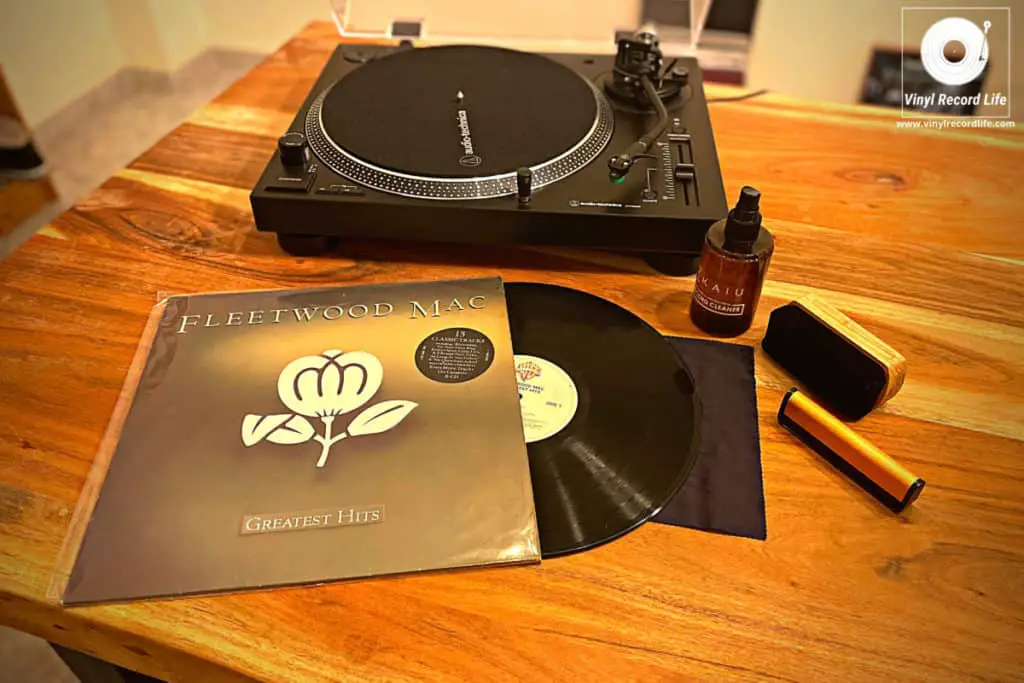
Cleaning records by hand will be the go-to method for most vinyl enthusiasts, and to be perfectly honest if you use a decent record-cleaning kit (incorporating an anti-static brush, specialized solution and microfiber cloth) and follow the below steps then cleaning by hand is more than sufficient for protecting your records.
A Good Vinyl Record Cleaning Kit is Essential for Cleaning Records by Hand
To clean records effectively by hand, I really recommend a good quality cleaning kit. It’ll set you back around $30, but it’s a worthy investment.
There are three kits I can recommend from personal experience: GrooveWasher, KAIU and Big Fudge.
The KAIU kit provides the best value for money, in my opinion, and comes with everything you need to give your records (and stylus) a thorough clean.
However, I’m happy recommending either of the three as they are all quality, and each offers something slightly different in terms of what it contains. Here’s a quick comparison to help you decide on which may be best for you, if you’re in need of a cleaning kit.
| Brand | What’s included in the kit | Link to purchase |
| GrooveWasher | > Handcrafted walnut handle > Replaceable microfiber cleaning pad > G2 record cleaning fluid > Record label protector |  |
| KAIU | > Anti-static record cleaning solution > Stylus cleaner > Carbon and velvet brushes > Record label protector > Microfiber cloth |  |
| Big Fudge | > Velvet record brush > Cleaning liquid > Stylus brush > Storage bag |  |
How to Clean Vinyl Records: A Step-by-step Guide
Always make sure you’ve got clean hands and a clean surface (I always lay down a lint-free microfiber cloth on a flat surface) before you clean your records!
Step 1: Light Cleaning with an Anti-Static Record Brush
Place the record on the turntable and set it spinning. Take the anti-static brush and gently place the bristles on the record surface, making sure you’re holding the body of the brush and are not touching the bristles – this allows for the static removal.
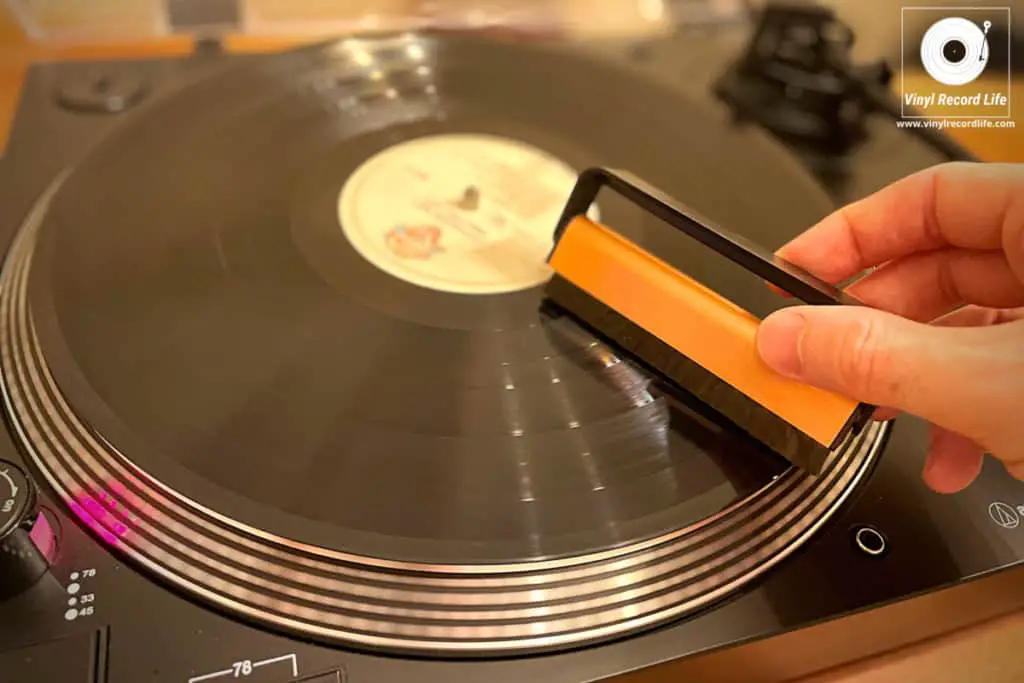
You don’t want to be applying so much pressure that the bristles of the brush become squashed, flattened or misshapen, as this will only serve to push dirt etc further into the grooves. Just enough pressure should be applied so that the tips of the bristles are grazing the surface of the record and are able to run in the grooves – this pressure should be minimal.
Hold the brush in place for 3-4 revolutions of the record, and then scoop the brush up gently.
There are a number of different methods when it comes to what to do when the brush is in contact with the record surface. Some advocate for moving the brush from the outer edge of the record towards the inner edge, while others believe moving from inner to outer edge is the best way.
There is no right or wrong method. I prefer to avoid moving the brush across the grooves and keep it stationary for a few revolutions purely to avoid dragging any debris across the record surface and risk damaging/scratching it.
Step 2: Clean the Brush and Repeat
Most brushes (like the two in the image) come with a handle, which serves to both protect the bristles when not in use, but also help clean any dust/dirt collected without the need to touch the brush with your fingers.
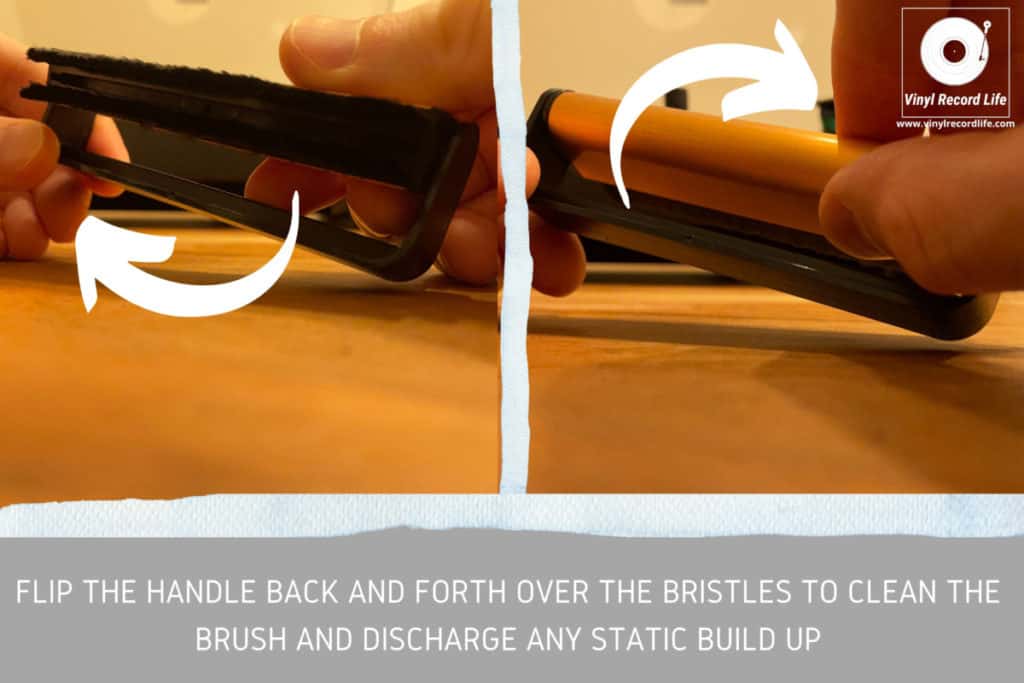
Flipping the handle back and forth a few times over the bristles will help remove whatever the brush has collected, and you can then repeat the process of running the brush over the record’s surface.
- This process of light cleaning is the one you should practice pre- and post-play each time you use a record.
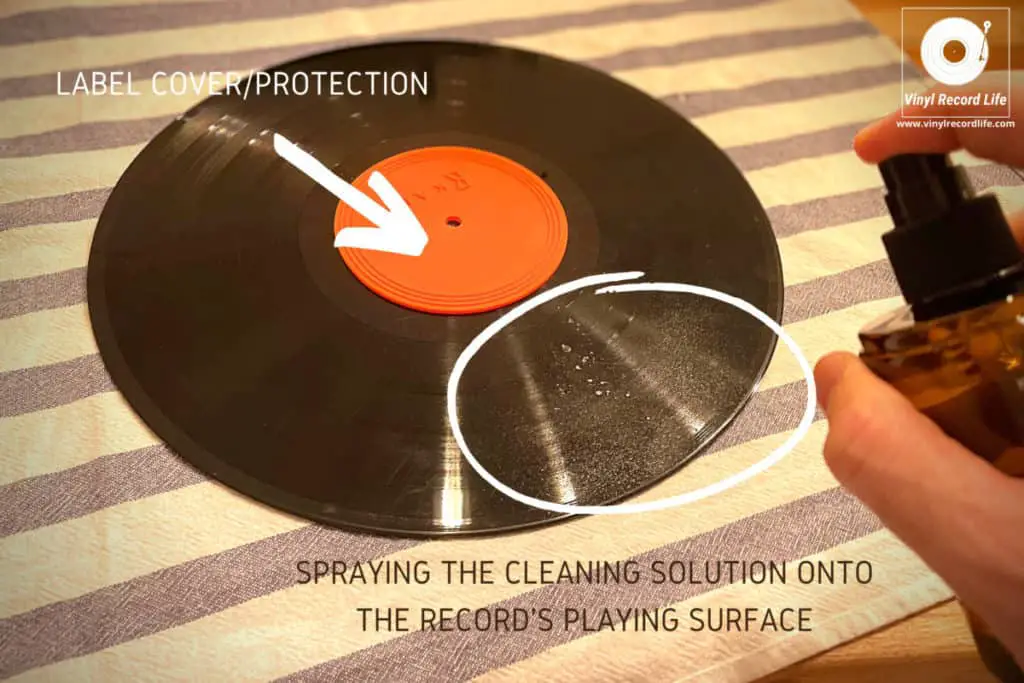
Step 3: Apply the Record Cleaning Solution
Move the record from the turntable platter to a flat, clean surface such as a lint-free towel.
Protect the record label to ensure the solution doesn’t damage it, and then apply the solution by spraying it as evenly as possible across the surface of the record. Do this from a distance of about 6 inches (15cm), and no more than 5 sprays should be plentiful.
Leave the solution for a minute, maximum 2 minutes, to get to work.
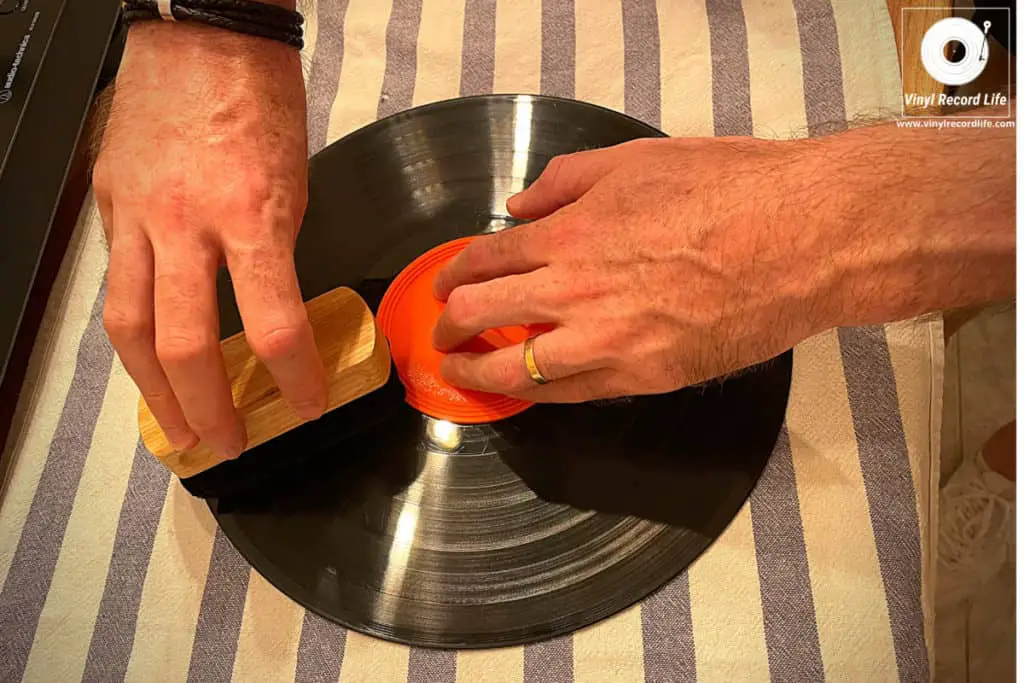
Step 4: Wipe the Cleaning Solution Off the Record
Once the cleaning solution had had its chance to work away on the dirt, you can then take your microfiber cloth and gently wipe the record in a clockwise, circular motion.
If your cleaning kit has a velvet brush like the KAIU kit provides, you can use this before the microfiber cloth, to remove the bulk of the solution, and then use the cloth to remove any remaining traces.
Leave the record to dry for a couple of minutes. You may need to repeat steps 3 and 4 if the record is particularly dirty.
Step 5: Repeat the Process on the Other Side
Once the first side is dry, you can repeat the whole process on the other side.
Step 6: Repeat the Light Clean Process Before Storing the Record
Once both sides of the record have been deep cleaned, you can repeat steps 1 and 2 quickly on each side of the record to eliminate any static charge and superficial dust that may have already gravitated towards the record.
Doing this before you place the record in its inner sleeve and jacket is important to ensure that the record is being stored in as clean and dust-free a way as possible.