Used records offer so many great opportunities for expanding your music horizons, digging up old favorites, and uncovering gems. They’re a real part of the romance of collecting vinyl, but they can also come with plenty of pitfalls too.
Being able to inspect a used vinyl record properly is key to not getting caught out when buying one second hand, and will help you avoid wasting money on records that could also cause damage to your equipment.
The condition of used records can vary wildly, so the ability to spot any issues quickly will stand you in good stead.
To inspect a used vinyl record, remove it carefully from its sleeve and hold it up flat to eye level. Observe the sheen of the surface and whether it’s become overly dull, look for scratches or blemishes, and check for any warping or irregularity in shape. If possible, always give a record a play.
These are the quick, relatively superficial checks you can carry out to gauge the condition of a used record, but it always pays off if you have the time to spend even just a minute or two more going through a slightly more rigorous process.
In this article we’ll get into how you can do that, and the main factors to consider when inspecting records.
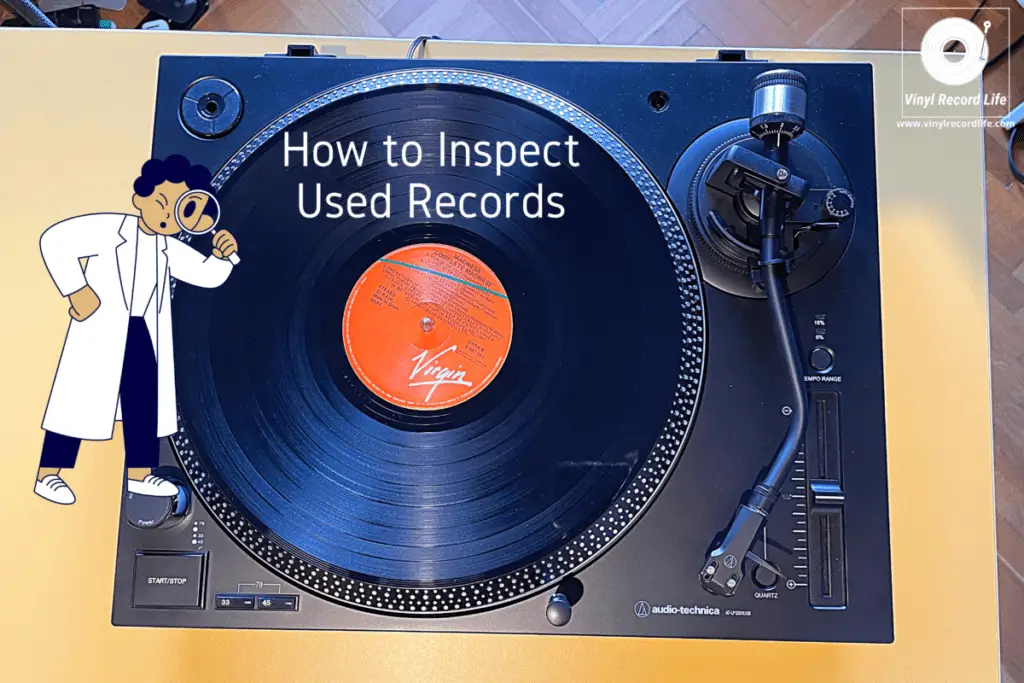
The Key Steps to Focus on When Inspecting a Vinyl Record
We’ve pulled together what we consider to be the most important steps you can take when inspecting a vinyl record, to ensure you’ve got a useful resource for knowing what to do.
Before getting started on inspecting a record, it’s important to quickly establish a couple of important things that will significantly aid what you’re about to do:
- To inspect a record you need good light. Without being able to really show up the true appearance of the record’s surface, it’ll be much harder to do a comprehensive inspection.
- You need to be ready to not feel self conscious about inspecting a record. This means be prepared to do what you’re about to do without any qualms about taking records out of their sleeves in a store or at a thrift sale. I’ve seen people feel inhibited about doing this, but it’s totally fair and part of the record-buying process to properly inspect a used record before buying it.
Step #1: Don’t Judge a Book by Its Cover, but You Can (Semi) Judge a Record by One
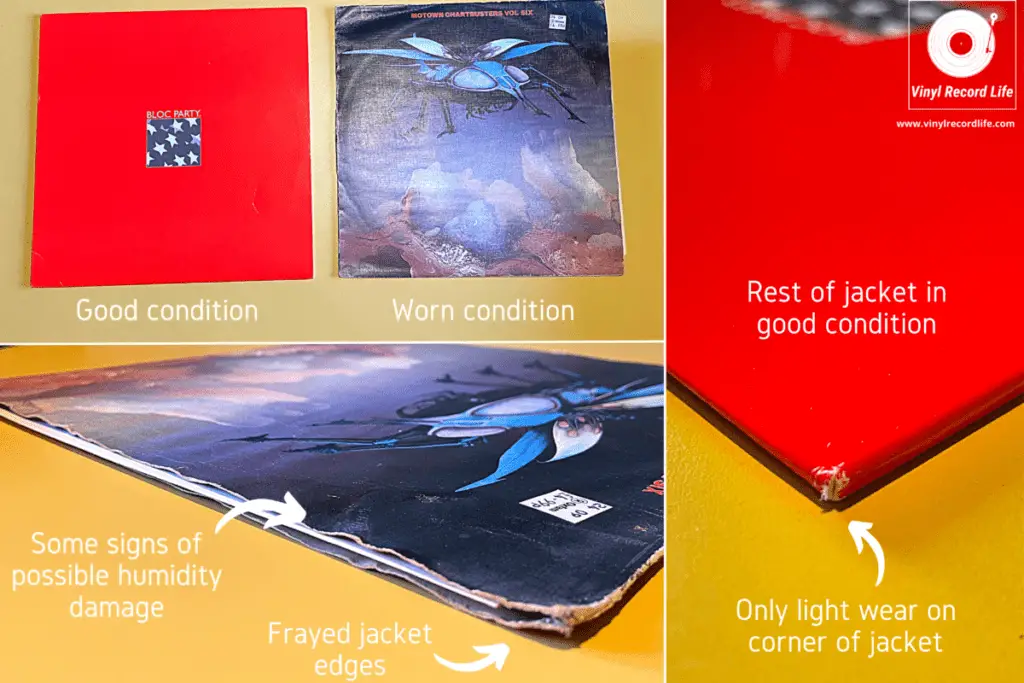
Don’t write a record off based on its jacket, but do take into consideration the condition it’s in.
A tatty, worn jacket cover often means the record’s not been stored well, or generally taken care of in the ideal manner.
Of even greater importance is the inner sleeve. If it’s really old, stained and/or torn or damaged in any way, then it’s most likely not been able to do its job of protecting the record inside.
If it’s an old paper inner sleeve then that means it hasn’t been changed for a very long time, and that the record may have been somewhat neglected.
If there’s no inner sleeve at all, then the record is likely to have a fair amount of dirt embedded in its grooves, and its surface most probably has a lot of finer debris sitting on it.
So, what is the general appearance of the record cover at first sight? And how does it make you feel about what kind of condition the record inside could be in?
Tip: When you do buy a used record, give it a new inner and outer sleeve, as the old ones will usually be extremely worn and carrying a lot of fine debris. My inner sleeves of choice are these ones (link opens in Amazon), and I use these outer sleeves.
Step #2: The Initial Visual Inspection
This is the first few glances you take as you see the record for the first time you get it out of the cover.
I tend to immediately look for the following:
- Does anything jump out at me? Are there any obvious defects or damage that can be seen without even having to make the effort to look for them?
- Is the record warped or out of shape? Sometimes this is so obvious that you don’t even need to look closely.
- What does the center label look like? If this is clearly damaged or tatty/worn, then it’s usually a sign to me that other things will be problematic when I take a closer look at the record’s condition.
Always remember to handle records with care, whether they’re new or used. For top tips on how to handle a vinyl record properly check out our guide.
Step #3: Inspecting the Record’s Surface
Now that you’re ready to take a closer look at the record’s surface, this is where I take stock of the luster of the disc. How bright is it?
If the record still has a bit of a shine to it, then generally that’s a good sign. The duller the surface, the more worn it’ll be.
How smooth and unblemished is the record surface when held up to the light? If it reflects the light brilliantly then this is a good sign, and when you’re throwing some light on it for the first time you’ll see any dirt or dust that’s present. If there’s a little bit, it’s par for the course with a used record, but if there’s a satisfying sheen with little debris then you can be pleased!
Sometimes, a used record has had such little play that its inner sleeve still leaves very small slivers of paper on the surface. This is a great sign, and not to be confused with dirt. It can be taken as an indicator that the record’s had little use and should be in great shape. You’ll often only find this on brand new records however.
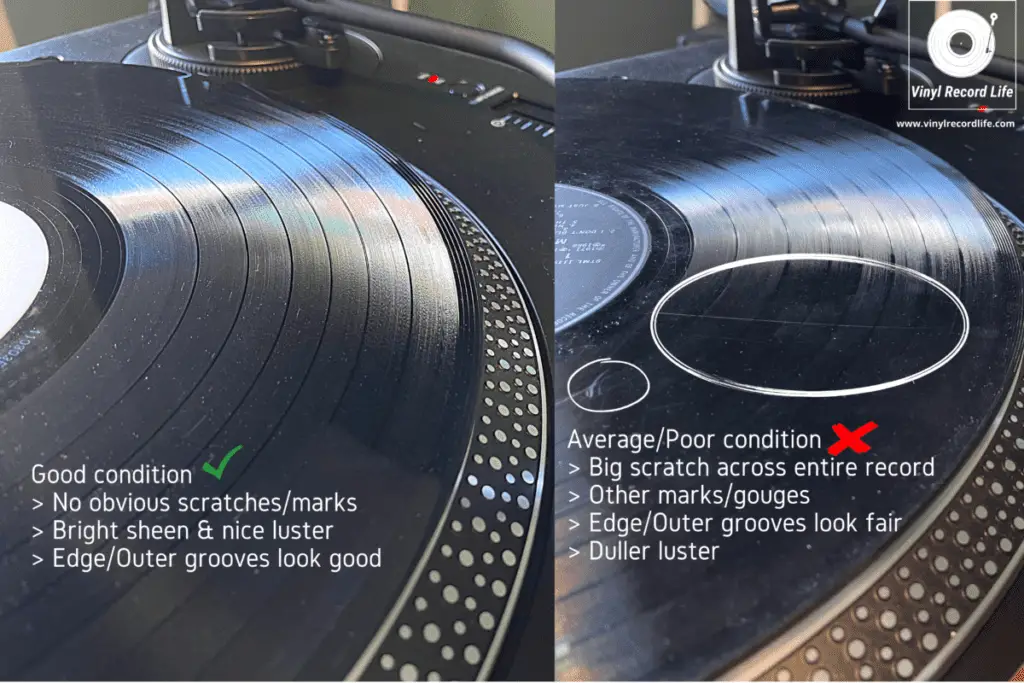
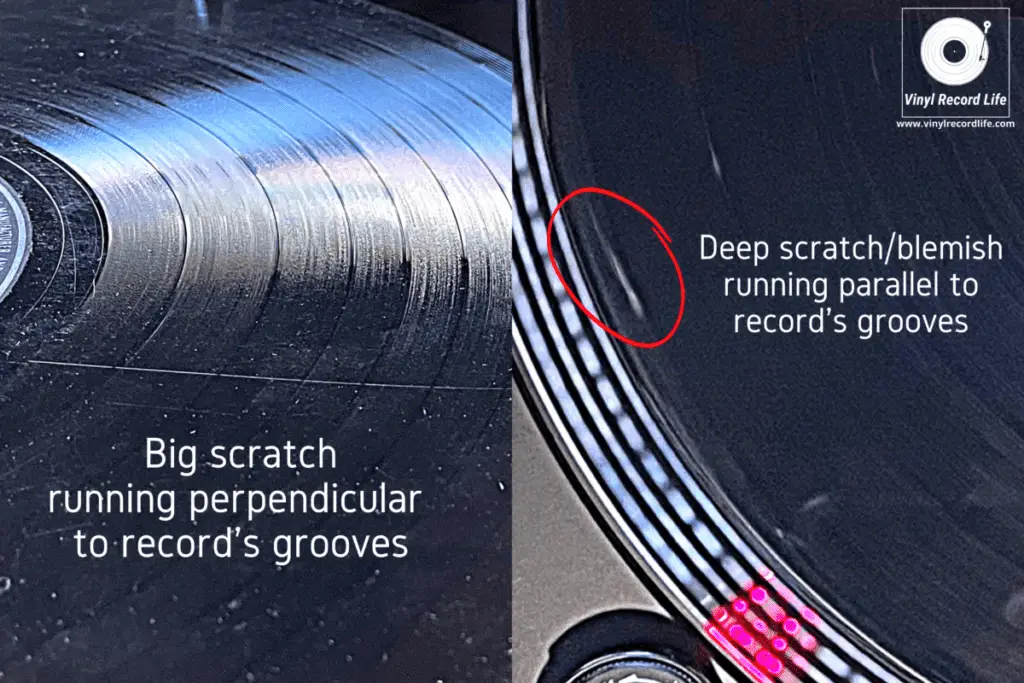
Step #4: Looking for Scratches and Blemishes
A crater of a scratch will jump out at you straight away, but often there are a lot of micro scratches on a record that can vary in severity from barely noticeable when listening to being completely unbearable.
You need to get the record under a bright light, and play with the angle of the light on the record’s surface to be able to survey and easily see the scratches. You can do it with ambient light too, but it may take longer.
Any kind of scratch can be potentially terrible, but the scratches that are almost in line with, or running parallel to, the record’s grooves can be the worst as these cause the record to skip. Scratches that run perpendicular to the grooves will cause pop when playing.
Don’t be afraid to run your fingers over the scratches too. Ordinarily, touching a record’s surface is a big no-no, but if you’re inspecting one and are planning on parting with cash for it, and you see scratches, trace your fingertips over the scratches.
If you can feel the scratch, then it’ll be heard a lot stronger than a delicate one that is either hard to feel or can’t be felt at all. Read more about scratches, how they occur and how to avoid them here.
Step #5: Another Telltale Sign To Be Attentive To
Always look at the edge of the record, as the start of each side is where the most significant damage can be done.
If the record’s previous owner wasn’t careful when placing the stylus on the record at the start of each play, then they may well have caused some damage there, and this will give you a heads up for the general condition of the disc.
Step #6: The Listen Test
This is something you really should do if you can. Most record stores will have a listening station where you can take second hand records for a quick spin. Take advantage of this.
Visual inspections using the steps outlined above will give you a good idea of what the record may sound like. But of course, your ears will be the real judge, so put them to work!
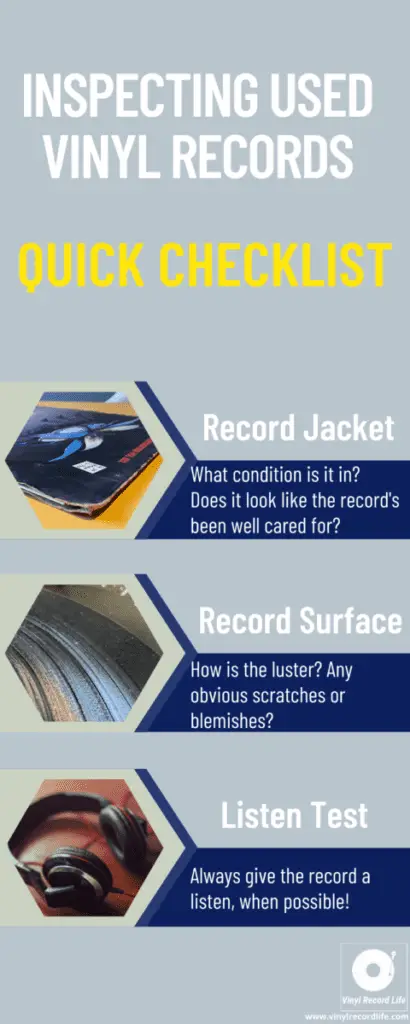
Inspecting Used Records: Quick Recap Checklist
As a final sign-off on the subject, here’s a brief summary overview of some of the most important points to look for when inspecting a used vinyl record.
And remember, it’s always a good idea to give a newly purchased record, whether it’s brand new or second hand, a good clean as soon as you get it home.
Enjoy your quest for some pre-owned gems!