
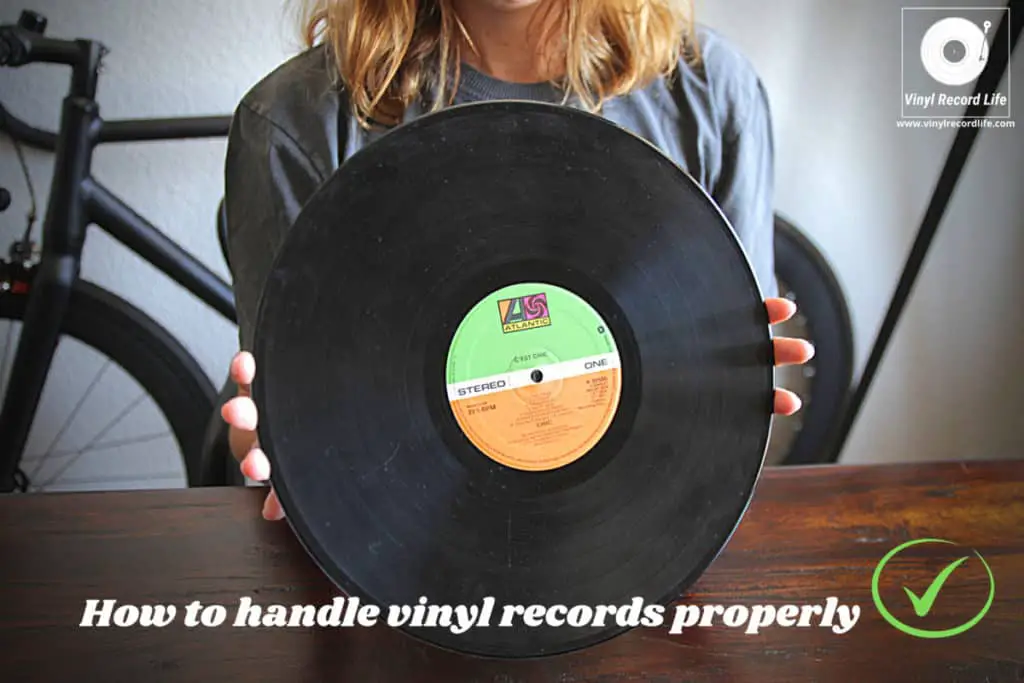
One of the most important steps in a proper care routine for a vinyl record collection is the handling of records. However, it’s also one of the most overlooked areas of record maintenance.
It’s all too easy to not give any thought whatsoever to how you actually hold a record, but thankfully it’s also a very simple process which is fast and easy to master safely.
By implementing the following guide to handling vinyl records, you’ll be able to rest easy knowing that you’re doing everything possible to ensure their preservation.
To correctly handle a vinyl record, first remove the inner sleeve from the jacket. Next, slide a hand inside the inner sleeve and place your index, middle and ring fingers on the record’s center label, and your thumb on the record’s outer edge. Slide it out, and avoid touching the record’s surface.
Once you have the record out of its sleeve, handling it in the correct manner is just as important.
Through the years, I’ve found – often through my own mistakes, and also through learning from experienced record collectors – just how easy it is to mishandle a vinyl record and the negative impact that can have on its longevity and sound quality.
Thankfully, that experience has also helped me to understand and develop a simple, fast and effective routine for handling my records, and I’ve outlined this in a step-by-step guide below.
It should also help you to handle your own records in a way that doesn’t make it laborious, but which also doesn’t cut any corners. The aim is to keep it so simple that it’ll quickly become second nature!
Handling Vinyl Records: Where to Start
While this is a relatively straightforward subject, and one which it’s important to not overcomplicate, there are a few simple but significant precursors to handling vinyl records. These will provide a solid foundation of best practice when it comes to how you treat your records.
Even before a record is taken out of its sleeve and handled, the way it’s stored is very important, as is the cleanliness of the record and its environment. Don’t worry, we’re not talking about forensic-lab levels of hygiene here!
Just by making sure that the record surface itself is kept clean and that your hands are free from any grime, grease or anything else that may get onto the record’s playing surface is what’s needed.
Some enthusiasts go the extremes of wearing microfiber or nylon gloves when handling their records, but I’ve never ventured that far! In all honesty, just being sensible about hand cleanliness will be more than sufficient.
The fact that handling records is such a frequent part of the whole record-playing experience means that you can’t exactly avoid touching your records, right? The next best thing you can do is handle them right and minimize any risk of damaging them.
Why Is The Way You Handle a Record So Important?
Every time that a vinyl record comes out of its sleeve it is exposed to any number of external environmental factors that can damage it. A lot of these will be such small influences which, in isolation, are nowhere near enough to cause damage on their own. However, if they build up over time they can combine to have a real impact on the degradation of a record.
Dirt and dust are two of the major enemies of a record playing surface. Both are easily transferred from your hands, and even from the record’s cover to the record without you realizing it. If you want to know more about how dirt can harm records, and how to avoid it, check out my post How Vinyl Records Get Scratched, And How You Can Avoid It. It has some great tips on how you can avoid damaging records.
Naturally-occurring oil on your hands can have a real detrimental effect on a record, so even with great care it’s still easy to transfer some kind of dirt onto the playing surface.
This is why handling records in a careful, considered manner is so important to prolonging their lifespan and preserving their sound quality, and is why I recommend the following steps in the handling process.
Step 1: Removing a Record from Its Cover
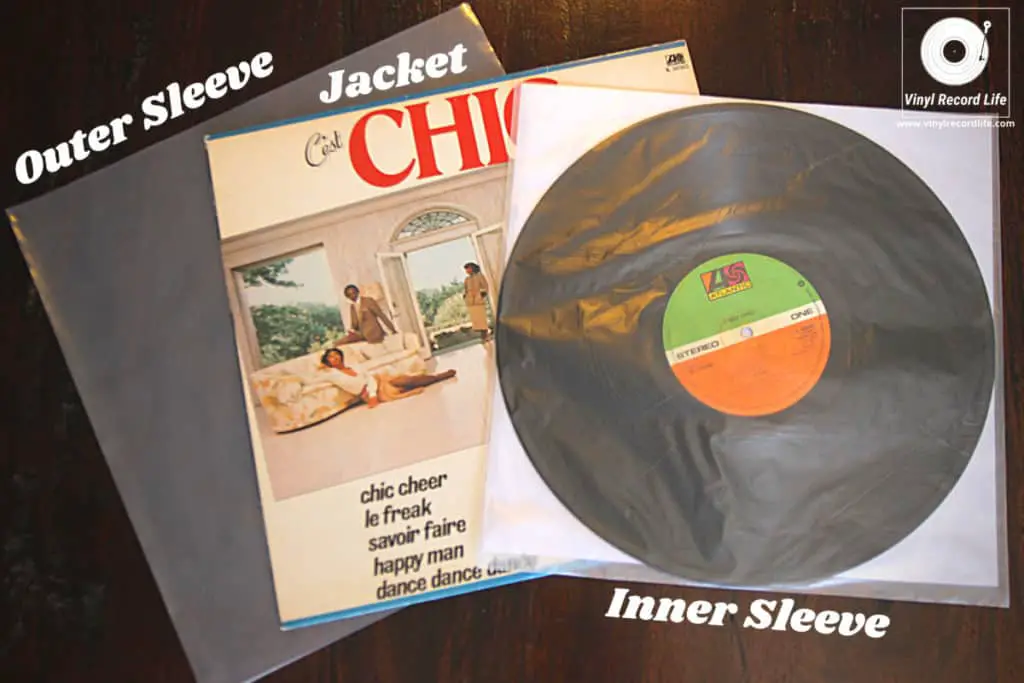
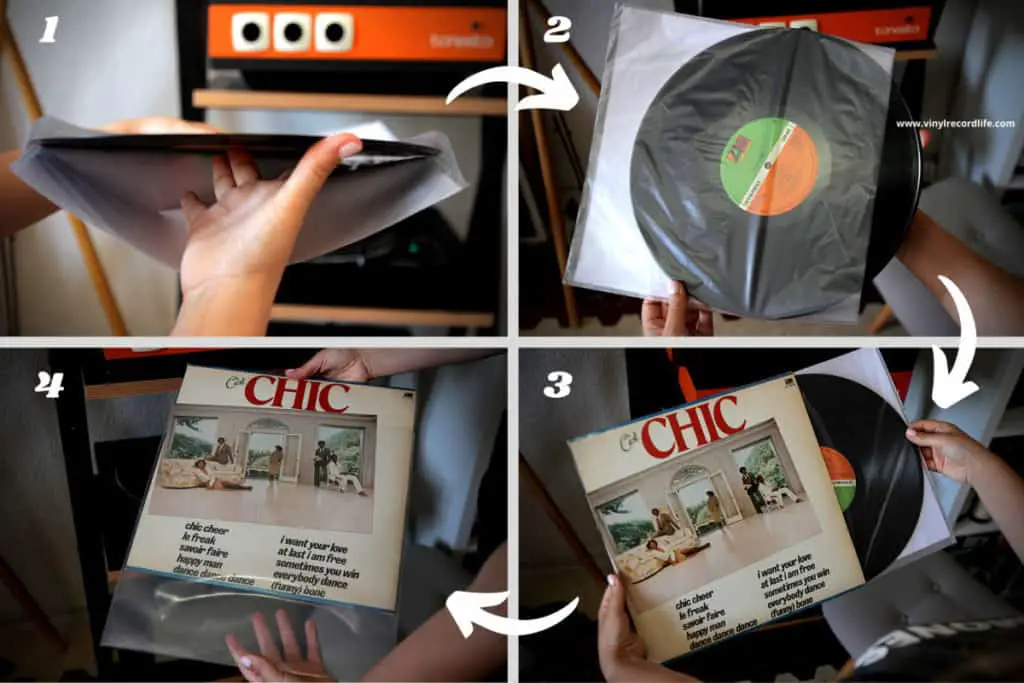
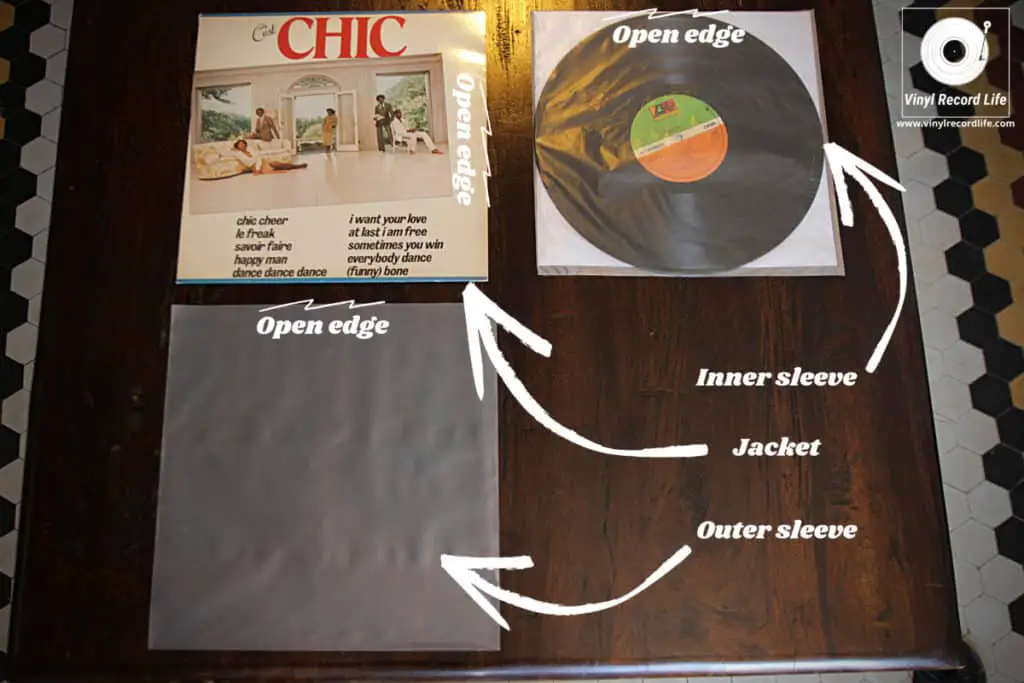
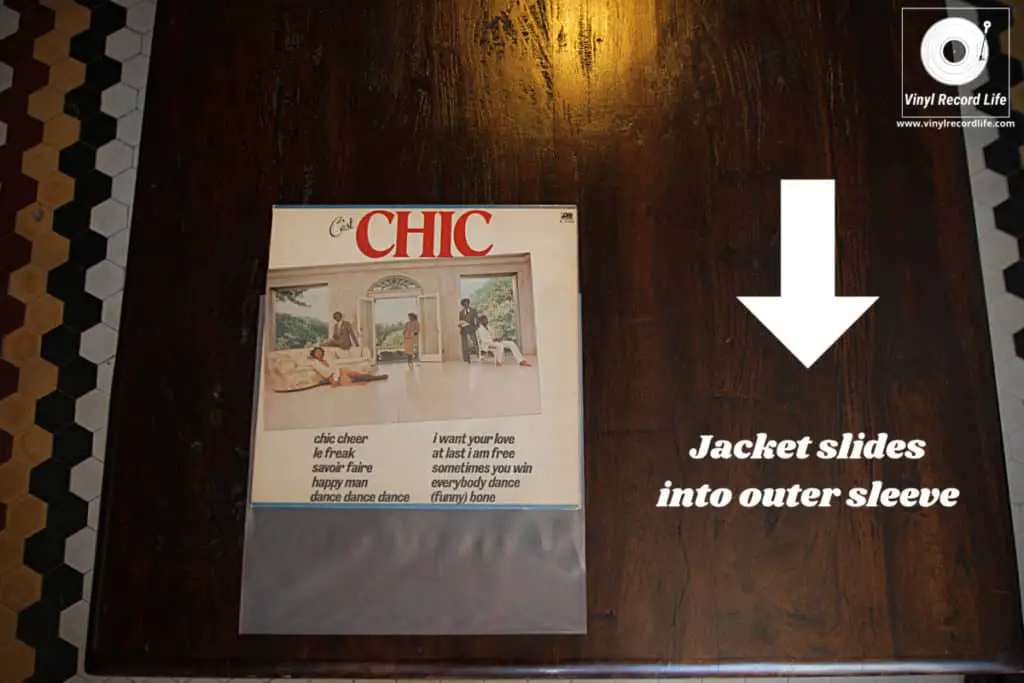
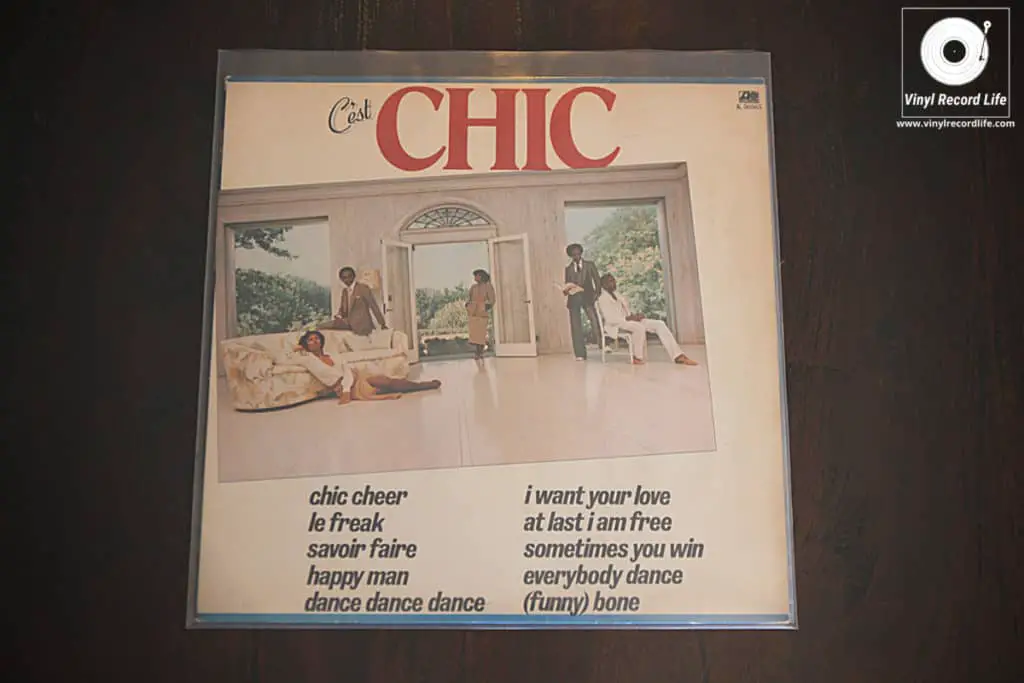
First up, you need to get the record out of its protective cover and into your hands. I store all my records in outer sleeves, so I have a three-step process to get the record out of its various protective layers. I’d recommend the outer sleeve/jacket/inner sleeve combination for storing your records too (see image further up the page), but if you don’t have an outer sleeve you can just ignore that part of the process.
These are the inner and outer sleeves that I use on my record collection, and which I highly recommend.
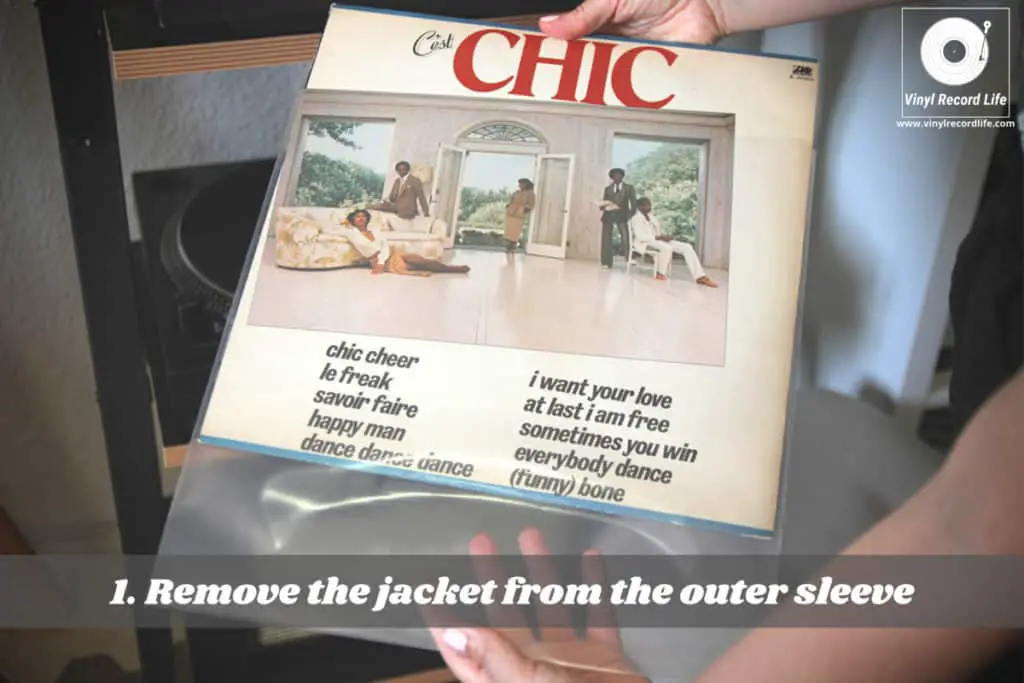
Lift the jacket out of the outer sleeve so that you have the jacket in one of your hands.
Then, slide the inner sleeve out of the jacket being careful to not accidentally touch the record surface through any hole that the inner sleeve may have.
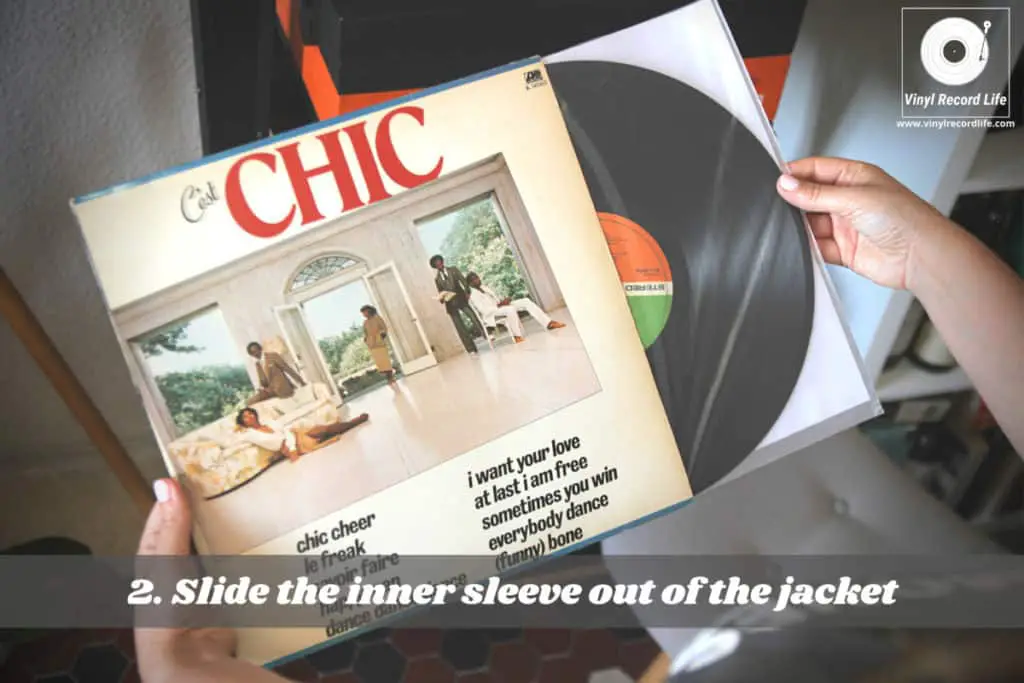
Some inner sleeves have completely solid sides and protect the entire record and center label of the record (like the one in the image above), whereas others have a hole that lines up with the record’s center label, but which often slips and exposes some of the playing surface.
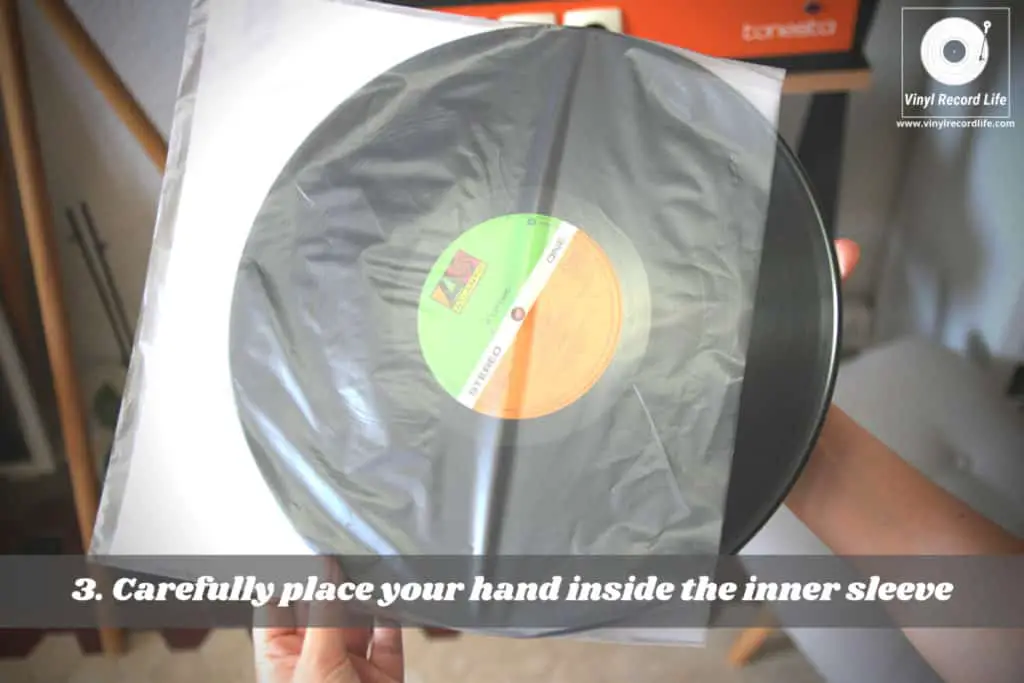
Now that you have the inner sleeve in your hands, you’ll need to remove the record itself. This is where you need to exercise a little dexterity! Slide one hand inside the inner sleeve, but taking great care to not touch the record’s surface.
Once your hand is in there, place your index, middle and ring fingers on the record’s center label, and place your thumb on the outside edge of the record.
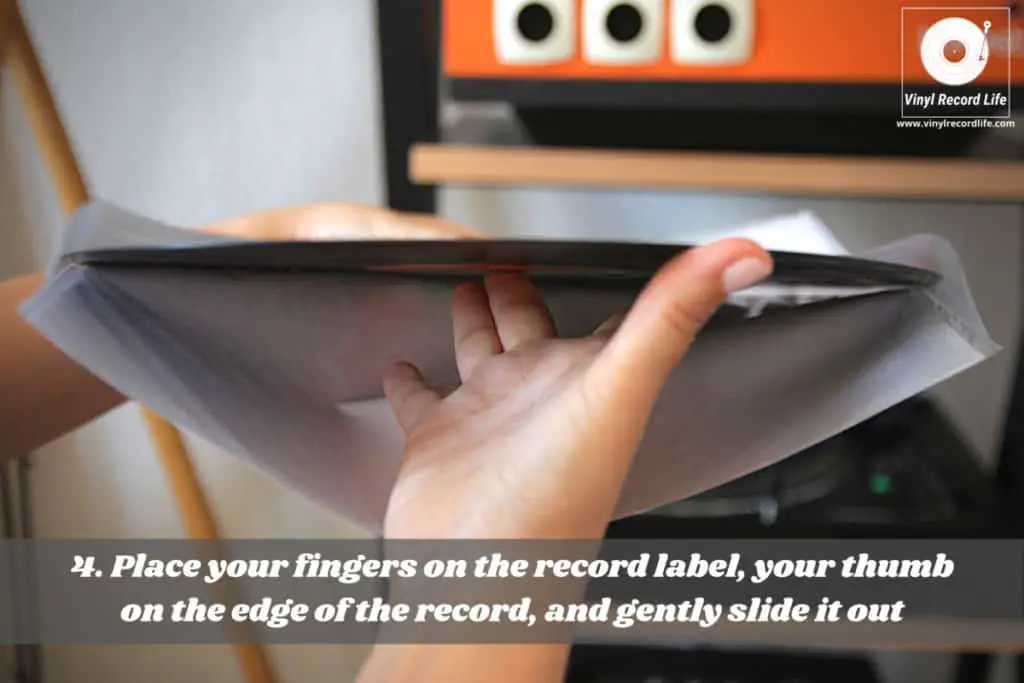
At this point, you should have the record securely within your grip, but without any part of your hand or any fingers touching the actual playing surface of the record (like the image above). Now you’re good to slide the record out of the inner sleeve!
Some extra tips here… You don’t have to place all three fingers (index, middle and ring) on the center label! You can place whichever combination of two or three fingers you feel most comfortable with to gain the best balance and grip on the record. I’ve found that using all three, with the tip of my middle finger nestling into the small hole for the spindle, gives me the greatest control over the record.
Also, I use the lower, crux part of my thumb to hold the outer edge of the record with, and I keep my thumb perpendicular to the record’s outer edge to avoid accidentally touching the surface with the palm of my hand.
Step 2: Handling the Record When It’s Out of Its Sleeve
Now that you’ve successfully got the record out of its protective covers and have it in your hands, you need to ensure that you keep up that excellent level of care and attention!
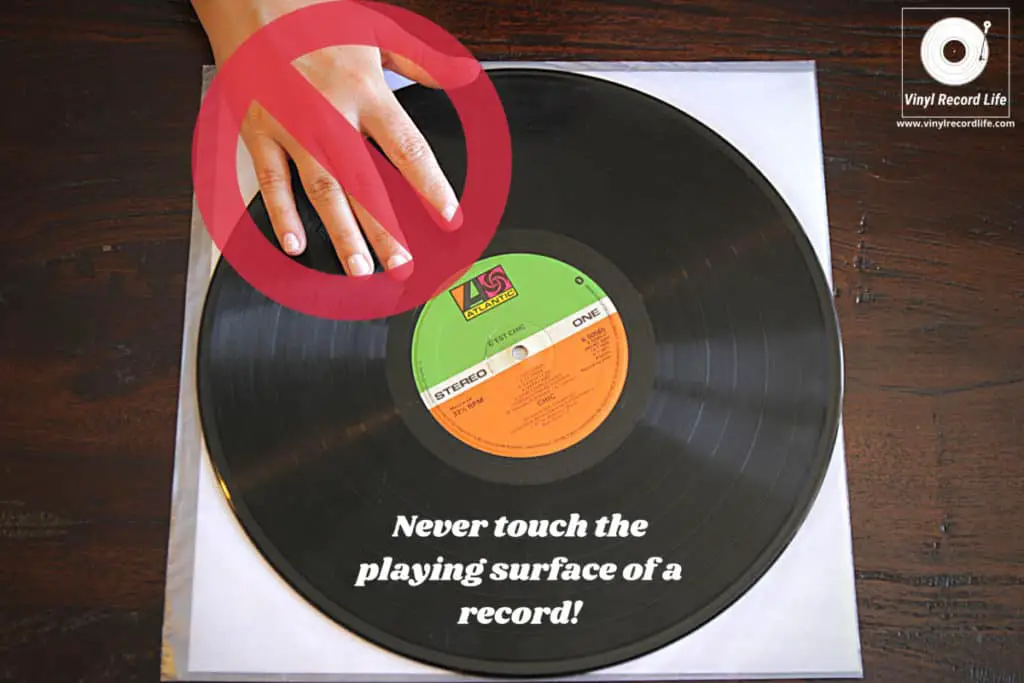
In reality, handling the record when it’s out of its sleeve is really easy and straightforward. The same mantra of never touching the record’s playing surface applies in all situations, so the best way to handle the record is holding it by its outer edges.

Using your index fingers, you can securely and confidently hold the record without coming into contact with its playing surface, thus ensuring it remains dirt and blemish free.
There are a few important dos and don’ts to always keep in mind when it comes to handling vinyl records:
Dos
- Only ever touch the outer edges of the record.
- Store your records in an inner sleeve made from high-density polyethylene, which has natural anti-static properties and which protects the record far better than the traditional paper or card inners that most records arrive in.
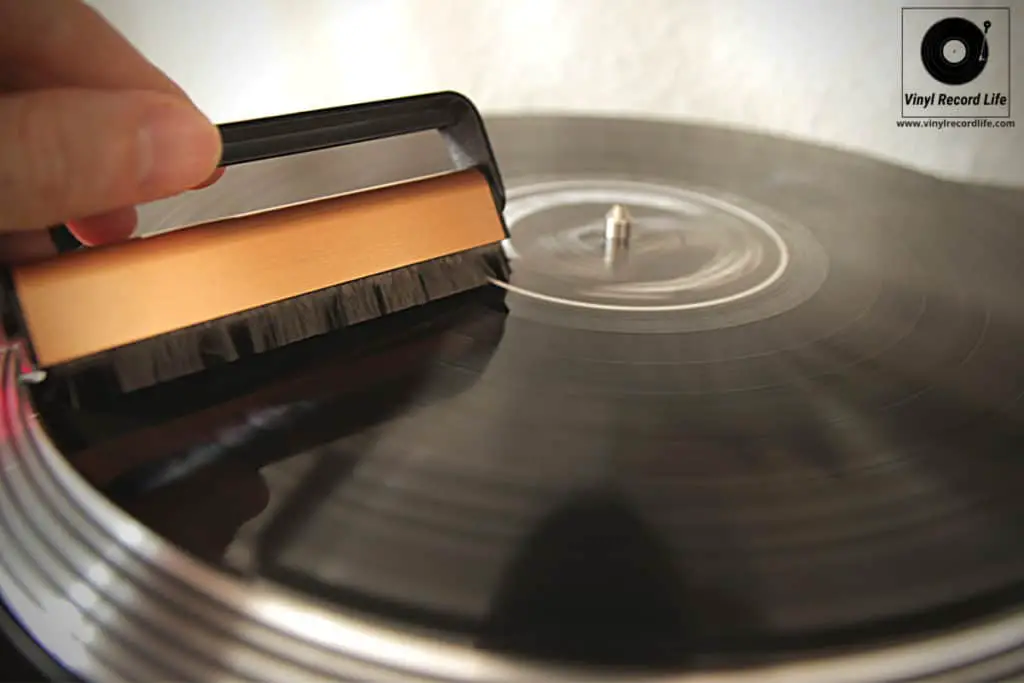
- Clean the record surface with a proper anti-static brush before playing it.
Don’ts
- Never touch the record’s playing surface, not even by “pinching” the very edge of it to try and minimize contact.
- Never put the exposed record down on any surface other than your record player or turntable’s platter.
- Never leave the record out of its sleeve for any longer than is necessary. Take it out when you’re ready to play it, and return it to its sleeve as soon as you’re done with it. Limiting the time your records are exposed will help minimize the amount of dust they’ll pick up.
Step 3: Handling the Record Before, During and After Playing It
Again, this is a simple step but something which many people will not pay sufficient attention to, and neglecting it can inevitably lead to the degradation of a record ahead of its time.
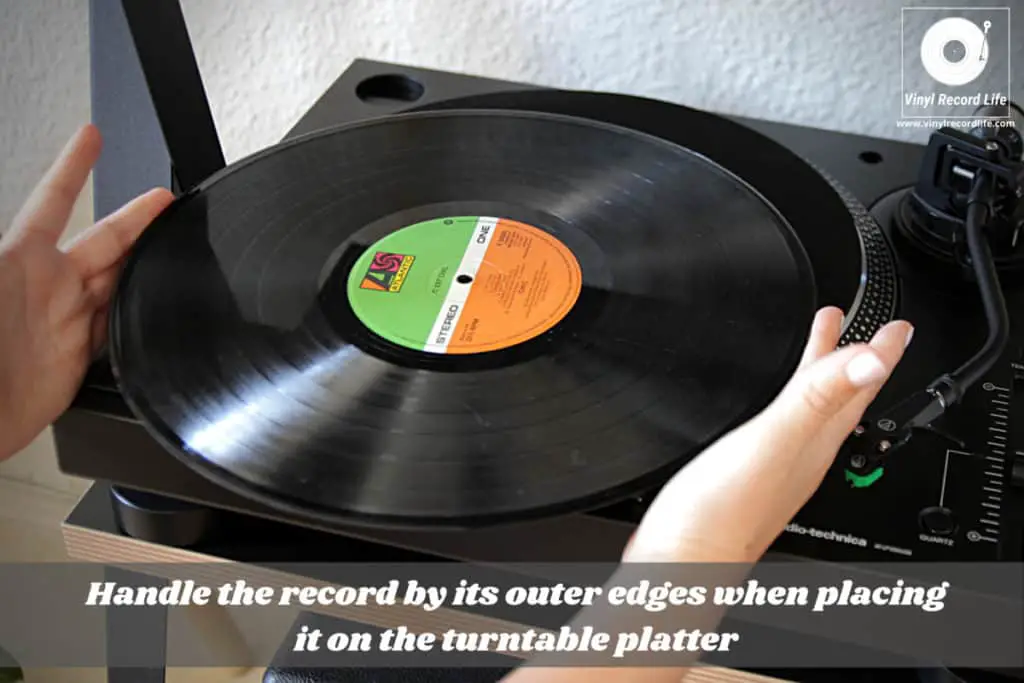
The way you handle a record when placing it on and taking it off a turntable platter is just as important as every other step along the way.
Holding the record by its outside edges, you need to place it on the record player slowly and ensure that the spindle of the player lines up properly with the center hole of the record before you gently lower it onto the spindle and platter.
Dropping the record onto the spindle or lowering it too fast so that the record has to be moved about to find the spindle means the record is more likely to fall off center while you find the spindle. This means there is more likelihood of your hands accidentally touching the record’s playing surface. It’s also just not very good for the overall condition of the record as it can cause damage in other ways.
Once you’ve got the record on the platter, giving it a clean with an anti-static brush is a good habit to get into, as it removes any dust and dirt from the surface before the stylus does its thing in the grooves.
Post play, I usually give the record a quick once-over with an anti-static brush, wait for the platter to come to a complete stop, and then gently lift the record off the spindle by handling only the outer edges of it again.
Step 4: Placing the Record Back in Its Protective Sleeves
Getting a record back into its protective sleeves as soon as you’re done with it is another important step you should never let slip.
Removing any residual dust or dirt build up with a final brush clean as per the previous step means your record is ready to be re-stored in as best condition as it can possibly be, and you want to avoid it picking up any dust, fluff or fibers that may be floating about so a prompt return to its cover is necessary.
Handling the record in exactly the same way as you did in Step 1 above, by placing your index, middle and ring fingers in the center label part of the record and your thumb on the outside edge, slide it gently back into the inner sleeve.
Avoid the temptation to drop the record into the inner sleeve once you’ve got it halfway in! It’s something we’ve all done before, and while it won’t damage the record as long as you’re holding the inner sleeve in the air and not supporting it on any hard surface, it will cause the inner sleeve to weaken and can eventually lead to a split, which in turn will lead to the record falling out when you least expect it.
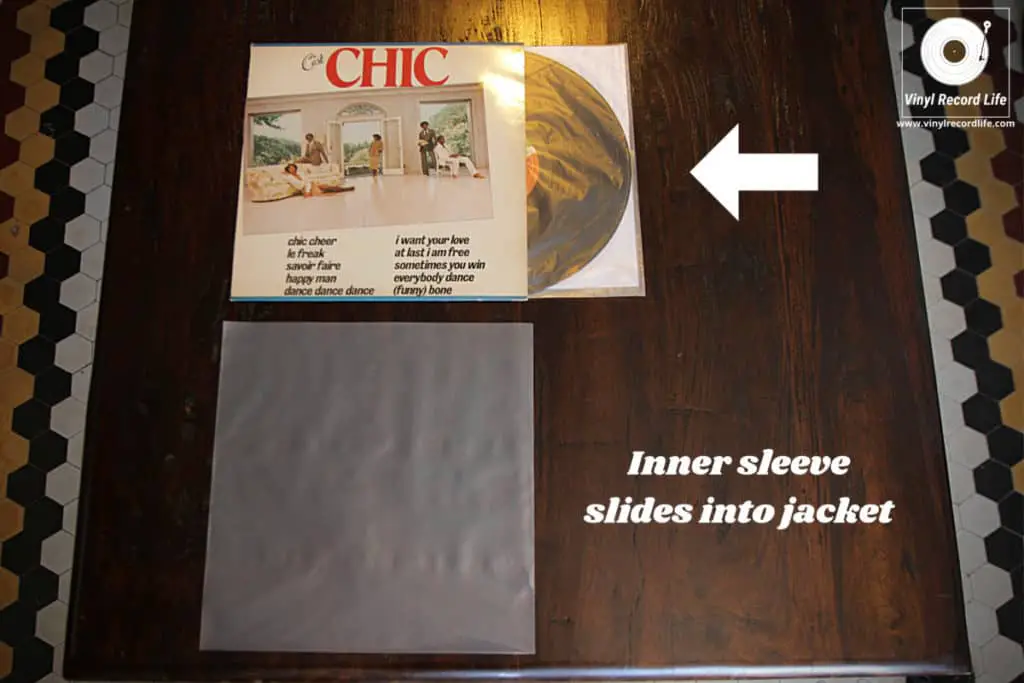
Once the record is inside the inner sleeve, place the inner sleeve inside the jacket. I keep the opening of the inner sleeve facing the sky, and make sure the inner sleeve isn’t snagging the inside lip of the jacket before I slide it all the way in.
By keeping the opening of the inner sleeve facing upwards, you avoid any risk of the record sliding out and remaining inside the jacket, which with its cardboard construction can lightly scratch the record and/or leave micro traces of card on the record playing surface. Worse still, if the record falls out of the jacket altogether it’s going to be hitting the floor from a decent height.
Now that you’ve got the record inside the inner sleeve and jacket, place the jacket inside the outer sleeve. With the opening of the outer sleeve facing upwards, I slide the jacket in with the jacket’s open side protected by one of the outer sleeve’s closed sides.
This way, the inner sleeve that contains the record cannot slide out of the jacket and/or the outer sleeve. Now, neither the inner sleeve nor the jacket have their open edge exposed.
Place the record back on the shelf, in a record box, or wherever you store it permanently, remembering to always make sure the records are stacked upright!
By following these steps when handling vinyl records, you’ll be ensuring that you’re taking the best possible care of your collection when you have them in your hands.
It’s not possible to eliminate every single possible element of risk to your records, but by following this routine you can certainly minimize those risks. Enjoy your collection!