Recent Posts

Are Vinyl Records Better Than Digital?


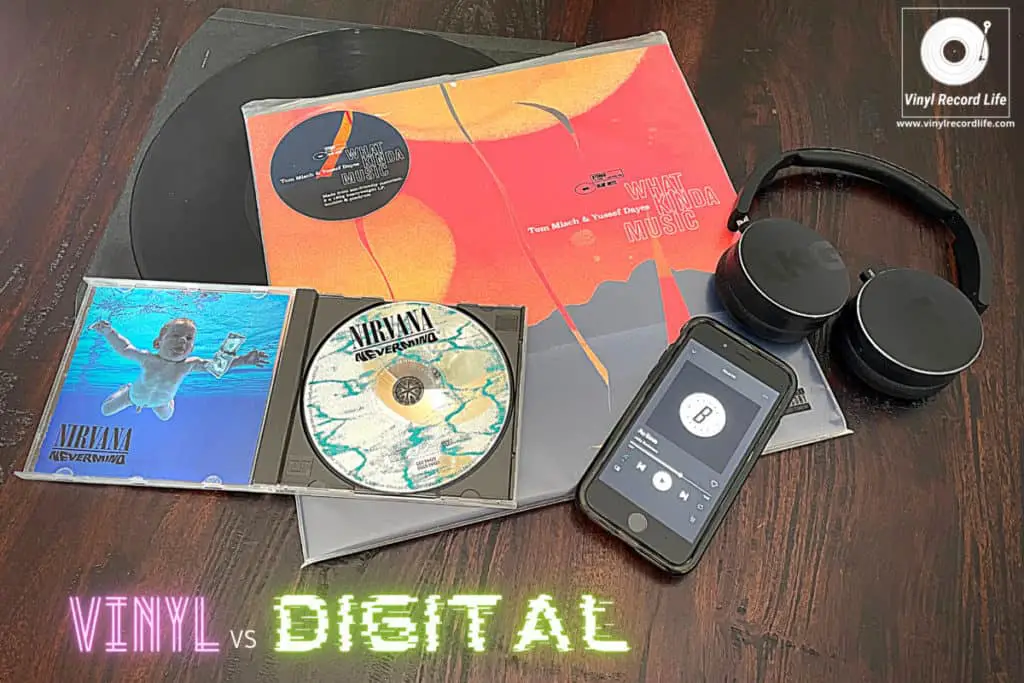
There’s an eternal debate that’s raged for a very, very long time between vinyl purists, digital evangelists, diehard audiophiles, general music fans and just about anybody who has an opinion on music fidelity: is vinyl better than digital?

The answer to this question is influenced by a variety of objective and subjective factors.

Vinyl records are not definitively better than digital formats, when analyzed objectively. Vinyl’s physical properties mean records offer different sound qualities to digital, which are valued by those who prefer vinyl to digital, and which does lead to a preference for vinyl over digital formats.

In this article, I’ll look at both the objective differences between vinyl and digital formats, as well as the subjective ones that influence opinion on whether vinyl is better than digital.

Taking these points into consideration is important both for understanding how and why people weigh up this often contentious discussion, but also for helping to distinguish the different definitions that people apply to a question that can have multiple implications.

Analog (Vinyl) vs Digital: Establishing Some Basic Information

The first port of call when weighing up a discussion around whether vinyl is better than digital is to set out some key facts.

Vinyl, as an analog format, is the closest thing we have to original sound because original sound is analog by definition. Vinyl is also fully lossless, which means that because it is not compressed in any way no data is omitted and then approximated in playback: what you hear is a totally uncompressed soundwave.

Digital, on the other hand (CD, mp3, AAC streaming and other formats) is a lossy format, which means that via compression it loses small bits of data and then approximates those when reproducing a file.

So, there is an argument that, straight off, digital is unable to reproduce sound exactly how it was originally intended to be heard. Vinyl, as an analog format, is. Simple, right? Well, it’s not quite that straightforward.

Whether the human ear can distinguish that difference is debatable, as the sampling and bit rates at which digital files are reproduced surpass the upper limit of what the human ear can hear, so it could even be considered moot.

Plus, the fact that the FLAC format now brings us lossless compression of digital audio, there are even digital files that now sidestep this whole issue completely, in theory.

Despite this abundance of technical information, there are some fairly straightforward ways in which we can come at the vinyl vs digital question, as it’s not always as easy as comparing the technical properties of both formats.

The Main Differences Between Vinyl and Digital Formats: Key Objective Distinctions

There are key distinctions to make between listening to music on vinyl and digital formats

Let’s look at some of the main areas that affect the sound quality and reproduction of audio, and which can be used as part of the balancing act when weighing up the vinyl vs digital question.

Dynamic Range Variance Between Records and Digital

Dynamic range is the difference between the softest and harshest – or quietest and loudest – sounds without distortion occurring when they are reproduced.

Digital has a dynamic range of 96dB while vinyl’s can be anything from 55 to 70dB, so you’d think it’s pretty cut and dry that digital wins here. That’s not necessarily the case though.

The effective dynamic range of analog recordings can be greater, and this is due to their master mixes never having been made with the aim of boosting loudness.

In the 1990s, a so-called “loudness war” began to take hold as CDs became the dominant format, where to compensate for quieter instruments being harder to hear, the average loudness was raised in the final mix. This had the effect of narrowing the dynamic range.

By the 2000s many songs were mastered with less and less dynamic range, however they got louder. This reached a climax with the release of Metallica’s “Death Magnetic” album in 2008, which was widely criticized for its loudness and distortion on its CD version due to over compression of its dynamic range, and even saw a mastering engineer who’d worked on the album criticize the approach.

Vinyl had never gone through this, and as a result was considered in many quarters to have better sound quality because it had a greater dynamic range.

Mixes for most vinyl are relatively quiet, and therefore don’t push the limits of dynamic range. The result is that some instruments resonate better on vinyl recordings and are more realistic, but conversely some instruments are not best suited to vinyl playback.

The mastering of a vinyl record can affect its dynamic range greatly, and a lot of modern vinyl now comes from a digital master in any case.

Frequency Range Across Vinyl and The Various Digital Formats

The frequency range is another factor that comes into consideration when debating the differences between vinyl and digital and which format is better.

Here’s a simple table to show the frequency ranges of vinyl and a few of the main digital formats:

FormatFrequency Range
Human range of hearingUp to 20kHz (this decreases over time, and not everyone can hear the full range)
Vinyl recordUp to 50kHz
CD44.1kHz
mp3Up to 48kHz
Advanced Audio Coding (AAC)Up to 96kHz
Free Lossless Audio Codec (FLAC)Up to 192kHz

Frequency range affects vinyl records because it can struggle with high and low frequencies. High-pitched frequency sounds like drum cymbals and sibilance (“s” sounds) and low frequency sounds such as a deep bass can both affect sound playback, whereas digital doesn’t suffer in the same way.

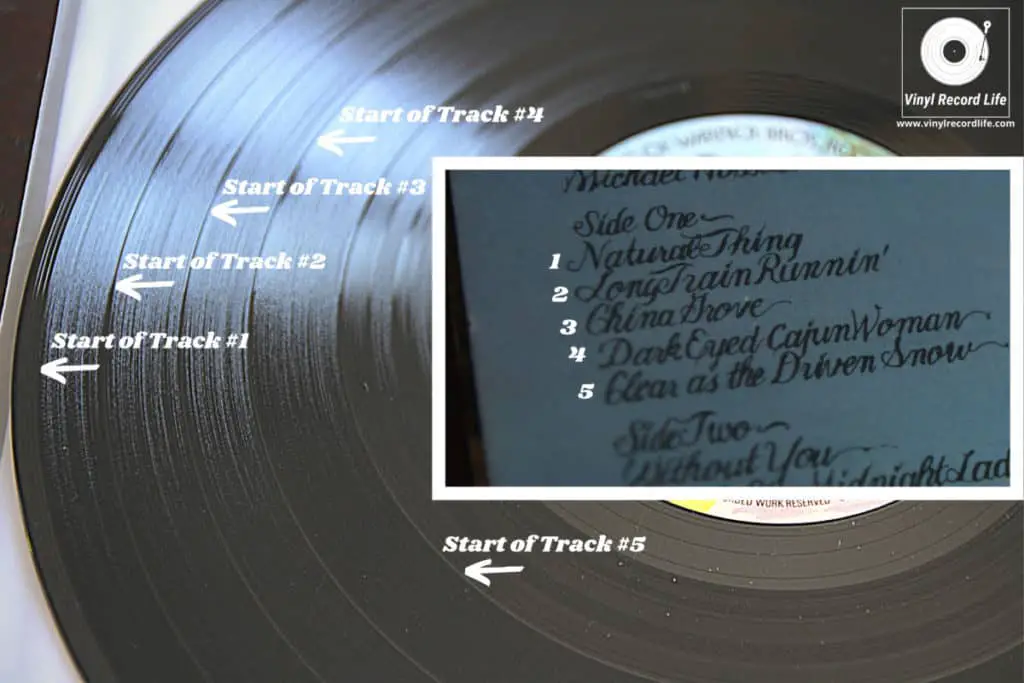
Another way in which frequency can affect vinyl is with the narrowing of its grooves closer to the center of the record. This make it harder for the stylus to pick up finer sound detail, and the result is that the start of a record can sound better than the end.

Sound engineers tend to put songs with less demanding frequency requirements towards the end of a vinyl record’s side to avoid this.

Channel Separation Variance Between Digital and Vinyl

A better listening experience thanks to an improved channel separation (between the left and right channels) is another point that gets called into play in the discussion between vinyl and digital.

Vinyl, which generally has a maximum channel separation of 30dB, has less range than digital which can hover around the 70-90dB mark. This can make for a more limited soundstage on vinyl in certain situations.

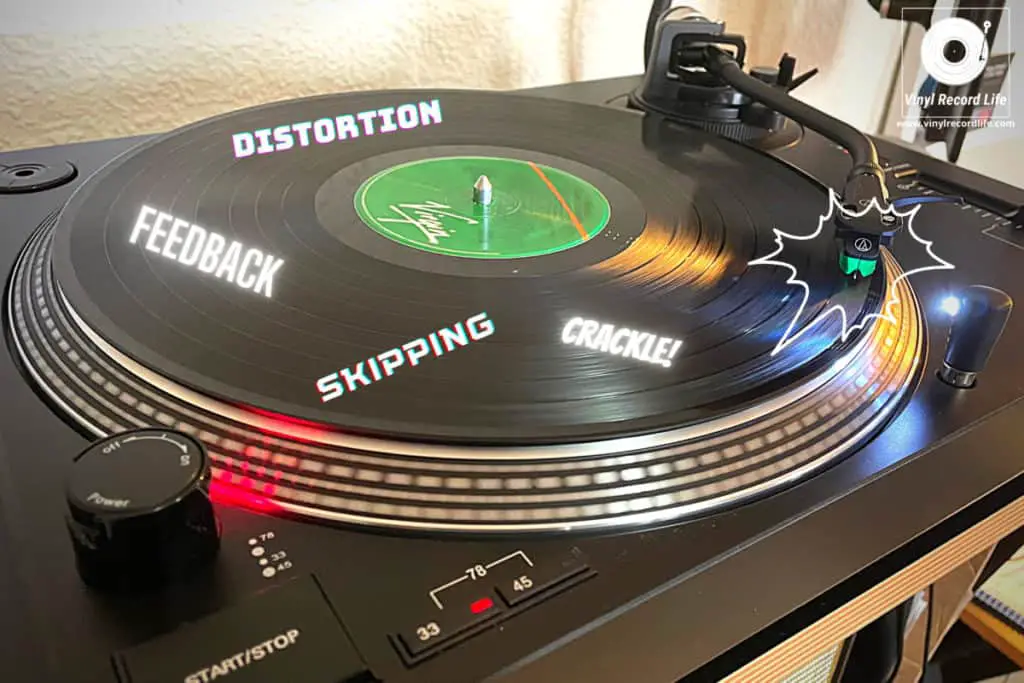
Mechanical and Surface Noise on Vinyl

Mechanical noise generated by the low frequency rumble of a turntable or record player, and the surface noise caused by dirt or static charge on a record are both factors that digital doesn’t have to battle.

Speed Fluctuations and Changes on Different Formats

All vinyl experiences wow and flutter during playback, but it rarely surpasses 0.2 percent on most turntables. Besides that, most people can’t pick up wow and flutter that’s below 0.25 percent, so it’s often a moot point.

However, there are occasions when it does reach a level that it has a negative impact when listening to records. This is another factor that digital formats avoid completely.

Wow refers to a low frequency variation in cyclical speed, and flutter is much the same but at a faster frequency.

Subjective Differences Between Vinyl and Digital Formats

Storage space is one of many factors in personal preferences between vinyl and digital

Having looked at the quantifiable differences between vinyl and digital formats, there are other factors that influence many discussions around which is a better format.

These are often based on characteristics that are a combination of subjective factors, such as the convenience of both formats, as well as certain sound variations that tend to be personal preferences.

Usually these subjective differences fall under two main areas: those which relate to physical factors, and those that are more sound-based distinctions.

Vinyl vs Digital Formats: The Physical Divergence

Space, Storage and Cost

A major sticking point in any discussion over vinyl vs digital is always the space that each format occupies. Vinyl records take up physical storage space, whereas digital formats don’t due to their immaterial nature and that they can be stored on a device.

Vinyl is also more cumbersome to move, but digital formats are much less so if we’re talking about CDs, and virtually hassle free when considering mp3 files.

The cost involved in building a music collection on each format is also another thing that influences opinion. A record collection is costly to accumulate, whereas digital formats are cheaper to buy.

Here’s a comparison in cost between formats of the top five selling albums from 2021:

ArtistAlbummp3 PriceCD PriceVinyl Price
Taylor SwiftEvermore$12.49$13.98$29.98
Taylor SwiftFolklore$13.49$13.98$48.99
BTSBE$8.99$33.99Not available at time of writing
Olivia RodrigoSour$9.49$13.98$27.98
Taylor SwiftFearless$9.49$10.98$39.98
*Billboard year-end chart, top album sales 2021. Prices indicative only, correct as of October 2022

When you start getting into older albums, original and collectible pressings of vinyl records, and even special pressings of modern-day releases, the cost can get very high, very quick!

It’s more expensive to amass a vinyl collection than it is to have a catalog of mp3 files on a device, but the value and worth of that spend is a purely subjective opinion.

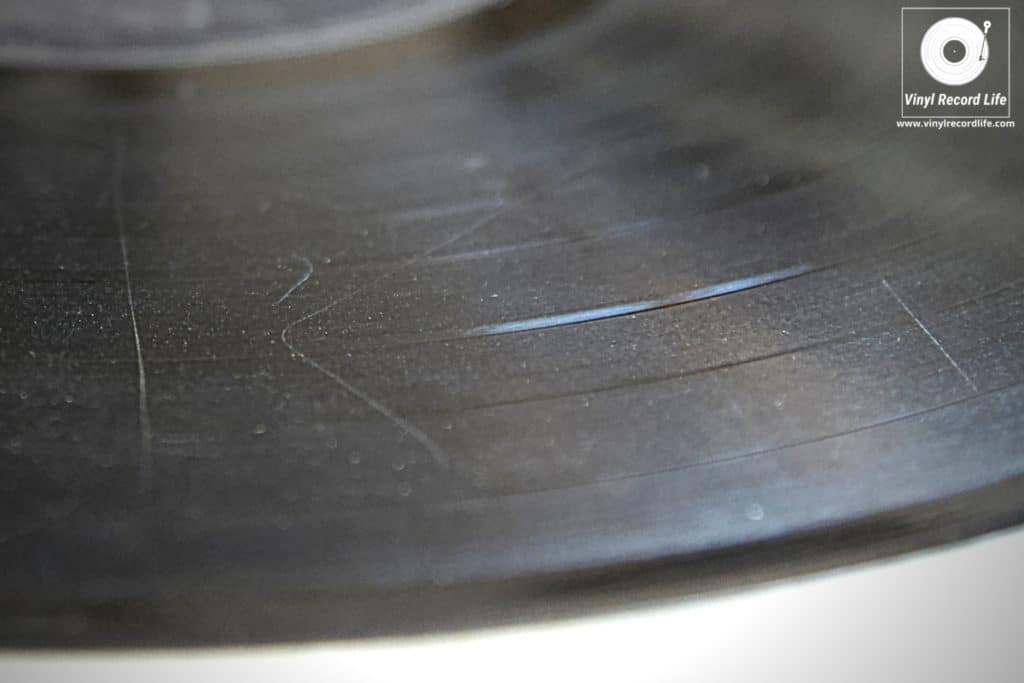
Damage & Degradation

There’s a lot of care that goes into maintaining a record collection. This can be viewed as a worthwhile labor of love in one person’s eyes, but as a time-consuming nuisance in another’s.

Keeping records clean and properly stored affects their sound quality, as vinyl is a fragile format and easily damaged. It also degrades over time with repeated plays.

Listening Process & Engagement with Format

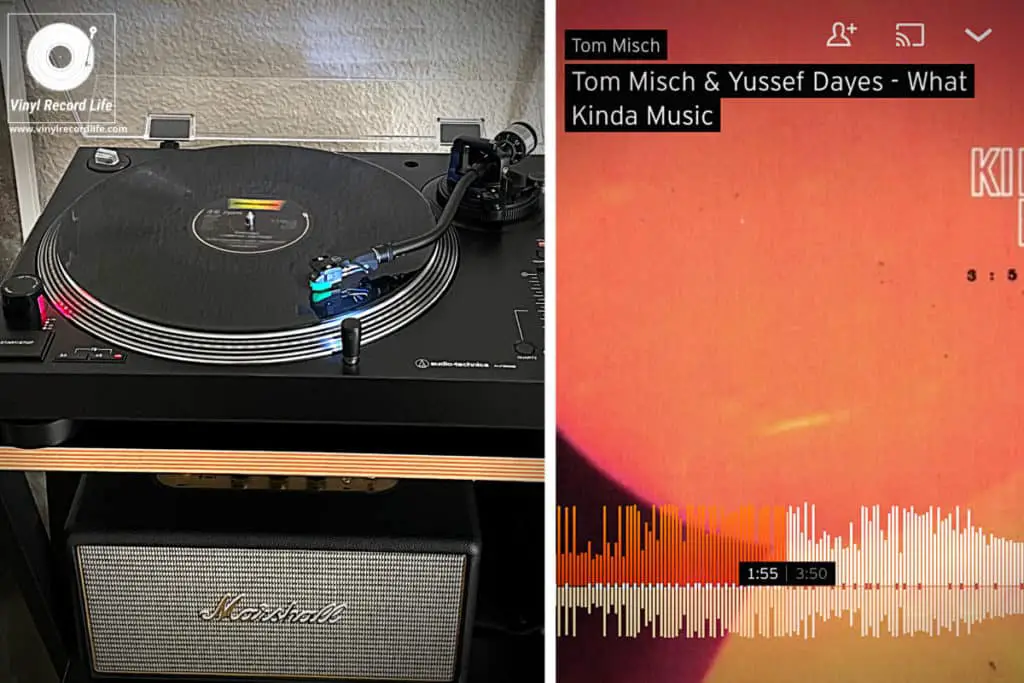
A lot of audiophiles and record collectors simply enjoy taking the time to play records, and the process of engaging with the format.

The instantaneous convenience of digital formats is an advantage, but the sentimental connection often enjoyed with a specific vinyl record and taking the time to become absorbed in admiring the artwork while listening to a record, for example, has very different qualities to the way in which digital files are played.

There are aesthetic and physical elements to records that digital formats don’t fulfil for many music lovers.

Vinyl vs Digital Formats: Personalized Sound Preferences

Warmth of Sound Across the Formats

Warmth refers to the quality of the sound and the immersive nature of it. The warmer the sound, the more enjoyable it can be. The analog nature of vinyl means that it is a lot closer to the original sound and the way we hear sound – and music – when we listen to it directly or live.

A lot of enthusiasts hail the warmth achieved with vinyl over digital, which is due largely to the compression of the music on a digital format.

Richness Plays a Big Part

The diversity of audible factors heard on vinyl records is another benefit that audiophiles cite as superior to digital, and which is referred to as the richness.

The grooves of a record hold more information and, again due to its lossless nature, that means that there is a greater quantity of auditory features that are possible to be heard.

Whether all ears can pick up on these details is debatable, but a lot of listeners will note the richer sound of vinyl.

Depth in Sound

How much of a particular sound or instrument can be heard is what people are usually referring to when mentioning the depth of the sound on vinyl or digital.

Again, due in large part to the compression element of digital vs the analog nature of vinyl, many will argue that the depth achieved on vinyl can’t be matched.

Vinyl vs Digital: Popularity and Resurgences

Digital formats have been more popular than vinyl for more than three decades now, and sales statistics from the Recording Industry Association of America (RIAA) demonstrate this clearly.

When CD sales started to be recorded in 1983 with the introduction of the format, they quickly surpassed vinyl as the most popular format being sold, and by 1990 CDs accounted for 33.1% of all music format units sold in the United States.

In that same space of time vinyl went from accounting for 58.4% of all units sold to just 4.6% in 1990. CDs continued to dominate, reaching a peak in 2003 when sales of the format took up 94.4% of all units sold in the US.

With the introduction of digital downloads in 2004, that trend then swung heavily in the favor of this new format, and by 2015 CDs and digital downloads were making up 96.4% of the music units sold in the US.

In 2021, vinyl made up 12% of the volume of music format sales in the US (to CD and digital downloads’ 85.3%), so the evidence points resoundingly towards which is the more popular format in terms of sales, but this doesn’t tell the whole story.

Since 2007, vinyl LPs have seen year-on-year growth in sales, the only music format which has had an upward curve in sales every single year.

Other formats, such as CDs and downloads have been heading in the other direction, with year-on-year sales of download albums and singles both shrinking every year since 2014, while CD albums have been dropping off since 2005 (with an arrest in that slide occurring in 2021 – whether that is the start of a new trend, or a one-off remains to be seen).

Total sales volumes remain much higher across digital formats such as CDs and downloads than they do across vinyl, but vinyl is the format posting consistently increasing sales, indicating a continued growth in its popularity, and in 2021 vinyl out-sold digital downloads for the first time.

Image courtesy of RIAA

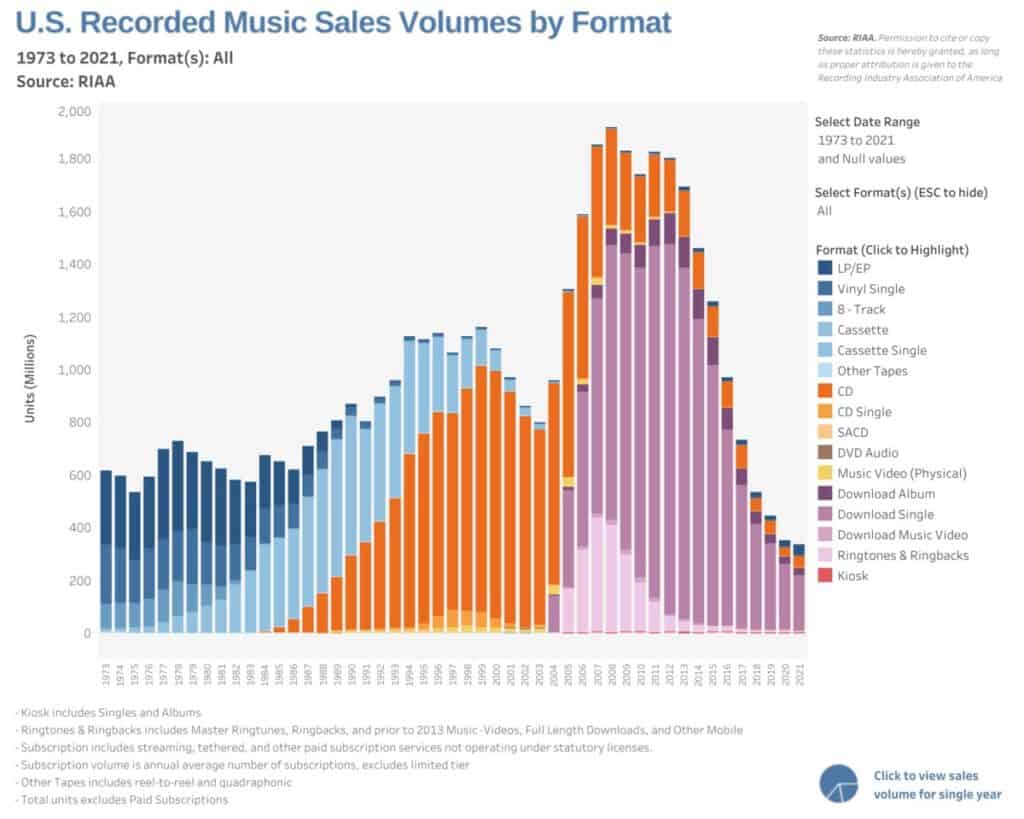
These tables show the year-on-year sales performance of digital downloads, CDs and vinyl, to give an indication of which formats are increasing in popularity, but also the difference in total volume of each format being sold:

Vinyl LP/EP Sales 2005-2021

YearUnits soldYear-on-year change
202139,700,000+67.3%
202023,700,000+28.3%
201918,500,000+10.9%
201816,700,000+7.2%
201715,600,000+5.3%
201614,800,000+8%
201513,700,000+32.6%
201410,300,000+10.3%
20139,400,000+35.2%
20126,900,000+25.7%
20115,500,000+31%
20104,200,000+20%
20093,500,000+20.7%
20082,900,000+123.1%
20071,300,000+44.4%
2006900,000-10%
20051,000,000-28.6%
*Statistics courtesy of the RIAA

CD Sales 2005-2021

YearUnits soldYear-on-year change
202146,600,000+47.7%
202031,600,000-33.6%
201947,500,000-8.2%
201851,800,000-40.3%
201786,700,000-11.2%
201697,600,000-16.7%
2015117,100,000-15.5%
2014138,700,000-20.2%
2013173,800,000-12.3%
2012198,200,000-17.7%
2011240,800,000-4.8%
2010253,000,000-14.7%
2009296,600,000-19.5%
2008368,400,000-26.3%
2007499,700,000-19.4%
2006619,700,000-12.1%
2005705,400,000-8%
*Statistics courtesy of the RIAA

Download Album Sales 2005-2021

YearUnits soldYear-on-year change
202129,100,000-12.1%
202033,100,000-11.8%
201937,500,000-24%
201849,300,000-23.6%
201764,500,000-24.2%
201685,100,000-20.3%
2015106,800,000-6.5%
2014114,200,000-3.2%
2013118,000,000+1.1%
2012116,700,000+12.4%
2011103,900,000+21.1%
201085,800,000+15.2%
200974,500,000+17.1%
200863,600,000+27.7%
200749,800,000+80.4%
200627,600,000+102.9%
200513,600,000+195.7%
*Statistics courtesy of the RIAA

Another Strong Year for Vinyl in 2021

Data from MRC’s year-end report of 2021 charted another year-on-year growth for vinyl LP sales, with 39.7 million units sold in the US, representing a huge 67.3% growth on sales of 2020 for the vinyl format.

All indications continue to point to a continued growth in popularity of vinyl as a music format.

Why Your Record Player Sounds Bad: 11 Things To Check


We’ve all been there. It can happen gradually over time, sometimes it can occur suddenly, but whichever way it does unfold a bad sounding record player or turntable is extremely frustrating.

Oftentimes the root cause of the issue is quickly identifiable, and while the fix can be as simple as leveling your turntable, it can also range right through to replacing parts or equipment.

Here, I’ve outlined a number of different reasons behind a bad-sounding record player or turntable, which you can use to check and troubleshoot any issues you may be having.

Establishing Why a Turntable Sounds Bad

Understanding the different ways in which a record player sounds bad can help greatly in getting to the cause.

Here’s a table of some of the most common audible issues you can encounter and where the problem usually – but not always – lies:

Type of audio issuePossible root cause
Static, crackling, poppingCleanliness of record or stylus, or scratches on record surface
Skipping or jumpingCleanliness of record or stylus, tonearm set-up, damage to the record itself such as being warped or scratched
DistortionThis can be down to cabling, incorrect input/output set-up, positioning of equipment and more
FeedbackPoor isolation of turntable/speaker/amp

Things You Can Check When Your Vinyl Records Are Sounding Bad

As touched on above, there are any number of things that can negatively impact the playback sound quality of a record, but the following is a list of factors you can easily check to try and quickly get to the bottom of an issue.

A lot of sound issues with a turntable can be solved with relative ease – they just require patience and a methodological approach to working through possible causes.

Let’s take a look through 12 common sound issues and where their problem may lie.

Make Sure the Record Isn’t Damaged in Any Way

A scratched or warped record will often result in a skipping sound when it is being played, so it’s always advisable to carefully inspect the surface of any record before playing it.

Records need to be stored carefully, in an upright position and not stacked to avoid becoming warped or misshapen, and they also need to be kept in protective sleeves to ensure no dirt, dust or other contaminants get embedded in the record grooves and result in surface damage such as scratches.

The better the condition a record is in, the crisper and warmer the sound it will produce.

A scratched record can result in skipping

Check the Cleanliness of the Record to Ensure Minimum Crackle and Pop

A simple pre- and post-playing clean with an anti-static brush to remove any dust will help reduce static and crackle, and if you’ve been experiencing a lot of this kind of noise when listening to records then it is possible that a dirty record surface is contributing to the poor sound quality.

Using a brush takes just a few seconds and make a big difference to the longevity of your records and how good they’ll sound. A wet clean from time to time, using a carefully chosen solution, is essential to keeping your records in top shape and sounding good too, so consider this as an important factor in eliminating bad sound on playback.

As mentioned in the previous pointer, correct storage is also key to great sounding records, and by storing them in proper anti-static sleeves you’re already winning the battle against collecting dust and other dirt that can lead to scratches and other blemishes and which will negatively impact playback sound.

Crackle and pop are hallmarks of vinyl records and a little bit is always to be expected, but an excess can ruin the listening experience and can also be a sign of damage being caused to your records.

To understand why it happens, and how you can minimize it greatly, check out this guide I put together on dealing with the issue.

The Quality of the Equipment Will Influence the Sound Quality of a Record

There’s no gentle way of saying this, but cheap kit will result in poor sound when playing records. If you’ve purchased an all-in-one record player such as a Crosley, then the sound quality won’t be up to much. I have nothing against Crosley or any other affordable player, but it’s an undeniable fact that they don’t produce a great sound and you’re going to have a tinny playback from your records with no depth of sound.

These kinds of players also tend to use cheaper components, such as a poor quality stylus, and neglect important factors such as tracking force, which will damage your records.

It’s not just your record player that can make a record sound bad. Speakers, amps, cables and any other equipment that forms part of your set-up will all have an impact, so it’s worth assessing each element of your record playing system to make sure you’re doing the music justice.

An affordable upgrade in just one area can make a vast difference to how a record sounds, and with a little research you can often find equipment that is not too expensive but which will make a vast improvement to the overall sound quality of your records when playing.

The Tonearm Can Greatly Affect Sound Quality of a Record

Tonearm set-up is such a critical step in getting a turntable balanced just right for great-sounding music. Poor tonearm set-up can result in any number of sound issues, and is also a big factor in protecting your records from long-term damage.

I’ve covered a comprehensive list of common tonearm issues and quick fixes which could help you remedy any potential bad sound you may be getting out of your records.

Tonearm set-up can affect the sound of a record in a number of ways

If the Cartridge Is Not Properly Set Up the Music Will Not Sound Good

Muffled sound, distortion, unequal channel balance, harshness or softness… these can all be caused by a cartridge that isn’t correctly aligned.

Most cartridges come pre-aligned on new turntables, but if your record-playing experience is being ruined by a poor playback sound, then the cartridge should be something you check out.

The wiring and connection to the headshell pins is also something that you should inspect closely when having a look at your cartridge.

Alignment is a relatively simple process but one which does require an attention to detail, and is covered in our guide to replacing a cartridge.

A Stylus Inspection Will Help Root Out Some Issues with Bad Sound

A damaged stylus won’t just make your records sound bad, causing possible skips, pops and other jarring snags, but it’ll also destroy your records.

Keeping your stylus clean is important and should be something you keep on top of – there are very affordable cleaning kits out there that can do the job.

It’s also important to observe the general wear of a stylus, and when the time is right, to change it.

Check out how to know when the time is right to change a turntable stylus, and how to do it, in our step-by-step guide.

A clean stylus is another important factor in quality sound

Speed Variation Can Cause Issues with The Sound on a Turntable

If you’re getting a slurred, sped-up or just irregular consistency of sound on your records, it could be down to a series of factors that need attention, from the simplest being the wrong speed selection, to something that needs more attention like the calibration of the turntable rotation speed or the elasticity or tension of the belt.

There’s a comprehensive list of things you can check, accompanied by fixes, in our post Why Is My Record Player Speed Too Fast or Slow and How Can I Fix It?.

The Position and Leveling of the Turntable Will Greatly Affect Sound Quality

If you’re experiencing some unwanted surface noise, this can often be down to a turntable not being level. Making sure your turntable is flush is one of the essential basics when setting up your system. Over-emphasis of one channel (left or right) can also be a result of a non-level platter.

The positioning of the turntable or record player is another key factor to clean sound, and if your turntable isn’t isolated away from other equipment, you may be hearing anything from hum through to feedback.

If your turntable hasn’t been placed away from cables, speakers and on a steady surface that is free from vibration, then poor sound can be a result.

Always make sure your turntable is level and on its own footing away from other kit to ensure the best possible sound.

Finding the Sweet Spot for your Speakers Will Improve Sound

If you feel like you’re not getting the maximum out of your record player set up, the positioning of the speakers can have a real effect on the richness and quality of sound.

Placing speakers too close to a wall can affect the bass, and placing them too close together can negate the effect of being able to pick out instruments, solos and other sound details.

The larger your speakers, the further away from a wall you’ll need to place them, and creating an equidistant triangle between yourself and the two speakers will help establish an ideal listening set up.

Check the Grounding of Your Record Player to Avoid Hum

If you’re getting hum when using your turntable at a reasonable volume level, it’s more often than not caused by incorrect grounding.

Grounding hum is the most common type of hum that you’ll come across, so ensuring that your turntable is properly grounded according to manufacturer instructions is a first port of call.

Loose wires connecting the tonearm to the cartridge can also be a cause of hum, so check that there are no loose connections. Take care with this, as the wires and connecting pins are delicate so a steady hand is required.

The grounding pin on a turntable

Make Sure the Right Cables are Plugged into the Right Inputs

Mixing up cable outputs and inputs can lead to bad sound, with either a boost in sound level or a notably quiet playback level being the result.

Not having the turntable plugged into an amp with a phono input will usually result in a very weak or quiet sound.

On the flipside, if your turntable has a built-in phono stage and is hooked up to the phono input on an amp, the result will be a loud and distorted sound as the signal is being boosted twice.

Making sure that the output from your turntable is correctly pre-amplified is a key step in getting the best sound out of your set up.

Find out more about phono preamps and how they can affect sound here.

A Step By Step Guide to Changing Your Record Player Needle


The needle – or stylus – on your record player or turntable is one of the most important parts of your whole set-up.

As with all moving parts on any mechanical appliance, the time comes when a replacement is due, and a stylus will need periodic changing on a turntable.

This can seem like a daunting task but the truth is that it’s a relatively straightforward one if you follow some key steps, and take good care when changing a stylus.

I recently had to change the stylus on my turntable, so I put together a step-by-step guide (with pictures) to doing it, which I’ve shared below.

Why Is It Important to Change Your Record Player Needle?

When it comes to maintaining sound quality and protecting your records, a well-cared for stylus is essential. The stylus is the only part of a turntable that comes into direct contact with a record’s surface, so it needs close attention.

A turntable stylus, however well maintained, will wear down over time and need replacing. As this degradation of the stylus happens, there will be an effect on the sound quality of the records being played, as well as on the physical condition of the records.

For this reason it’s really important to maintain a clean stylus, keep an eye on its general condition (although this is hard with the naked eye and any degradation is also very gradual over time), and eventually switch it out for a new one.

How to Know When It’s the Right Time to Change a Record Player Stylus

While it’s not possible to give a “one size fits all” answer to the question due to the importance of the condition of the individual stylus in question, it is possible to make an informed call.

There are several factors that influence when a turntable stylus should be changed. These include: the stylus’ recommended lifespan as per manufacturer guidelines, its actual age, the hours of use it has had, its audible and visual performance and its general condition.

There are also some important audible and visible signs that, while not always easy to pick up on, do give a real indication. More on these below!

The Expected Lifetime of a Turntable Stylus

If well cared for, the general rule of thumb for the lifetime of a turntable stylus is approximately 1000 hours of playing time before it needs to be changed. If you were using your turntable for an hour a day this would mean roughly after two-and-a-half years.

Not all stylus manufacturers state the expected lifetime of their styli, but I’ve rounded up some of the major players who do here to show the variance in advice given:

BrandRecommended Stylus LifetimeBrand Comments
Audio-TechnicaBetween 600 and 1000 hours“When the diamond is worn out, (between 600 and 1000 hours) or if the cantilever becomes damaged, the stylus assembly needs to be replaced.”
OrtofonUp to 2000 hours“With proper care we find that up to 1000 hours is possible without degradation of performance. The stylus does begin to exhibit changes after 1000 hours, but the stylus life as a whole is expected to top 2000 hours.”
Roksan800-1000 hours“The stylus should last around 800-1000 playing hours.”
Denon400 hours“The supplied stylus is good for approximately 400 hours of playback.”
Nagaoka150-200 hours“The stylus replacement interval varies depending on the using conditions, but for general use at home, the reference time is between 150-200 hours in which the stylus begins to wear and the tone quality deteriorates.”

The Major Signs of a Worn or Damaged Record Player Stylus

Audible factors can be hard to discern and usually only become apparent very gradually over time. Likewise, visible factors can be hard to see with the naked eye and will often need some magnification of the stylus for you to be able to actually note anything that’s awry.

The key signs of a damaged turntable stylus can include: excessive sibilance, sound distortion, degradation in sound quality, skipping or bouncing, stylus misalignment, misshapen stylus head, and residue on the stylus.

If you’re experiencing sound issues with your turntable, and aren’t able to get to the bottom of what the problem is, check out our troubleshooting guide here.

Audible Factors:

FactorSign(s)
Excessive sibilanceHiss or static during record playback
Sound distortionHigh and/or low frequencies sound bad (treble and bass don’t sound like you know they should)
Degradation in sound qualityMuffle, gradual drop in crispness and overall clarity of music playback
Skipping or bouncingA stylus that’s skipping or bouncing on the record isn’t just frustrating when listening to your music, it’s a sign that either the alignment and set up of the stylus or the needle itself needs serious attention

Visible Factors:

FactorSign(s)
Stylus alignmentIf the needle head of the stylus is misaligned, bent, has a jagged edge or any other visible defect. The same goes for the cantilever’s shape and angle
Needle head shapeIf you have a spherical stylus, which is the most widely used type, and it has become more pointed, this is a sign of extreme stylus wear
Dirt or residue on stylusIf the tip of the stylus has black residue which is not easily removed with careful cleaning

There’s no exact formula for working out precisely when a stylus should be changed, but by cross-referencing the general guidelines on stylus lifespan (per manufacturer guidelines) with the above pointers of what to be vigilant about, you should be able figure out when the time is right for a stylus refresh.

Something important to mention at this point is that if you’ve bought a second-hand record player or turntable, it’s a wise and highly advisable move to equip it with a brand-new stylus before you play any records on it for the first time.

It’s impossible to reliably know the age, hours of use and therefore true condition of the stylus beyond a visual inspection, so a stylus renovation is small but worthwhile investment.

I speak from lived experience here, after buying a second-hand restored Tonesta Olympic record player a good few years ago. I damaged a record on its first play, because I didn’t check (and change) the stylus before use.

Another quick tip here for being able to more easily pick up on the audible signs of stylus wear, is to have a “reference” record for noting any sound degradation on.

This means having an inexpensive or non-sentimental value record with which you’re really familiar, and on which you’ll be able to recognize any deterioration (distortions, lack of sound clarity, etc) caused by the stylus.

How to Change a Record Player Stylus: A Step-by-Step Guide with Pictures

Okay, it’s time to get into it! Here’s an easy-to-follow guide with photos that will help you through the process of changing a turntable stylus.

Depending on the kind of cartridge you’re using, replacing just the stylus may be possible. It all depends on the brand, but most moving magnet cartridges offer this option.

If removing the stylus alone isn’t possible due to it being integrated into the cartridge, then a new cartridge will be the way forward. Both eventualities are covered in the steps below.

Before you start on any of these methods, it’s important to remember that clean hands and avoiding touching the tip of the stylus directly are key! And of course, that cleaning your records regularly is a key factor in prolonging the life of your stylus.

Step #1: Figure Out If the Headshell is Removable

The first thing you should always do is switch off and unplug the turntable.

If the tonearm has a removable headshell, then disconnect and remove it from the tonearm carefully as this will make the replacement of the stylus far easier.

If the headshell isn’t removable, you’ll need to ensure you keep the tonearm steady for the whole process by locking it in place with the locking clamp.

If there isn’t one, sometimes an extra pair of hands can come in handy here.

Step #2: Establish Which Stylus You Require

The stylus should generally have a serial or model number visible on it, which will make looking up a replacement to order straightforward.

If there’s no model number evident on the stylus, then a quick search of the instruction/set-up manual for your turntable or record player online should yield a result.

If you’re in any doubt, you can always ask for help in figuring out the appropriate replacement stylus from an expert or retailer. You may also want a stylus upgrade, in which case it’s likely you’ll already know which make/model you want.

Step #3: Remove the Old Stylus from the Cartridge

Once you’ve got the new stylus, it’s time to remove the existing one from the cartridge.

Grip the stylus assembly between your forefinger and thumb, and gently but firmly pull the stylus assembly away from the cartridge. This may take a little effort, but it should clip out.

Step #4: Attach the New Stylus to the Cartridge

The new stylus should come with a set of instructions, so give these a close read to check if there are any specific pointers around the model you’ve purchased.

To attach the new stylus, first make sure the new stylus is properly seated in its protector. Then, grip it by its side as in the previous step, and align the underside of the stylus with the cartridge body, ensuring any tabs and openings are properly lined up.

Next, ease the stylus assembly into the cartridge body and gently apply some pressure until it clips into place. The new stylus should now be ready to go.

Step #5: Reattach the Headshell if Necessary

If you removed the headshell for this process, reattach it to the tonearm and secure it.

As long as the tonearm’s counterweight stayed in place throughout, rebalancing the tonearm or resetting the tracking force shouldn’t be necessary. Now you can remove the stylus protector.

You can find the Audio-Technica AT-VMN95E cartridge with stylus I use in the above demo here.

Replacing the Cartridge Entirely on a Turntable: A Step-by-Step Guide with Pictures

Step #1: Remove the Old Cartridge from the Headshell and Establish Which Model You Want or Need

A quick look at the instruction manual for the turntable can sometimes reveal the cartridge model number, but in any case you’re going to need to remove the existing cartridge from the headshell to replace it with a new one.

On some cartridges, it’s not possible to identify the model serial number until they’ve been removed from the headshell, so this is likely to be the first thing you’ll need to do.

Refer to Step #1 in the stylus replacement steps above for information on how to first remove the headshell from the tonearm, if your turntable model allows this.

To remove the cartridge from the headshell, you’ll need a small flathead screwdriver.

Unscrew the small screws which attach the cartridge to the headshell, and be careful not to let it fall as there are small wires which connect to the cartridge.

Then, you’ll need to gently disconnect these wires from the cartridge, and a pair of tweezers can be very useful for this delicate job.

Before you disconnect the wires, make sure you note down which color wire connects to which pin, so that you know which wires to reconnect where on the new cartridge. I usually just take a photo for visual reference.

Now, you should have the old cartridge completely disconnected from the headshell.

Establish the model number of the replacement cartridge you need by inspecting your existing cartridge to get the relevant info.

It may also be the case that you want to upgrade the cartridge, so it’s likely you’ll already have done some research on which model you want.

Step #2: Remove the Stylus from the New Cartridge Before Installation

To avoid any accidental damage to the new stylus while installing the new cartridge, remove it before you attach the cartridge to the headshell.

Before you do anything, though, make sure you read the installation instructions that come with the new cartridge. Also, ensure the stylus protector remains on throughout this entire process.

Gently grip the stylus assembly between your forefinger and thumb, and then ease it out of its seating in the cartridge. See Step #3 from the stylus replacement steps further up the page for images on this.

Put the new stylus to one side in a safe place.

Step #3: Attach the New Cartridge to the Headshell with Screws

Now you need to install the new cartridge by lining it up on the headshell, and using the small screws and flathead screwdriver from Step #1.

At this stage, you don’t want to tighten the screws too much – only enough to keep the cartridge in place but allow a little flex for adjustments.

Step #4: Attach the New Cartridge’s Pins to the Headshell Wires

Using your tweezers, reattach the headshell’s wires to the pins on the new cartridge, making sure you connect the correct wire to the corresponding pin as per the notes you made in Step #1.

Take extra care when doing this step, as the wires can be easily damaged!

Step #5: Insert the Stylus back into the Cartridge

Making sure the stylus protector is still properly in place, you can now reattach the stylus assembly to the cartridge.

Take the stylus assembly between your forefinger and thumb, line it up with the cartridge, and slot it back into its seated position. It should click back into place.

Step #6: Reattach the Headshell to the Tonearm

If you removed the headshell from the tonearm, you can now reattach it and secure it in place.

Step #7: Ensure the Stylus is Correctly Aligned

Aligning the stylus is an important step, and the first thing you should make sure of is that the stylus overhang is correct. The correct measurement should be stated in the instructions that came with the stylus, but is usually between 15mm and 16mm.

Stylus overhang refers to the distance between the tip of the stylus and the center spindle on the turntable, when the headshell is positioned directly over the spindle.

This can be measured with either an overhang gauge or a digital caliper, and if you’ve bought a whole new pre-mounted cartridge and stylus assembly the overhang will most likely have been preset at the point of manufacture. In any case, most manufacturers have instructions on their websites for stylus alignment which you can easily track down.

The other step in aligning the cartridge is ensuring the stylus remains as tangent to the record groove as possible when tracking the groove.

You can do this using the paper protractor method, which involves printing out a special protractor to scale and then placing it on the turntable platter and lining up the stylus with the markings.

Paper protractors come with instructions printed on them and some manufacturers have them available on their websites. Audio-Technica (click here for pdf) and Fluance (click here for pdf) are two who make theirs freely available.

Step #8: Tighten the Headshell Screws

Once the cartridge and stylus are aligned, you can tighten the headshell screws to firm up the cartridge. Make sure you don’t over-tighten them.

Step #9: Final Checks

Give the tonearm set-up instructions for your specific model a quick check over to ensure the tracking force and anti-skate are all good to go before you play any records.

If the tonearm’s counterweight stayed in place during the process, then rebalancing the arm or resetting the tracking force shouldn’t be an issue.

Now you should be good to give your new stylus its first spin. Enjoy!

You can find the Audio-Technica AT-VM95E headshell and cartridge combo I use in the above demo here.

11 Great Ways to Display Your Vinyl Record Collection


Records don’t just sound great, they often look great too, which is why making a display of the artwork on the covers of your collection is part of many vinyl lovers’ ritual.

If you’re looking for some inspiration when it comes to displaying your vinyl collection, there are a wealth of ways in which you can do it, from the simple and basic to the more elaborate and creative.

You may be all about the aesthetics and want to display your records in a visually striking manner, or perhaps you want something much more utilitarian but which still looks great. Maybe you want a combination of style and function.

Whatever your preference when it comes to putting your records on show, I’ve got all angles covered here with a comprehensive list of various ways in which you can display your record collection!

I’ve grouped display possibilities into 11 main categories below, with examples and various budget options for each different method. Let’s dive in…

1. Floating Display Shelves

The starkness of a floating shelf or case in the middle of a wall really helps make a bunch of records stand out. You may be tight on space, in which case this can be a neat fix, or perhaps you want to work a floating shelf around some other wall decorations or displays.

With a floating shelf you can display a small selection of records (as per the above photo), or with a floating case you can usually hold around 20-25 records, and with one record facing out you can regularly change whichever record is at the front for a bit if variety on your display.

Check out these two sleek options:

BrandMaterialCapacity (12” records)Price LevelNumber of FinishesLink
Hudson Hi-Fi – Vinyl Record Display ShelfSolid Steel25 records (manufacturer stated)$2
Deep Cut – Flip Record Display ShelvesHardwood20 records (manufacturer stated)$$2Deep Cut website

2. “Invisible” Mounts

If you like the floating shelf option, but want to go more minimal with your record display, then “invisible” mounts could be for you.

Whether it’s a single record or a select group of discs, you can build this display out as much as you want to and in any pattern that takes your fancy.

There are various versions available, from those which display just the artwork to those which allow you to perch your record’s artwork behind the disc for an even more complete display.

Twelve Inch’s magnetic-backed solution is smart and stylish as an artwork-only display, and I’d recommend sticking with something like this, as the “exposed disc with separate artwork” can leave your record open to attracting dust etc.

BrandMaterialPrice LevelCommentsLink
Twelve Inch – The OriginalMagnetic-backed wall mount$Uses a magnetic backing, to give you a floating record cover!

3. Record Ledges

Photo courtesy of KAIU.co

Another great minimalist and “invisible” option, ledges may only hold a single record and therefore not the quantity that other solutions can, but they sure do display your prized possessions in a classy way.

Ledges come in a range of materials, so price, quality and finish can vary vastly, but this also means there will be a solution for every taste, budget and demand.

With the different styles, you can often find a ledge that suits the look you’re going for perfectly. You can also have as few, or as many, as you want so creating a gallery-style display to your exact requirements is easy and straightforward.

A couple of cool possibilities that I like the look of:

BrandMaterialPrice LevelNumber of FinishesCommentsLink
Mönke – Vinyl Record Wall MountSolid Pine Wood$3Minimal, affordable and effective.
KAIU – Vinyl Record Floating ShelfSolid Oak$2Made from solid oak, really easy installation, and great price.

4. Record Walls

The great thing about working up your own record wall is the ability to change the records on display, and it also means you can match your display to your current listening mood.

Wooden ledge solutions mean you can add a discreet touch of dark oak or light pine, or whatever works best with your wider furniture stylings, and are basically longer versions of the single record ledges mentioned in tip #3.

You can keep it minimal with as few as just four records with a single row from Northern Pine Goods’ Storage Shelf, or you can add further rows for a full wall display.

You could also go for a fabric material modular system like that of Record Roots. These options give you great adaptability in expanding your record wall display if you feel like adding to it at a later stage.

BrandMaterialCapacity (12” records)Price LevelNumber of FinishesCommentsLink
Record Roots – LP Wall StorageFabric Material8 records (per frame)$$1Expandable by adding more frames, so you can increase the wall display by 8 records at a time.Record Roots website
Northern Pine Goods – Vinyl Record Storage ShelfSolid Walnut4-6 records (depending on width)$$$1Choice of width of 4-6 records, plus you can add rows.Northern Pine Goods’ Etsy Store

5. Single Record Stands

If, like me, you like to make an occasion of getting some time to sit down and play some records, then a single record stand really adds to the pleasure of admiring a record’s artwork while you’re listening.

A “now playing” stand can also just hold a single record on display on a desk or on top of a piece of furniture if you want. Either way, stands are another display solution with a multitude of uses.

BrandMaterialPrice LevelNumber of FinishesCommentsLink
KAIU – Vinyl Record StandSolid Wood$3Another excellent KAIU product at an affordable price point.
Divider Records – The Album StandVarious Wood$$4 wood finishes, with 2 finishes for the metal rod supports.As with other Divider Records products listed here, this is a quality hand-made piece that looks fantastic.Divider Records website

6. Record Holders

Photo courtesy of KAIU.co

Record holders act like a rack and can come in various formats, shapes and sizes. They can slot in to plenty of spaces around the home and they display the artwork of records nicely, and they’re also easy to sift through when perusing which album to pull out next.

KAIU’s a brand I really like, for their simple but cool design and the fact they’re very reasonably priced, and their Vinyl Record Holder is an awesome way to display up to 50 records with minimal clutter.

Hudson Hi-Fi’s Desktop display is also pretty cool, and reminds me of the old toast holders you’d see in hotels as a kid! Maybe it’s just me. Anyway, it’s a sleek display solution!

BrandMaterialCapacity (12” records)Price LevelNumber of FinishesCommentsLink
KAIU – Vinyl Records HolderSolid Wood & AcrylicUp to 30$6Simple, effective and in a number of different finishes.
Hudson Hi-Fi – Desktop Storage DisplayAcrylicHolds up to 25 or 50 records, depending on size.$2Neat display solution that creates the illusion that your records are free-standing.

7. Frames

Perhaps one of the most old school, straightforward display methods out there, but one that never fails to make a special record stand out is a trusted frame.

There are some really solid cheap frames that do a great job, such as IKEA’s Lomviken, while I really like KAIU’s Vinyl Record Frame for its hinge opening, meaning you can switch records in and out whenever you like.

If you’ve got a special or limited edition record that you want to go all out with in terms of presentation, then a gatefold or deluxe frame such as MCS’ offers the opportunity to display a record and its cover together.

BrandMaterialDimensionsPrice LevelNumber of FinishesCommentsLink
IKEA – LomvikenAnodized Aluminium12 ¾” x 12 ¾”$1A traditional picture frame that makes for a great budget option.
KAIU – Vinyl Record FramePine Wood13.9” x 13.7”$1Hinge opener which means you don’t have to dismount from the wall to switch the record on display.
MCS – Deluxe Record Album FrameWood25 x 16.5$$1A wide frame which allows you to make a presentation-style display of both the record and its cover.

8. Bins & Crates

Crates can be as fancy and stylish or as basic and brutal as you want!

An old wood or plastic crate can be found for next to nothing on eBay or Craigslist, and can provide a shabby chic touch to your display. If you go higher end, you can get personalized and luxury versions such as Symbol Audio’s stunning Dovetail Record Crate.

Record bins can offer an easier access option too. Flipbin’s Model 33 listed below has an open front, so your display has an even more practical touch.

BrandMaterialDimensionsCapacity (12” records)Price LevelNumber of FinishesCommentsLink
Sound Stash – Bamboo Record CrateWood15 7/8″ (H) x 14 3/4″ (W) x 12 1/4″ (D)80 (manufacturer stated)$$2Simple, effective and relatively cheap!
Flipbin – Model 33Steel12 1/4″ (H) x 13″ (W) x 10″ (D)33 (manufacturer stated)$$11Great retro feel with a large variety of colors, also makes flicking through records easy.Flipbin website
Symbol Audio – Dovetail Record CrateSolid Walnut or White Oak11″ (H) x 14 ¼ ″ (W) x 16 1/4 ″ (D)100 (manufacturer stated)$$$2High-end option with superior finishes, so if you’re in the market for a luxury solution this is it!Symbol Audio website

9. Open Shelving Units

Simple form and function is a great way to go about things if you’ve got more than just a few records and the space for an open-shelving system, which helps you display your records in an organized manner.

The beauty of open shelving is that it’s a neat and tidy solution to displaying records, and it also makes your collection easily accessible. Your records look cool all lined up and you can have them spine-out for easy locating with dividers. As long as you’ve got your records in good protective covers, then they’ll be guarded against dust etc.

IKEA’s Kallax is something of a longstanding veteran in this area, and is a great option for its flexibility and low cost. With its modular nature you can go big, small, in between, and have sections with doors and/or drawers.

I own two of these and counting up my collection on the Kallax, 75 12” records fit snugly into each cube, which makes for a decent cost-effective solution. It’s not the most stylish option out there, but it’s simplicity mean it blends in most places nicely.

Other options that have caught my eye and which look great are Hammacher Schlemmer’s The Aficionado’s 800 LP Organizer, which is another well-priced product for the quality and storage capacity, while Divider Records’ beautiful Bedford Storage Unit is a fair bit more expensive but brings a whole different level of design with a selection of high-quality finishes, not to mention superior build quality.

There are a lot of open-shelving units out there that are either specifically made for records, or which can be appropriated for this purpose, but these serve as some great inspiration.

BrandDimensionsCapacity (12” records)Price LevelNumber of FinishesCommentsLink
IKEA – Kallax57 7/8” (H) x 30 3/8” (W) x 15 3/8” (D)400 records (my calculation based on my own collection)$$7Flexible, available in various sizes and configurations, cost-effective option.IKEA website
Hammacher Schlemmer – The Aficionado’s 800 LP Organizer60″ (H) x 30″ (W) x 13 1/2″ (D)800 records (manufacturer stated)$$$2Comes with a lifetime guarantee.Hammacher Schlemmer website
Divider Records – Bedford Storage Unit34″ (H – with legs) x 28 3/8″ (W) x 14 1/2″ (D)Up to 300 records (manufacturer stated)$$$$6Superior design and build quality, but limited delivery area within US.Divider Records website

10. Cabinets and Media Consoles

A dedicated record cabinet or media console is a great option if you want to integrate your record display into the overall design scheme of your living space.

With good storage capacity, and often with space for a turntable or record player and sometimes a few other decorative elements on top, there are some good affordable options out there from the more slim-line Novogratz Concord Turntable Stand, through to wider and higher capacity cabinets or sideboards such as Urban Outfitters’ Ema Low Credenza.

A unit with doors means you can have a piece of furniture that can fit more seamlessly into an overall look you may be going for, while those without doors will offer the same accessibility as open-shelving options discussed earlier.

There are also units out there that will combine storage sections that have doors and those that don’t.

BrandDimensionsCapacity (12” records)Price LevelNumber of FinishesCommentsLink
Novogratz – Concord Turntable Stand31.8″ (H) x 39.7″ (W) x 18″ (D)Up to 200 records (my calculation based on dimensions)$$1Great affordable slim-line option, with open face.
Hammacher Schlemmer – The LP Storage Media Cabinet35 1/2″ (H) x 20 3/4″ (W) x 16″ (D)80-100 records (my calculation based on dimensions)$$$1Mad Men vibes piece with a door.Hammacher Schlemmer
Urban Outfitters – Ema Low Credenza17″ (H) x 60″ (W) x 20.25″ (D)240 records (manufacturer stated)$$$$1Larger open-face piece of furniture.Urban Outfitters

11. Flight Cases

Flight cases are a more industrial route to go down for your record display, but they look good and serve more than one purpose in the eventuality that you need to transport part of your collection at any point.

I’ve got a pair of Citronic CVA50 cases (photo above!) which saw part of my record collection safely through an international move, and while these seem to be hard to come by online now there are other options such as Odyssey’s Transport Case (see below), which have detachable lids to make an open display.

BrandCapacity (12” records)Price LevelCommentsLink
Odyssey – Transport Case70 (manufacturer stated)$$Foam-lined, with a detachable lid.

Key Things Record Display Storage Should Do

Whatever option or combination of methods you opt for, there are a few key points that any kind of record display – whether it be display-led or otherwise – needs to fulfil.

Your records need to be protected, however you decide to display them, so any method you employ should ensure the following points are taken fully into consideration:

  • Light – Don’t place your display in direct sunlight, as that’ll help bring your records to a sad demise in super quick time.
  • Temperature – Keeping your records in a place where they won’t encounter heat or cold extremities is important. Cooler temperatures reduce the rate at which a record will degrade.
  • Humidity – Your records need to be displayed in a place where they won’t be exposed to humidity. A well-aired location is really important.
  • Cleanliness – Keeping your records inside their protective covers and sleeves when on display is important, as is keeping things dust-free and clean.
  • Weight and Pressure – Never stack records on top of one another when displaying them. Ensure they’re always displayed upright and don’t have anything leaning against them.

Keeping your records cool, dry, out of direct light and clean when displayed won’t just help protect them, it’ll keep them sounding great for longer too!

A Guide to Changing Songs on a Record Player (With Pictures)


If you’ve got your record player or turntable set up, have started enjoying your music, but are now wondering how to skip songs and jump to whichever track you want to hear, this post has you covered.

Playing and handling records is a delicate business, as we’ve covered in a few other posts such as our Complete Guide to Handling Vinyl Records (With Pictures) and How Vinyl Records Get Scratched, And How You Can Avoid It.

As outlined in those posts, the way records are treated is key to their longevity, and the way in which you change songs on a record player is another important factor in keeping your records in top shape.

To change songs on a record player, lift the tonearm while the record is still spinning, by using the cueing lever. Count the clearly marked rings on the record surface, which correspond to the track numbers. Now lower the tonearm onto the record surface where the track you want to play starts.

It’s a simple enough process, but one which is easy to get wrong, so I’ve outlined a guide below to show the best way to change a song on a record player.

It’s a step-by-step process accompanied by pictures to make it as helpful as possible.

Why It’s Good to Change Songs in the Correct Way on a Record Player

Before we dive into how to change a song on a record player, it’s important to understand why it needs to be done correctly, so here’s a brief overview of what we’re aiming to achieve – and avoid – by implementing the right method.

Any time you place the stylus (the record player’s needle) on the record surface and any time you take it off, the record is exposed to potential damage. This is due to the impact of the stylus, which is often constructed of diamond and is therefore much harder than the record’s playing surface.

The weight and pressure that the stylus applies to the record’s grooves is calculated very specifically by the manufacturer, but the inevitable result of repeatedly placing a hard component such as diamond onto a softer material such as a vinyl record constructed of PVC is wear to the record.

That’s just the nature of the beast. This wear is minimal with every use, but over time it builds up, and if the proper care and attention isn’t taken then a record will degrade much faster.

Changing songs on a record involves the repetition of the application and removal of the stylus, so it requires a careful approach. Despite taking great care, it’s still very easy to accidentally drag the stylus across the record surface, unintentionally make it drop or hop in or out of a groove, or inflict any other kind of impact on the record.

So, let’s jump into our simple but effective step-by-step guide to changing songs on a record, which will help protect your vinyl…

Step 1: Identify Where the Song You Want to Play is on The Record

Before playing any record, always give it a clean. It helps keep the record in good shape for longer, and also improves the quality of your listening experience.

If you’re looking for a decent, affordable cleaning kit I can highly recommend this KAIU one. I have it at home and it comes with two different brushes, cleaning solution for records and also a small brush and cleaning solution for the stylus.

The start of each song is easily identifiable on a record’s surface by a separating gap between each track.

Take a look at this photo for a clear indication of how to figure out where a song starts on a vinyl record:

By checking the track listing on your record sleeve, and counting the rings on the record surface, you can quickly and easily work out exactly where you need to place the stylus to start at the song you want to hear.

Having a lamp beside your record player will often help to make spotting the tracks a lot easier, and some turntables will even have a small light built in that shines across the record’s surface.

Now that you’ve identified where you want to listen from, how do you change the music on the record?

Step 2: Lifting the Tonearm

You need to remove the stylus from the record’s playing surface while the record is still spinning, and if your turntable or record player has a cueing lever, you need to use this any time you’re lifting or lowering the tonearm.

One of the main reasons it’s important to lift the stylus while the record is spinning is because by stopping the record with the stylus in the groove, the record is exposed to the heat build-up in the stylus.

As the stylus is running through the record’s grooves while playing, it generates heat, and this can be detrimental to the record if left in the groove.

If your record player doesn’t have a cueing lever, then you’ll need to lift the tonearm by hand. Resting your hand or your pinkie finger on something steady beside the platter will allow you to raise the tonearm as steadily as possible. See this photo for guidance:

Step 3: Moving the Tonearm to the Desired Track

The next step is moving the tonearm in line with the desired track, and preparing it to be lowered so that the stylus comes into contact with the record at the start of the selected song.

Moving the tonearm to the exact spot takes a little practice and is something you’ll improve on (quickly!). Once the tonearm is in place and the stylus is lined up, you’re ready to lower the tonearm.

Here’s a stylus all lined up and ready to be lowered:

Step 4: Lowering the Tonearm

Using the cueing lever, or using a steady hand, you can now lower the tonearm slowly so that the stylus comes into contact with the spinning record at the right place.

If you’ve lined it all up perfectly, you’ll place the stylus exactly in the ring between songs and the track you wanted to go to will start almost immediately.

Lining up the stylus perfectly isn’t something many people get right first time, so you may catch the end of the previous song or already be a few seconds into your desired track when the stylus finds the record groove.

This is something you’ll figure out with time, and the most important thing at this stage is that you’re lowering the stylus into the record groove carefully and in the correct manner.

10 Common Record Player Tonearm Problems (With Quick Fixes)


Problems with a record player or turntable can often be traced back to a small number of root causes, and one area that is always worthy of a close check is the tonearm.

Perhaps you’ve already identified that the tonearm of your record player is the cause of whatever issues you’re encountering, or it may be the case that you’re experiencing some sound or playback problems but aren’t entirely sure where to look.

Whatever situation you find yourself in, the tonearm of your record player or turntable is such a vital component in a good set-up that troubleshooting it is usually a good place to start when looking for a fix.

What Is the Purpose of a Record Player’s Tonearm?

Before we get into the reasons behind tonearm issues and their fixes, it’s important to first understand exactly what a tonearm does.

The tonearm supports the cartridge, which contains the stylus – or needle – and this is the critical link between getting the music signal off a record and through to your sound system.

A tonearm has multiple functions:

  • It maintains a fixed height and angle, to ensure the cartridge remains in the correct position.
  • It applies the correct weight and pressure, to ensure the stylus comes into contact with the record’s playing surface correctly.
  • It applies the anti-skate force, to stop itself from swinging to the center of the platter.
  • It houses the wiring that carries the signal from the stylus, through the cartridge, all the way to the output.

The smallest issue with any of these aspects can influence sound quality, either independently or in combination with other factors.

There are also other mechanical issues with a tonearm that can affect the sound of your records, and it is for these reasons that proper tonearm set up is essential.

What Are the Most Common Record Player Arm Problems?

The most frequently encountered issues when it comes to a record player’s tonearm fall into two main categories: those which are visibly obvious mechanical problems, such as a tonearm that won’t lower properly, and those which are less apparent to the eye but which affect sound quality and result in an audible problem such as a skipping record.

In the below guide, I’ve split the common issues and their potential fixes into those two main categories. Here are the 10 common issues we’ll address in the guide that follows:

Issues which present as visual mechanical problems with the tonearm
1. The Tonearm Swings to One Side.
2. Tonearm Won’t Lower All the Way.
3. The Tonearm Drops Too Fast.
4. The Tonearm Keeps Returning.
5. A Bouncing Tonearm.
Issues which present as audible and which can, in many cases, be traced to the tonearm
6. Hum or Noise When Playing Records.
7. Weak or No Sound During Record Playback.
8. Only Hearing Sound in One Channel When Playing Records.
9. A Skipping Record.
10. Interference When Moving the Tonearm.

Before you read the guide and attempt any of the fixes, there are a couple of points it is important to be aware of prior to trying any of the suggestions.

The first is that you should always check and follow the manufacturer’s guidelines when trying to fix any tonearm issues. The second is that many issues can be solved with correct tonearm set up according to the manufacturer’s instructions.

As a starting point with any tonearm issue, you should always run through its set up as this will often help to clear out any problems.

If you don’t have instructions handy here are links to some of the main manufacturer’s own general tonearm set-up guidelines, which they’ve made available online:

ManufacturerLink to tonearm set up instructions
FluanceFluance website (opens as webpage)
Pro-JectPro-Ject website (opens as webpage)
RegaRega website (opens as pdf doc instructions for RB330 tonearm model)
Audio-TechnicaAudio-Technica website (opens as webpage)

If you can’t find your specific brand/model’s instructions online, the general process is fairly standardized across most brands and models, and this Audio-Technica walkthrough provides a fairly comprehensive guide:

How to Fix Tonearm Issues: A Guide to Solving 10 Common Problems (with Pictures)

Let’s start with perhaps the most obvious problems you may encounter, and which you’ll most likely see in the shape of mechanical issues or odd behavior from your record player.

Issue 1: The Tonearm Swings to One Side

A common cause of a tonearm swinging when it isn’t supposed to is that the platter of the turntable or record player isn’t level. Many tonearms can be extremely sensitive, so being as precise as you possibly can with leveling the platter is very important.

Using a special turntable precision spirit level to ensure the platter is completely flush is highly recommended, and this is the one I use to get the job done.

If this doesn’t sort the issue out, another far less likely cause could be the tension of the wiring within the tonearm. This is much rarer, and if checking the balancing of the tonearm and the platter’s level haven’t solved things then this is a final check. This may be one you would prefer to get a professional to undertake.

Issue 2: Tonearm Won’t Lower All the Way

You may be finding that the tonearm isn’t lowering far enough to bring the stylus into proper contact with the record on the platter. This is usually because the tonearm bridge is not lowering enough when the cueing lever is used. There is usually an adjustment screw you can tweak which will adjust the bridge’s height, and in turn solve this issue in most cases.

Issue 3: The Tonearm Drops Too Fast

If the tonearm is lowering too fast, this can also be a symptom of an issue with the bridge, so try the bridge adjustment screw as a first quick check.

If this doesn’t work, then the most probable cause is the damping capability of the cueing lever. A little perseverance with this fix will be required, but it’s worth it and is very satisfying when you do fix it!

A cueing lever mechanism is lubricated with fluid that helps to control the drop of the tonearm, and over time this fluid can see its effectiveness degrade as it dries out and loses its viscosity.

You’ll need to carefully apply some fresh cueing lever mechanism damping oil to the area. This isn’t a complicated process and is relatively straightforward, but the result will make the effort worthwhile.

This video does a good job of explaining the process, and also highlighting what happens if you apply too much fluid:

You’ll need to choose the right viscosity of dampening fluid to apply based on the weight of your tonearm – I’ve used this one before and it’s helped me maintain the tonearm on one of my turntables.

Issue 4: The Tonearm Keeps Returning

Some record players have a tonearm that automatically returns to its resting position after the record stops playing. These tend to be older “stacker” models (I have a 1972 Tonesta which has this feature), or the cheaper newer mass-produced models such as Crosley.

An issue with this style of record player sometimes arises whereby the arm returns to its resting position when it shouldn’t. A quick fix that often works is to manually rotate the platter with your hand for a few revolutions, until you hear a click sound. This will be the auto-return mechanism disengaging and/or resetting, and should solve the problem.

If this doesn’t fix it, check the model’s instruction manual to see if there is any mention of an auto-return adjustment screw.

Issue 5: A Bouncing Tonearm

If your tonearm is bouncing, it may be because of a few issues. If you’re manually lifting and lowering the tonearm, this may be causing a bit of a bounce when you release it.

If your turntable has a cueing lever, you should use it and execute a smooth lifting action every time. Tonearms are delicate and sensitive mechanisms and what may not feel like a particularly rough movement can result in damage.

Another cause of a bouncing or non-smooth tonearm movement can be traced back to the cueing mechanism, as this is what helps to control the action of the tonearm’s lifting and lowering motion. Therefore, a run through of the fix suggested above in Issue 3 with regards to damping oil should be considered.

Next up, let’s look at some of the most common audible issues you may encounter, and which can be traced back to the tonearm.

Some of these issues will be caused by other factors, or even a combination of issues, but as any part of an elimination process to root out the cause the tonearm can always be checked out.

Issue 6: Hum or Noise When Playing Records

Hum is an issue that can be caused by a number of different things, but sometimes it does trace back to the tonearm.

If you’re getting hum when playing your records and have checked out a few other probable causes but without success, it’s always worth looking at the tonearm ground wire (if your turntable tonearm has one). Read the user manual to ensure you know how to properly check the ground wire is well connected to the ground terminal.

Hum or other noise interference can also often be traced back to the cartridge, so verify first that the cartridge is properly attached and connected to the tonearm. It’s always advisable to look up specific cartridge advice before delving into playing around with such a delicate component.

Issue 7: Weak or No Sound During Record Playback

If the tonearm is the culprit for weak or no sound at all when you’re playing your records, it will most likely be one of two issues.

The first is likely to be the classic tonearm balance fix. Without the correct Vertical Tracking Force (VTF), the appropriate weight will not be being applied to the stylus and it won’t track the record grooves properly. If the VTF is too light, bass frequencies will be lost and the overall sound will be weak and, in extreme cases, almost nonexistent.

The correct VTF is determined by the manufacturer of the cartridge, and they’ll state a weight that is usually between 2-3 grams, so check their guidelines for optimum set-up.

The other possible cause for weak sound output that can be linked to the tonearm is the bridge. Using the guidelines from Issues 2 and 3 above, check the height of the bridge to ensure it isn’t preventing the tonearm from lowering far enough to bring the stylus into proper contact with the record.

Issue 8: Only Hearing Sound in One Channel When Playing Records

The tonearm shouldn’t be the first port of call for this issue, but if you’ve checked out the other logical areas that could cause you to be hearing only the left or right channel, then tonearm balance and VTF are two things you can quickly and easily verify.

If that doesn’t help, then try disconnecting the headshell from the tonearm and clean the contacts that connect these two components. A dab of rubbing alcohol on a cotton swab should do the trick. You can also check the connections between the cartridge and the headshell to ensure they are clean.

Issue 9: A Skipping Record

A very common problem and one which we’ve all faced, or will face, at some point! A skipping record can be caused by a few different factors, but the tonearm is a good place to run some checks.

As per Issue 7, the VTF can often be a key factor in a skipping record. If the stylus pressure is too light, you won’t only experience weaker sound, but the stylus can also jump out of the record grooves, resulting in a skipping record. This is detrimental not only to the listening experience, but also to the record as the stylus can damage the groove when it lands again.

The anti-skate on the tonearm is also something that you should check if experiencing a skipping record. The purpose of anti-skate is to counteract the natural movement inwards of the tonearm, by applying a small force outwards to maintain a balance. If the anti-skate is off, record skipping can be a result.

A skipping record can also sometimes just be down to a dirty record, and an excess of debris in the grooves causing the stylus to jump out. I use this cleaning kit, which also includes a stylus cleaning brush and fluid, as it’s great value, does a good job and includes a few different pieces of kit.

Issue 10: Interference When Moving the Tonearm

If you hear any untoward sounds when moving or touching the arm but which don’t happen during playback, such as rustling or crackle, the most common cause is the tonearm’s cabling.

The wires inside the arm sometimes rub the walls of the tube, which in turn creates static, or they rub against one another which can also lead to induced current. This is more likely to occur in dry environments, so if you live in a warm, dry climate this could well be an explanation.

Getting into tonearm wiring is not as straightforward as some of the other fixes outline above, so unless you’re confident this may be one that is best left to a professional or at least someone with more experience.