Recent Posts

The Complete Guide to Handling Vinyl Records (With Pictures)


One of the most important steps in a proper care routine for a vinyl record collection is the handling of records. However, it’s also one of the most overlooked areas of record maintenance.

It’s all too easy to not give any thought whatsoever to how you actually hold a record, but thankfully it’s also a very simple process which is fast and easy to master safely.

By implementing the following guide to handling vinyl records, you’ll be able to rest easy knowing that you’re doing everything possible to ensure their preservation.

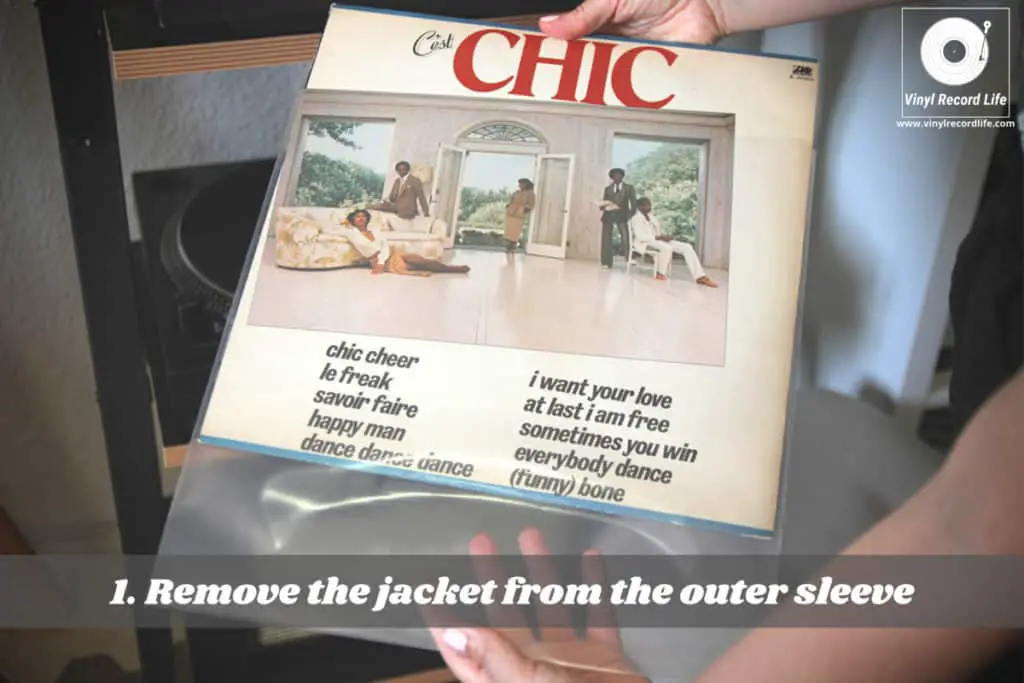
To correctly handle a vinyl record, first remove the inner sleeve from the jacket. Next, slide a hand inside the inner sleeve and place your index, middle and ring fingers on the record’s center label, and your thumb on the record’s outer edge. Slide it out, and avoid touching the record’s surface.

Once you have the record out of its sleeve, handling it in the correct manner is just as important.

Through the years, I’ve found – often through my own mistakes, and also through learning from experienced record collectors – just how easy it is to mishandle a vinyl record and the negative impact that can have on its longevity and sound quality.

Thankfully, that experience has also helped me to understand and develop a simple, fast and effective routine for handling my records, and I’ve outlined this in a step-by-step guide below.

It should also help you to handle your own records in a way that doesn’t make it laborious, but which also doesn’t cut any corners. The aim is to keep it so simple that it’ll quickly become second nature!

Handling Vinyl Records: Where to Start

While this is a relatively straightforward subject, and one which it’s important to not overcomplicate, there are a few simple but significant precursors to handling vinyl records. These will provide a solid foundation of best practice when it comes to how you treat your records.

Even before a record is taken out of its sleeve and handled, the way it’s stored is very important, as is the cleanliness of the record and its environment. Don’t worry, we’re not talking about forensic-lab levels of hygiene here!

Just by making sure that the record surface itself is kept clean and that your hands are free from any grime, grease or anything else that may get onto the record’s playing surface is what’s needed.
Some enthusiasts go the extremes of wearing microfiber or nylon gloves when handling their records, but I’ve never ventured that far! In all honesty, just being sensible about hand cleanliness will be more than sufficient.

The fact that handling records is such a frequent part of the whole record-playing experience means that you can’t exactly avoid touching your records, right? The next best thing you can do is handle them right and minimize any risk of damaging them.

Why Is The Way You Handle a Record So Important?

Every time that a vinyl record comes out of its sleeve it is exposed to any number of external environmental factors that can damage it. A lot of these will be such small influences which, in isolation, are nowhere near enough to cause damage on their own. However, if they build up over time they can combine to have a real impact on the degradation of a record.

Dirt and dust are two of the major enemies of a record playing surface. Both are easily transferred from your hands, and even from the record’s cover to the record without you realizing it. If you want to know more about how dirt can harm records, and how to avoid it, check out my post How Vinyl Records Get Scratched, And How You Can Avoid It. It has some great tips on how you can avoid damaging records.
Naturally-occurring oil on your hands can have a real detrimental effect on a record, so even with great care it’s still easy to transfer some kind of dirt onto the playing surface.

This is why handling records in a careful, considered manner is so important to prolonging their lifespan and preserving their sound quality, and is why I recommend the following steps in the handling process.

Step 1: Removing a Record from Its Cover

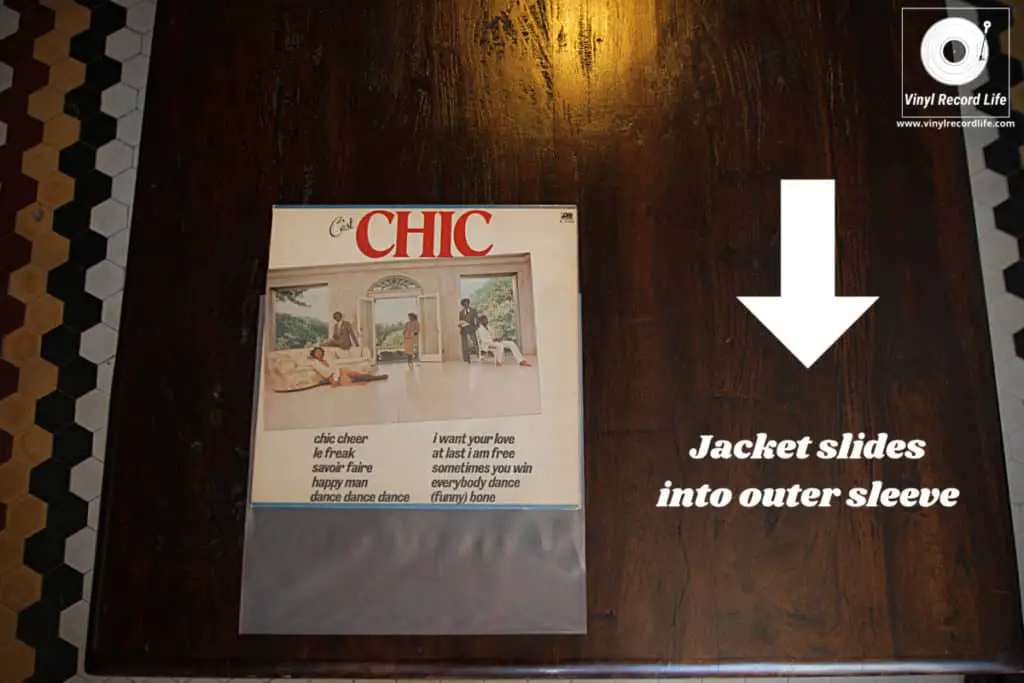
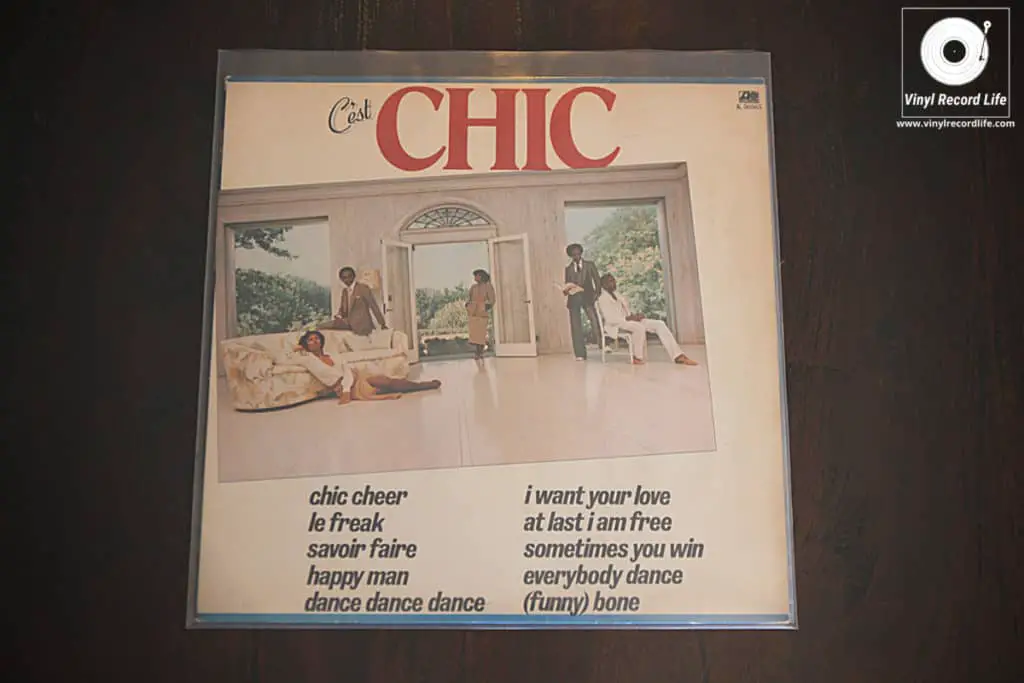
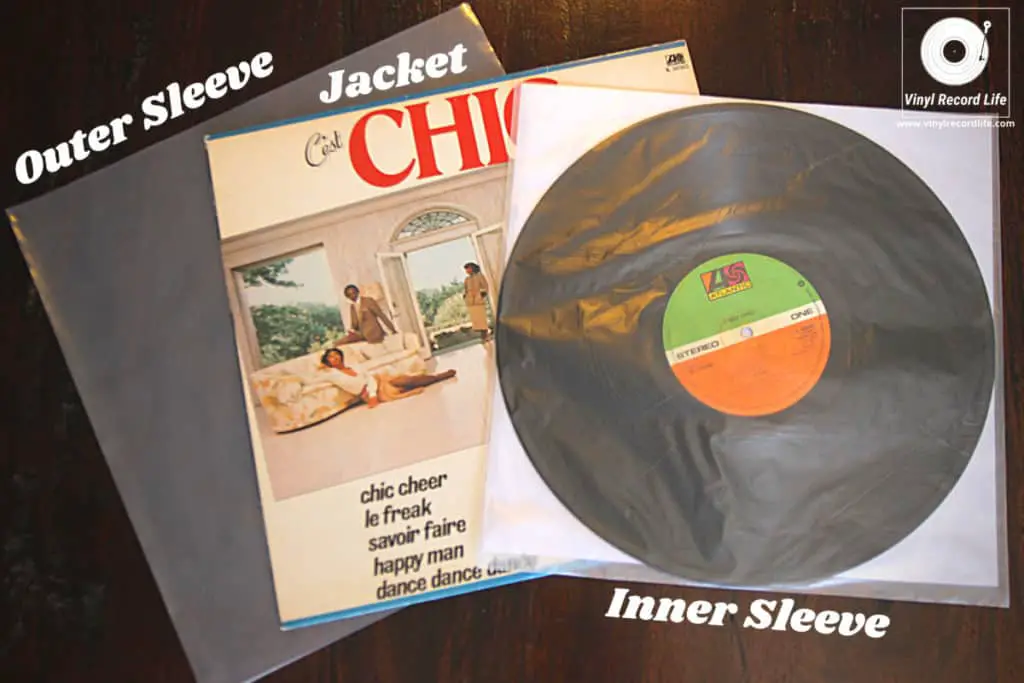
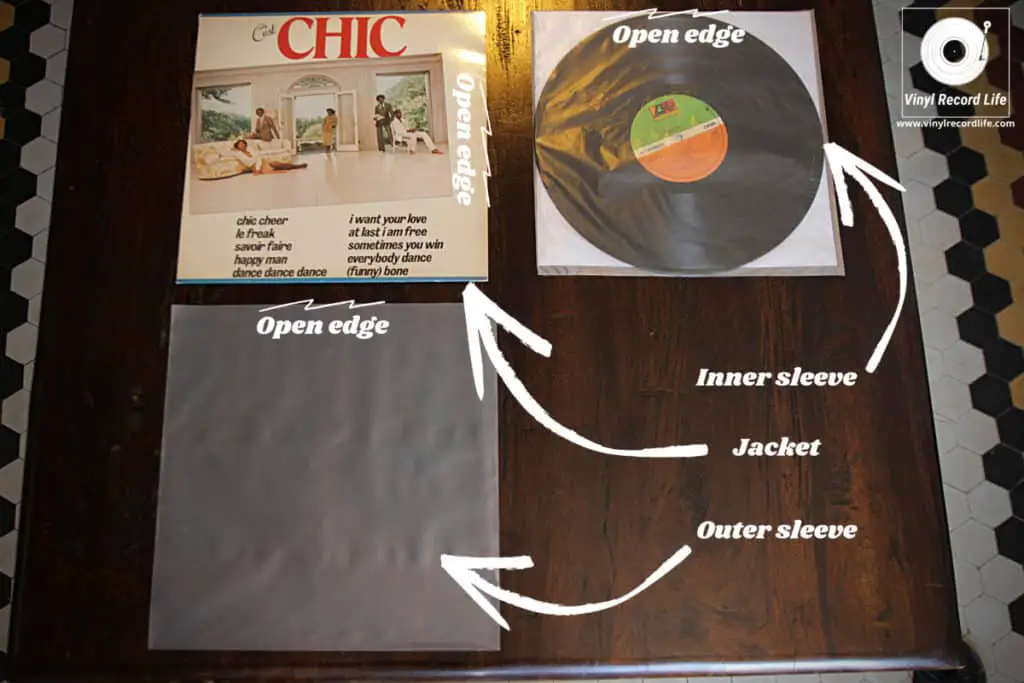
First up, you need to get the record out of its protective cover and into your hands. I store all my records in outer sleeves, so I have a three-step process to get the record out of its various protective layers. I’d recommend the outer sleeve/jacket/inner sleeve combination for storing your records too (see image further up the page), but if you don’t have an outer sleeve you can just ignore that part of the process.

These are the inner and outer sleeves that I use on my record collection, and which I highly recommend.

Lift the jacket out of the outer sleeve so that you have the jacket in one of your hands.
Then, slide the inner sleeve out of the jacket being careful to not accidentally touch the record surface through any hole that the inner sleeve may have.
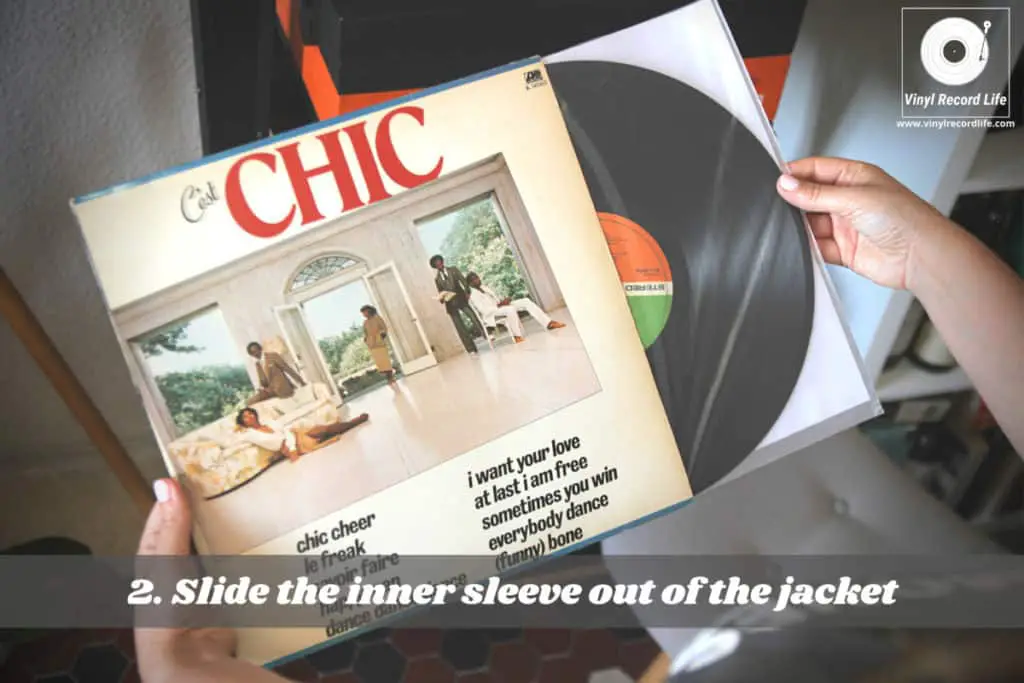
Some inner sleeves have completely solid sides and protect the entire record and center label of the record (like the one in the image above), whereas others have a hole that lines up with the record’s center label, but which often slips and exposes some of the playing surface.

Now that you have the inner sleeve in your hands, you’ll need to remove the record itself. This is where you need to exercise a little dexterity! Slide one hand inside the inner sleeve, but taking great care to not touch the record’s surface.
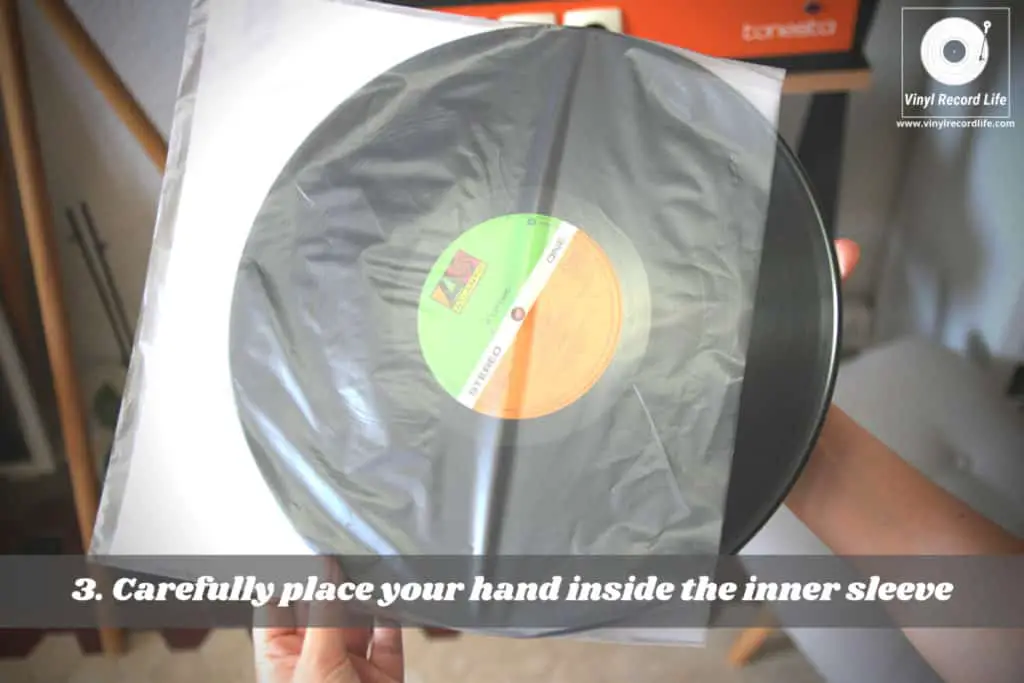
Once your hand is in there, place your index, middle and ring fingers on the record’s center label, and place your thumb on the outside edge of the record.
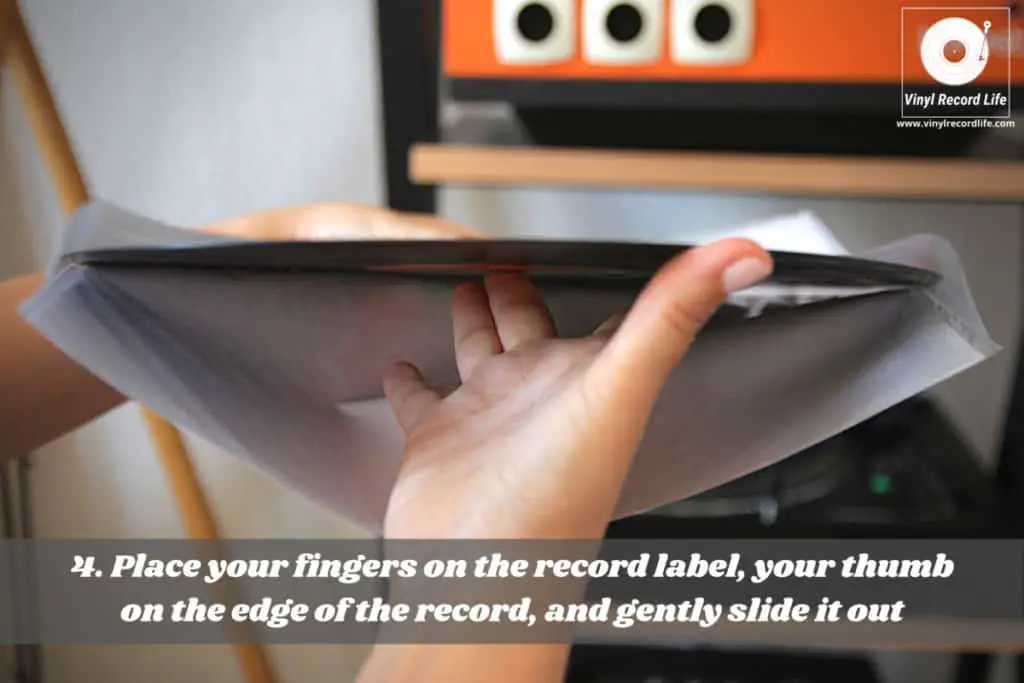
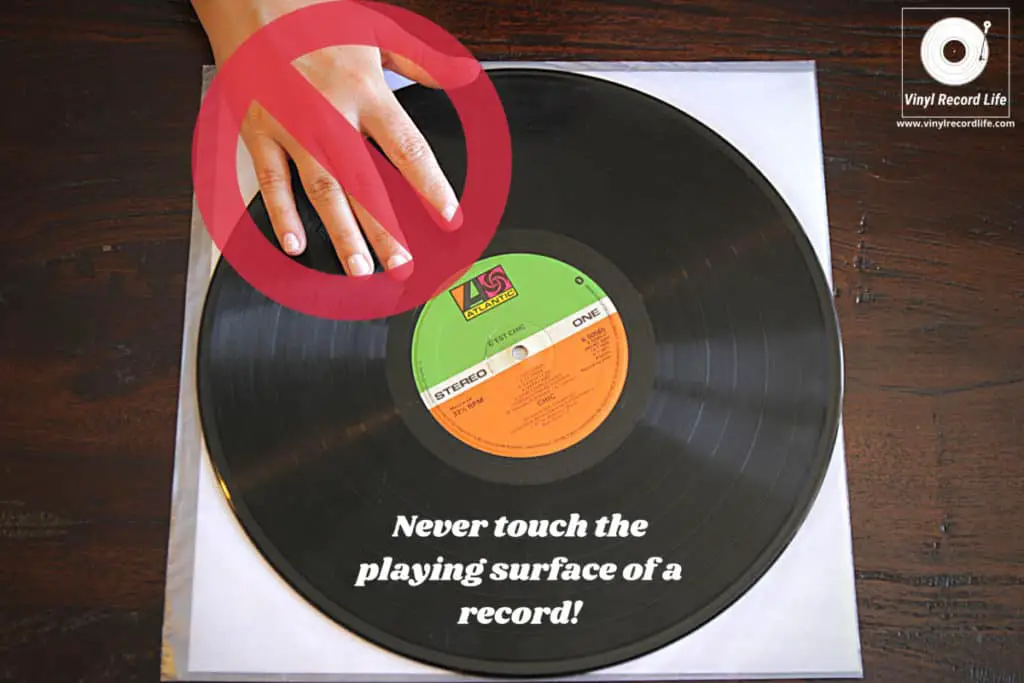
At this point, you should have the record securely within your grip, but without any part of your hand or any fingers touching the actual playing surface of the record (like the image above). Now you’re good to slide the record out of the inner sleeve!

Some extra tips here… You don’t have to place all three fingers (index, middle and ring) on the center label! You can place whichever combination of two or three fingers you feel most comfortable with to gain the best balance and grip on the record. I’ve found that using all three, with the tip of my middle finger nestling into the small hole for the spindle, gives me the greatest control over the record.

Also, I use the lower, crux part of my thumb to hold the outer edge of the record with, and I keep my thumb perpendicular to the record’s outer edge to avoid accidentally touching the surface with the palm of my hand.

Step 2: Handling the Record When It’s Out of Its Sleeve

Now that you’ve successfully got the record out of its protective covers and have it in your hands, you need to ensure that you keep up that excellent level of care and attention!

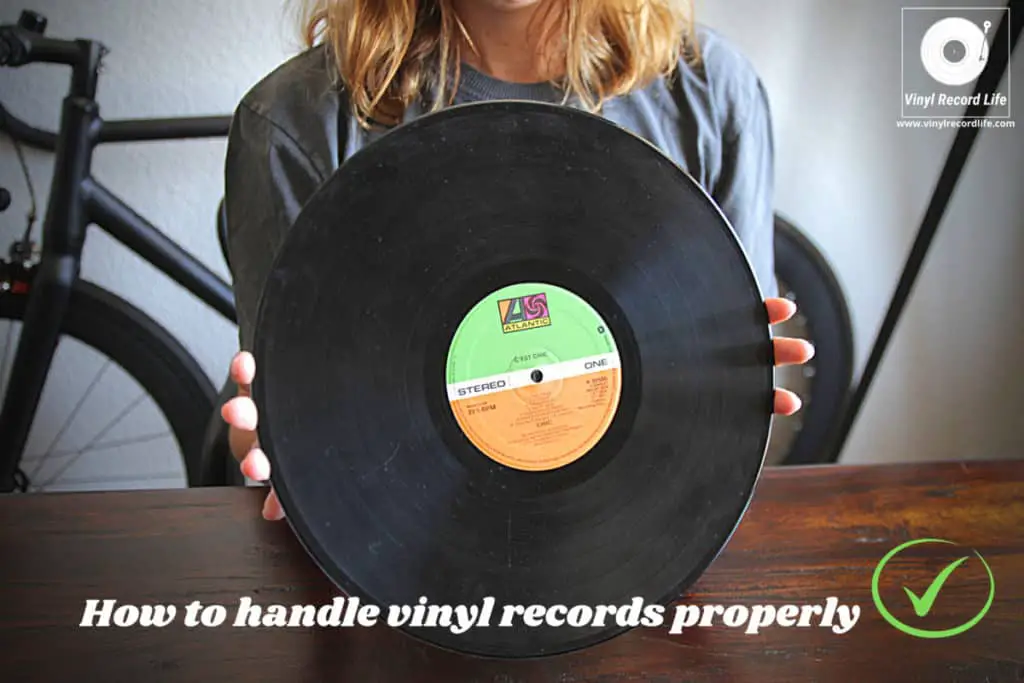
In reality, handling the record when it’s out of its sleeve is really easy and straightforward. The same mantra of never touching the record’s playing surface applies in all situations, so the best way to handle the record is holding it by its outer edges.
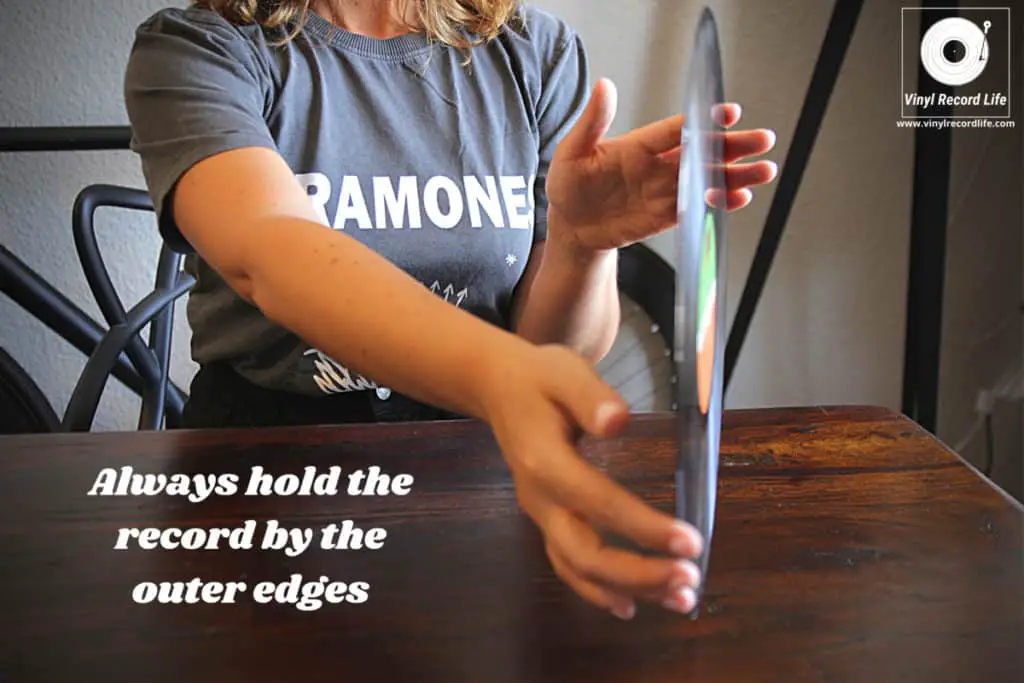
Using your index fingers, you can securely and confidently hold the record without coming into contact with its playing surface, thus ensuring it remains dirt and blemish free.

There are a few important dos and don’ts to always keep in mind when it comes to handling vinyl records:

Dos

  • Only ever touch the outer edges of the record.
  • Store your records in an inner sleeve made from high-density polyethylene, which has natural anti-static properties and which protects the record far better than the traditional paper or card inners that most records arrive in.
  • Clean the record surface with a proper anti-static brush before playing it.

Don’ts

  • Never touch the record’s playing surface, not even by “pinching” the very edge of it to try and minimize contact.
  • Never put the exposed record down on any surface other than your record player or turntable’s platter.
  • Never leave the record out of its sleeve for any longer than is necessary. Take it out when you’re ready to play it, and return it to its sleeve as soon as you’re done with it. Limiting the time your records are exposed will help minimize the amount of dust they’ll pick up.

Step 3: Handling the Record Before, During and After Playing It

Again, this is a simple step but something which many people will not pay sufficient attention to, and neglecting it can inevitably lead to the degradation of a record ahead of its time.

The way you handle a record when placing it on and taking it off a turntable platter is just as important as every other step along the way.

Holding the record by its outside edges, you need to place it on the record player slowly and ensure that the spindle of the player lines up properly with the center hole of the record before you gently lower it onto the spindle and platter.
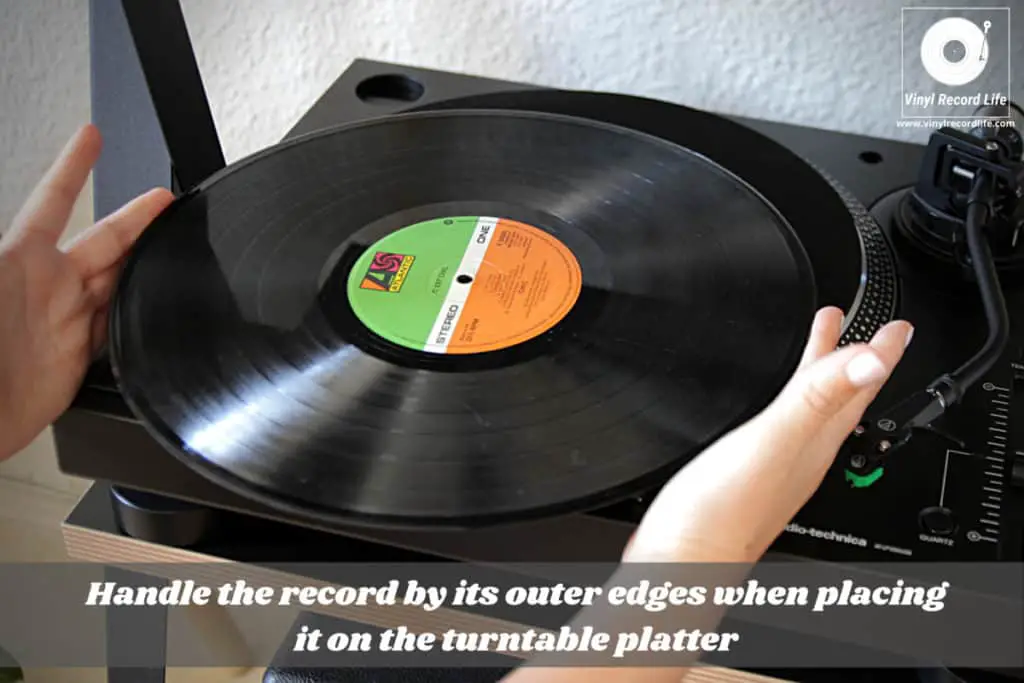
Dropping the record onto the spindle or lowering it too fast so that the record has to be moved about to find the spindle means the record is more likely to fall off center while you find the spindle. This means there is more likelihood of your hands accidentally touching the record’s playing surface. It’s also just not very good for the overall condition of the record as it can cause damage in other ways.

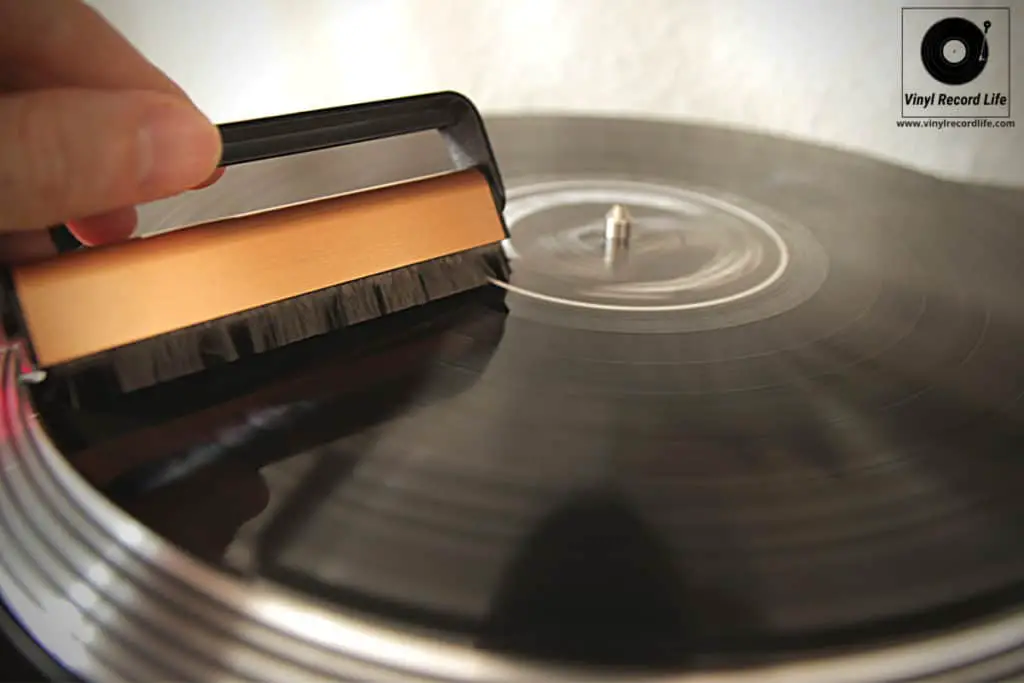
Once you’ve got the record on the platter, giving it a clean with an anti-static brush is a good habit to get into, as it removes any dust and dirt from the surface before the stylus does its thing in the grooves.

Post play, I usually give the record a quick once-over with an anti-static brush, wait for the platter to come to a complete stop, and then gently lift the record off the spindle by handling only the outer edges of it again.
Step 4: Placing the Record Back in Its Protective Sleeves

Getting a record back into its protective sleeves as soon as you’re done with it is another important step you should never let slip.

Removing any residual dust or dirt build up with a final brush clean as per the previous step means your record is ready to be re-stored in as best condition as it can possibly be, and you want to avoid it picking up any dust, fluff or fibers that may be floating about so a prompt return to its cover is necessary.

Handling the record in exactly the same way as you did in Step 1 above, by placing your index, middle and ring fingers in the center label part of the record and your thumb on the outside edge, slide it gently back into the inner sleeve.
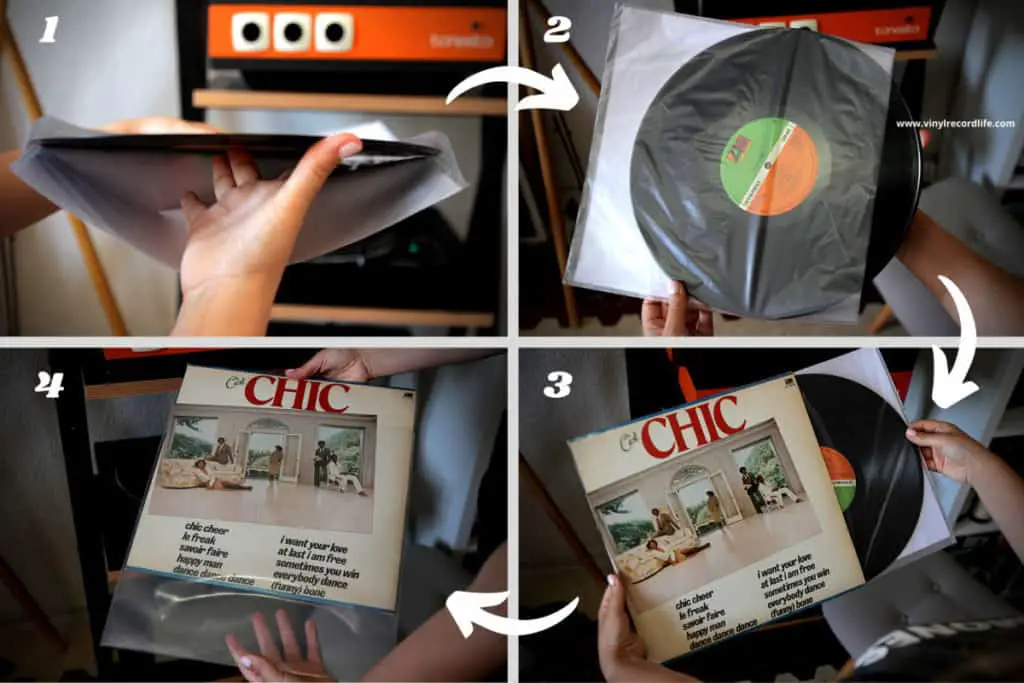
Avoid the temptation to drop the record into the inner sleeve once you’ve got it halfway in! It’s something we’ve all done before, and while it won’t damage the record as long as you’re holding the inner sleeve in the air and not supporting it on any hard surface, it will cause the inner sleeve to weaken and can eventually lead to a split, which in turn will lead to the record falling out when you least expect it.

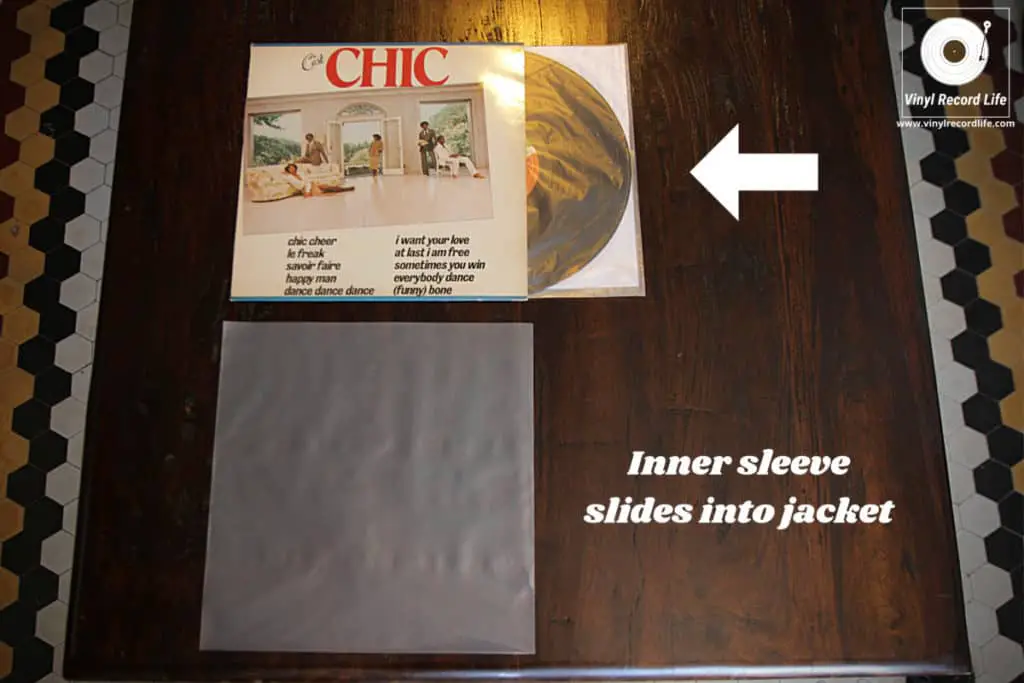
Once the record is inside the inner sleeve, place the inner sleeve inside the jacket. I keep the opening of the inner sleeve facing the sky, and make sure the inner sleeve isn’t snagging the inside lip of the jacket before I slide it all the way in.

By keeping the opening of the inner sleeve facing upwards, you avoid any risk of the record sliding out and remaining inside the jacket, which with its cardboard construction can lightly scratch the record and/or leave micro traces of card on the record playing surface. Worse still, if the record falls out of the jacket altogether it’s going to be hitting the floor from a decent height.

Now that you’ve got the record inside the inner sleeve and jacket, place the jacket inside the outer sleeve. With the opening of the outer sleeve facing upwards, I slide the jacket in with the jacket’s open side protected by one of the outer sleeve’s closed sides.

This way, the inner sleeve that contains the record cannot slide out of the jacket and/or the outer sleeve. Now, neither the inner sleeve nor the jacket have their open edge exposed.
Place the record back on the shelf, in a record box, or wherever you store it permanently, remembering to always make sure the records are stacked upright!

By following these steps when handling vinyl records, you’ll be ensuring that you’re taking the best possible care of your collection when you have them in your hands.

It’s not possible to eliminate every single possible element of risk to your records, but by following this routine you can certainly minimize those risks. Enjoy your collection!

Can My Record Player Play All Sizes of Record?


As you start to build up a vinyl record collection, you’ll undoubtedly have two main sizes of discs that make it up: 12-inch and 7-inch records.

There are other, less common sizes of record out there too, and if you’ve not long purchased your record player and are getting to grips with some of the rigors of vinyl records and turntables, you may start to wonder if a record player can play all sizes of disc.

All record players do not play every single size of vinyl record. All record players will play the two most common sizes of vinyl record, those being 12-inch and 7-inch, but it is far less likely they will be able to play a 10-inch record.

More as a convenience than for any other reason 10-inch records are much more of a rarity than they used to be, but you can still come across them.

For that reason it’s useful to know some key information about the various sizes of vinyl records, the differences between them, and how to know what sizes a record player will be able to play.

The Various Records: Understanding The Main Sizes

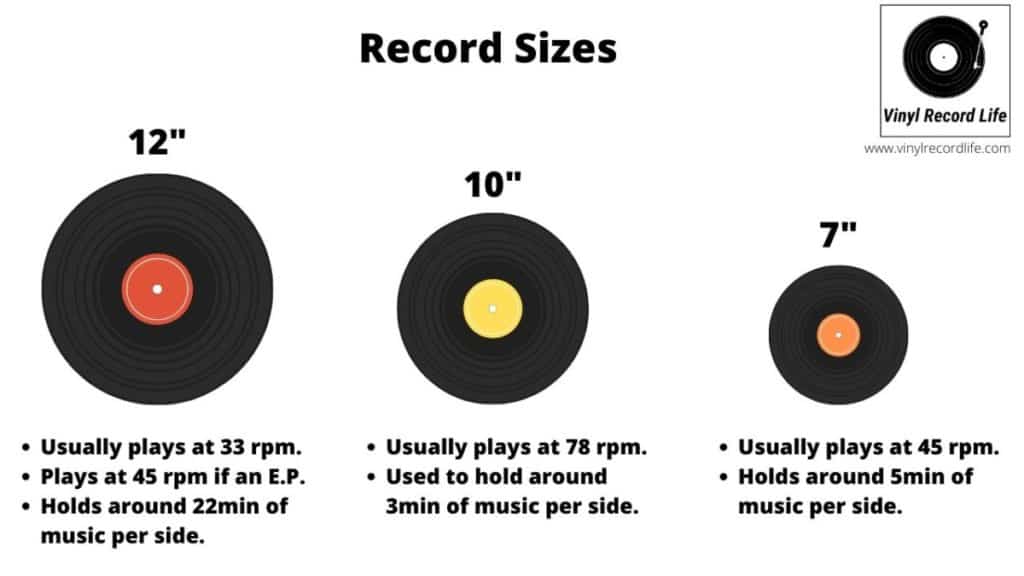
The most commonly commercially available vinyl records today come in two main sizes: the above-mentioned 12- and 7-inch formats, with the inches referring to the diameter of the physical record.

A record’s size usually indicates the revolutions per minute (rpm) it spins at on the turntable platter, and this in turn indicates how much music each side of the disc is able to hold.

Here’s a table which outlines the key information relating to record sizes, with information on how many minutes of music each standard size of record can hold:

Record Size (inches)Most Common rpmMaximum Amount of Music Stored (minutes per side)Typical Format
12″33 rpm22 minutesLP/EP
7″45 rpm5 minutesEP/SP
10″78 rpm3 minutes
*10-inch record included for comparison purposes, and its data is based on historical recording durations and not modern-day pressings.

It is important to note that any record size can be pressed to spin at any rpm, but that this table notes the most common matches between record size and rpm.

What Does LP, EP and SP Mean?

Vinyl records will often be referred to by either their size or in some cases their rpm, so being called a “12-inch” or “7-inch” record or a “45” are terms you’ll often hear in record parlance.

LP and EP are terms of reference you’ll also encounter when vinyl records are referred to. LP means Long Play and is used to describe a record that holds a full-length album on it, while EP means Extended Play and these records often hold between three to five songs on them.

Often, an EP will be pressed on a 12-inch record that spins at 45rpm, thus proving an exception to the above table’s general rule about the correlation between record size and rpm.

How To Identify a Record’s Speed in RPM

Using the above table as rule of thumb for identifying a vinyl record’s rpm will help in many cases, but there are some situations in which a record’s rpm doesn’t fall into the usual record size category, as per the EP example stated above.

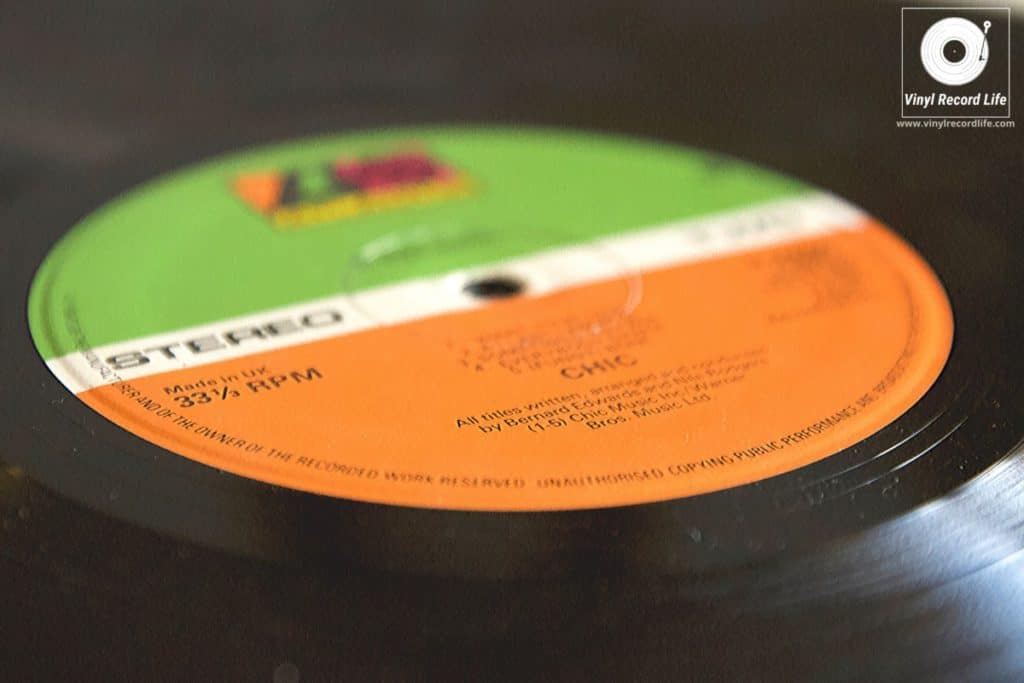
In any case, the speed at which a record should be played is often stated on the record’s label, and you should always check this before playing a record to avoid damaging it in any way. Remember to always handle your records properly!

The Evolution in Record Sizes

The 78 rpm record was the most common speed until the mid-1950s, due largely to it being the optimum speed for a record to spin at. This was down to the speed of the motors used within record players in this period.

It was also established early in the timeline of record production history that the slower a record spun, the worse the audio sounded. Conversely, the higher the rpm the lower the amount of information that’s able to be stored in the record’s grooves, so there were trade-offs in sound quality vs quantity.

Eventually, 10 inches came to be the most common size of the 78 rpm record, which was made from the more brittle shellac material that predated the PVC-based records we now use.

New technologies and the longer playing time of a 33 rpm record (as opposed to the then 3-4 minutes per side of a 78 rpm), as well as the emergence of the 45 rpm record, saw the tide shift away from 10-inch 78 rpm records..

The 78 rpm records faded in popularity, and the introduction of the 45 rpm record, which was much smaller, had similar audio quality and could fit just as much music on it meant that the 78 rpm was largely consigned to the history books.

Record Players and Their Ability to Switch Between Sizes

With the rise in popularity of 12-inch and 7-inch records playing at 33 rpm and 45 rpm, record players moved towards catering for these speeds and sizes exclusively, and these are the standard speeds between which modern turntables and record players can switch.

Some newer systems will have a speed selection for 78 rpm, but this is much less common on modern turntables due to the simple fact that the production of 10-inch records, and anything other than 12/7-inch records for that matter, is now extremely uncommon. So it is fair to say that not all record players play all sizes, by sheer virtue of the fact that most only now cater to these two record sizes.

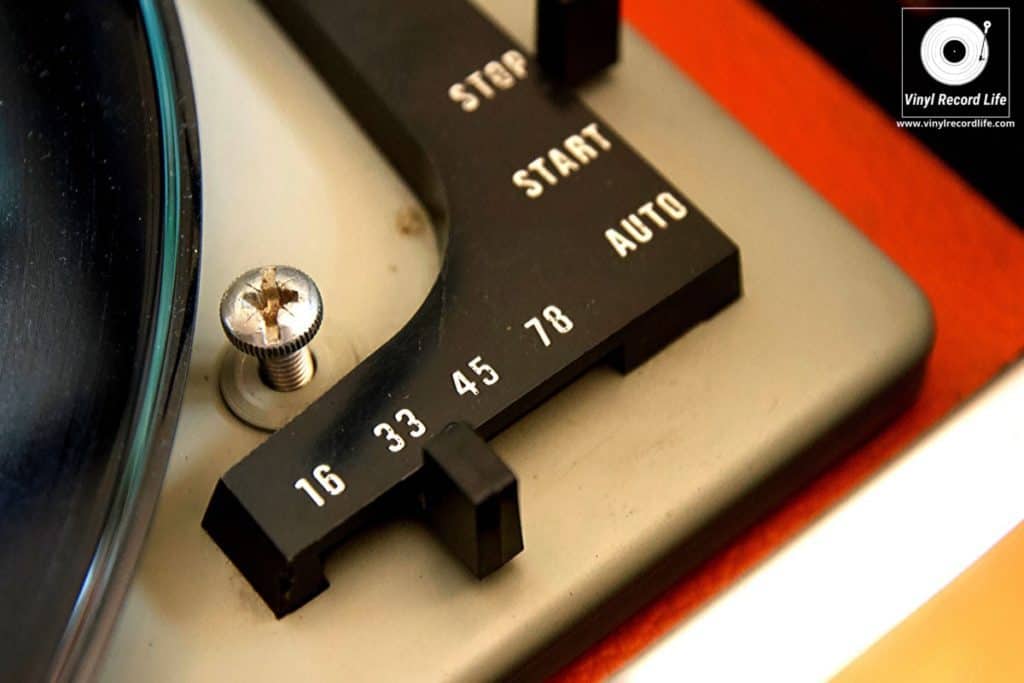
Some older, vintage record players will have three or even four-speed settings (at 16/33/45/78 rpm), but as these are now far less common it is becoming even more of a rarity.

I have a 1972 Tonesta Olympic record player which has four speed settings, but even by its production date of the early 1970s this was becoming more and more unusual.

The probability of you encountering anything other than 12- or 7-inch records today is low enough that you needn’t be concerned by whether your record player will play every single size of record that has ever been available.

It may well be the case that you’ve inherited some old 10-inch records, or records that play at speeds other than 33 rpm or 45 rpm, or that you come across them when crate-digging.

If so, this is probably the time to start considering whether you’re serious enough about collecting vinyl to look into purchasing a second-hand vintage player that could handle these speeds, if you do want to begin listening to these specific records.

An alternative would be diving into the online vinyl community and seeing if there is someone who does have a record player that could play the size/speed record you have in your possession, and asking if they could make a digital recording of your record for you. It’s something I’d happily do for a fellow enthusiast, so if you do need a hand just drop me a line in the comments!

What is a Phono Preamp and Do You Need One?


It’s easy to forget sometimes just how important certain parts of your record-playing set-up are, and take for granted the fully-integrated nature of many modern turntables.

One component of a turntable set-up that plays a very important role in achieving sound perfection is a phono preamp.

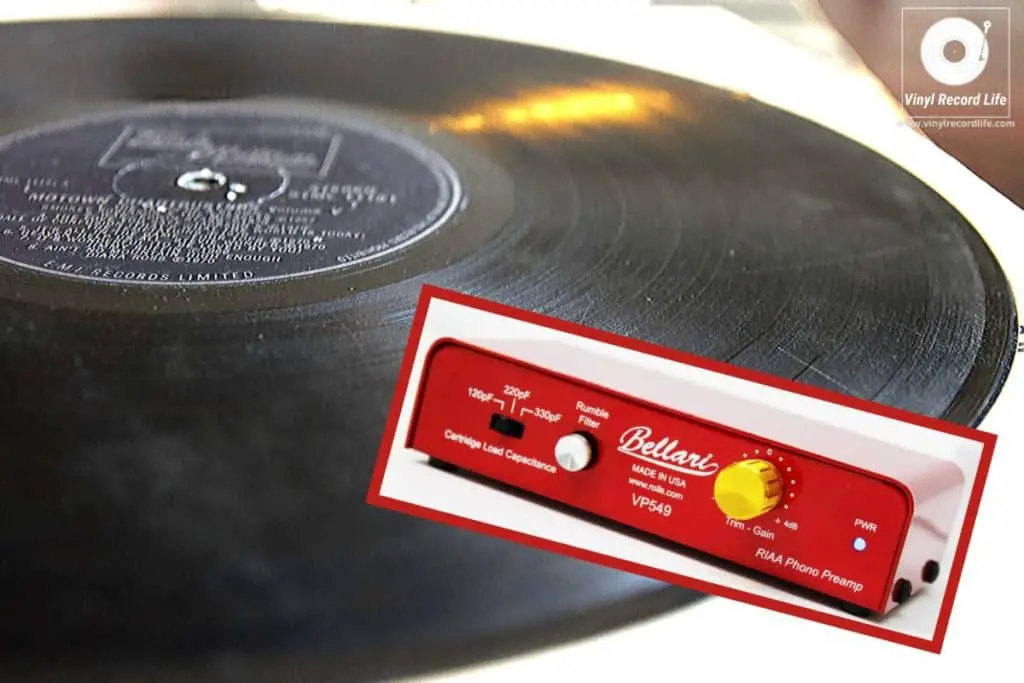
A phono preamp is a component that takes the signal from your turntable and amplifies it to a level that then permits you to connect it to your sound system, in the same manner you would do with any other audio source. A phono preamp is also sometimes known as a phono stage.

Whether you need to buy a separate phono preamp for your audio system set-up depends on a few factors. We’ll discuss these below, and will also look at the different types, how to tell if you already have one, and some other general points around preamps.

What a Phono Preamp Does, In Detail

A turntable produces an audio signal that is extremely low, and the signal that comes out of its cartridge is around 1000 times lower than that which a CD or streaming device produces. Therefore, this weak signal needs to be amplified significantly to make it strong enough.

A preamp is an electronic circuit that does exactly that: it boosts this weak electronic audio signal being produced by the turntable, and then delivers a much stronger signal.

This weak signal is called a PHONO signal and measures 0.005 Volts, and in the process of being boosted it becomes a LINE LEVEL signal which measures 0.3V. It’s this LINE signal that is required to be able to work with audio equipment such as stereo systems and speakers.

Another effect the phono preamp has is that it helps to apply the RIAA equalization curve, which is effectively a balancing out of the low and high frequencies of the recording for a more equalized playback.

Internal or External? The Phono Preamp Pros and Cons

There are two types of preamp; internal, which is built into a turntable or record player, and external, which sits apart as a separate piece of equipment.

Internal preamps have the benefit of not requiring extra wiring thanks to being an integral part of the record player already, and of course do not carry an additional cost. They also occupy less space.

However, a drawback of the internal preamp is that its user has no control over it and therefore one less point of control over the sound quality of the music.

With an external preamp, the pros and cons are inverse. Far greater control over the music sound quality thanks to the ability to tweak the configuration comes with added wiring and a separate power supply, as well as a cost.

The benefits are often worth that additional cost though, as they provide good protection from interference, their separate power supply eliminate the electrical noise an internal phono stage picks up, and there is choice between a wide range of models.

Do I Have a Phono Preamp Already?

A lot of newer models of turntable have in-built phono preamps, and there are a few indicators that’ll tell you whether this is the case.

Firstly, if it has a small box or panel which has a set of inputs, a set of outputs, a small ground screw and a phono label, then it’s got a phono stage built in. Some of these newer models also have a manual PHONO/LINE switch, which allows you to disengage the internal phono preamp and pass through to an external one if you so wish.

Another indicator as to whether your turntable has an internal preamp is the presence of a USB output. If it has one, then you’re in business already.

If you’re using an older amplifier (not to be confused with a preamp! An amplifier boosts the LINE LEVEL signal to the required level to be able to be sent to a set of speakers) or stereo system, these often have preamps built in and you can determine this by looking for inputs marked phono. Some newer speakers also come with a built-in phono preamp, and will state so clearly in the product specs.

Most newer amplifiers and receivers don’t have a phono preamp built in, neither do many older and vintage record players.

How Cartridge Type Affects a Phono Preamp

One other thing to be aware of when it comes to preamps is the impact of the type of cartridge being used. The two basic types of cartridge on a turntable are Moving Magnet (MM) and Moving Coil (MC), and their names refer to the part they carry and which converts the vibrations of the stylus into the electrical signal that the preamp must then boost.

An MC cartridge has less output than an MM one, so needs more amplification, and the preamp therefore must be capable of this extra boost.

Most phono preamps can work with both types of cartridge and have a switch to change between the two, but while an MC cartridge connected an MM phono input should produce the right sound quality, an MM cartridge playing through an MC phono preamp will most likely distort the sound.

Connecting a Phono Preamp: How To Do It

If you’ve ascertained you need an external phono preamp, the next step is to get hold of one and hook it up to your turntable or record player.

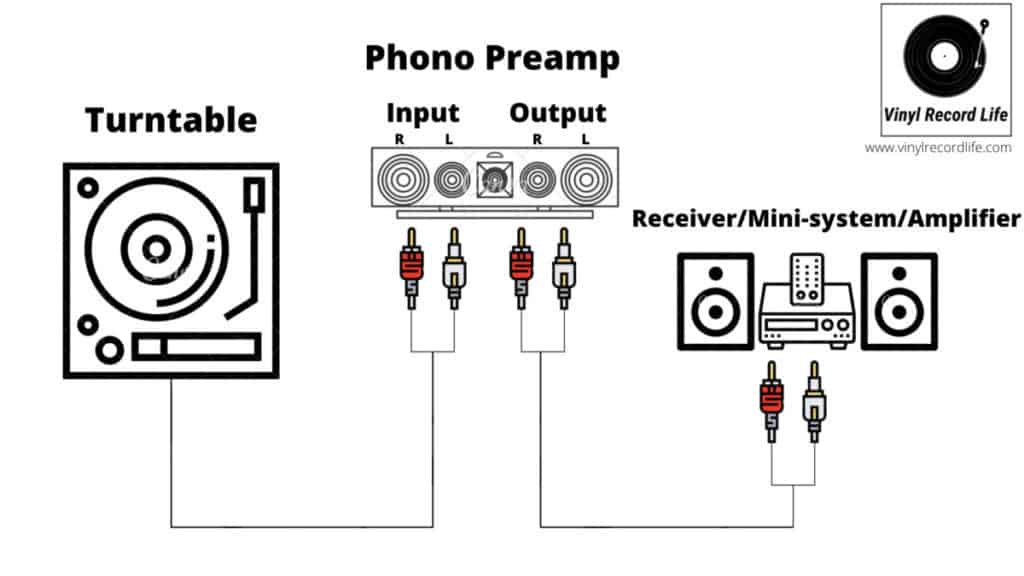
You’ll need audio cables, which you’ll plug into the L/R output terminals on your turntable. Then, plug the other ends of these cables into the input jacks on your phono preamp. If your turntable has a ground terminal then connect to it as per the set-up instructions.

Next up, connect some good quality audio cables to the output jacks on your phono preamp, and plug the other ends of them into your audio system, be it an amplifier or speakers. Just make sure you don’t plug them into a phono input by accident.

A simplified diagram showing how a phono preamp connects to a turntable and receiver/stereo system.

Arrangement and Positioning is Important!

When connecting equipment, it’s important to avoid running the audio cables and power cables parallel, and to ensure they don’t cross one another. That’s to say, don’t bunch them together when trying to tidy up the cables to make it all look neat, as this can create hum.

Just as important is where you place an external phono preamp. Never place it on top of other kit or equipment, as this can also lead to hum, and never plug a phono preamp into another audio component such as a CD player as there is a real risk of damage due to the difference in signal levels.

Is There Much of a Difference Between Phono Preamps?

Yes, there is! The quality of your phono preamp will impact the sound quality of your output greatly, as the amplification of the PHONO signal to a LINE LEVEL signal is a process that can introduce all kinds of noise “pollution” if not done properly. This is a critical step with regards to the minimization of sound distortion, so needs to be done well.

The most expensive phono stages aren’t always the best ones, but some of the more expensive options are also of such high quality that they are worth every cent, while there are also some very affordable ones that do an excellent job. You get the idea: there is a lot of choice and it’s worthwhile spending some time weighing up the different options.

When it comes down to it, it’s really a case of researching the models that fit your budget and seeing which phono preamps have the best reviews in relation to the specific components you’ll be hooking them up to, as sound quality can vary on the same preamp depending on what it’s being paired with.

Can I Take My Vinyl Records on a Plane?


A trip just isn’t complete without squeezing in a quick visit to a local record store or two if you’ve got the time, right?

If you make any purchases though you might be wondering how best to get them home safely, and if you happen to be flying you may well have pondered if you can bring those records onto an airplane.

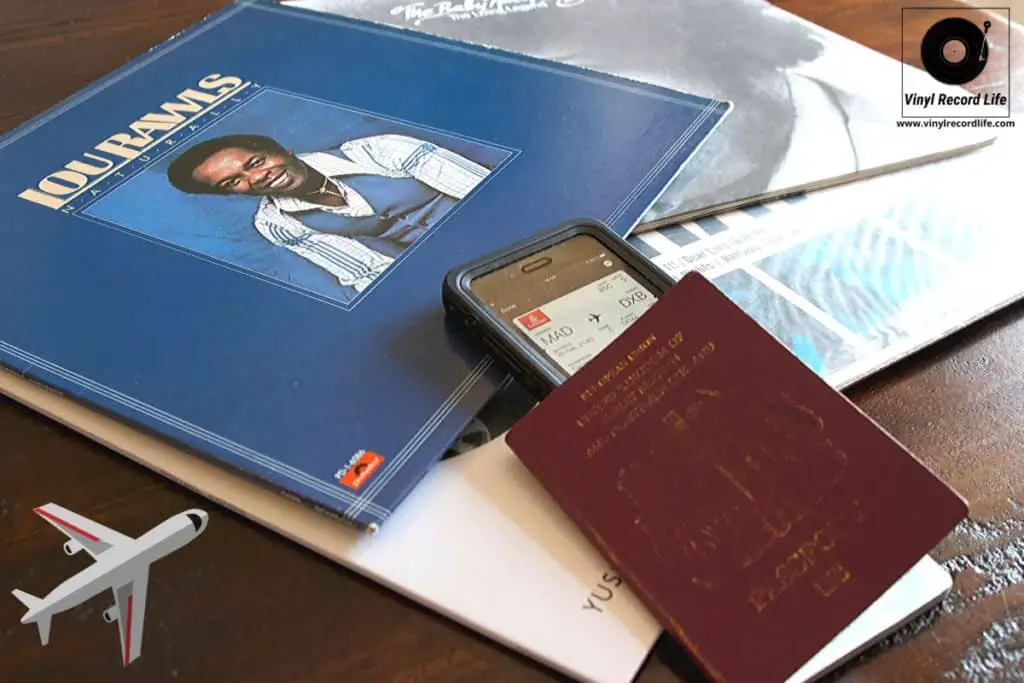
You can take vinyl records on a plane. Vinyl records are a TSA-permitted item for flying, and you can pack them as either carry-on or hold luggage, as long as you obey the dimension and weight restriction policy of the individual airline with which you are travelling.

I’ve travelled a number of times with vinyl records, both as carry-on and in my checked luggage (although I don’t recommend packing any records in the hold – more on that later), and have never had any issues.

I’ve always travelled light, transporting a handful of records rather than a large quantity, and I’d recommend this as being an important factor in successful air travel with vinyl.

There are different specifications and policies from airline to airline when it comes to the weight and dimensions of your luggage, so it’s imperative you check these out carefully before you travel. More info on that below…

Travelling by Air with Vinyl Records: Is Carry-On or Checked the Best Option?

The answer to this question will depend on one major factor: How many records are you carrying? The number of records you want to take on the plane will determine their volume and weight, and this will then dictate your options.

Go For Carry-On, If You Can

I would always advise going for carry-on whenever possible, as this way the records remain in your possession and control, but of course this may not be possible if the weight and/or volume dimensions of the records you want to transport exceed the carry-on allowance.

Records often have a monetary and sentimental value, and this is one of the main reasons I always ensure I’m not transporting more than I’d be allowed to carry-on. I want those records in my line of sight for the entire journey!

If you’re taking your records as carry-on, be prepared for an inquisitive airline agent at both check-in and the gate, as I’ve often been asked to verify weight and dimensions of my carry-on at both these steps of the flying process. Make sure you’re within the airline’s stated weight and dimension restrictions for carry-on, otherwise you could face fees at the gate.

How to Be Fully Prepared for Luggage Restrictions

The carry-on and checked restrictions really do vary from airline to airline, domestically and internationally both in the US and Europe, so here are two handy tables that outline the key info for five of the biggest and most commonly used airlines on both sides of the Atlantic:

Domestic & International Checked Baggage Size and Charges

AirlineChecked Bag SizeChecked Bag Weight*First Checked Bag Fee*
American Airlines62 inches / 158 centimeters50 lbs / 23 kgDomestic from $30 / International from $0
Delta62 in / 158 cm50 lbs / 23 kgDomestic from $30 / Int’l from $0
Southwest62 in / 158 cm50 lbs / 23 kgFree
United62 in / 158 cm50 lbs / 23 kgDomestic from $35 / Int’l from $0
JetBlue62 in / 158 cm50 lbs / 23 kgFrom $35
British Airways35.5 x 29.5 x 16 in / 90 x 75 x 43 cm50 lbs / 23 kgFree
Lufthansa62 in / 158 cm50 lbs / 23 kgFree
KLM62 in / 158 cm50 lbs / 23 kgFree
RyanairStarting at 22 x 16 x 8 in / 55 x 40 x 20 cmStarting at 22 lbs / 10 kgStarting from €10
easyJet108 in / 275 cmStarting at 33 lbs / 15 kgStarting from €9
*Depends on class of travel and/or destination. Check the airline website for specifics. This data was correct and independently researched as of October 19, 2022.

Domestic & International Carry-On Baggage Size and Charges

AirlineCarry-On Bag Size, one piece* (including handle and wheels)Carry-On Bag WeightCarry-On Fee
American Airlines22 x 14 x 9 in / 56 x 36 x 23 cmN/AFree
Delta22 x 14 x 9 in / 56 x 36 x 23 cmN/AFree
Southwest10 x 16 x 24 in / 25 x 40 x 60 cmN/AFree
United9 x 14 x 22 in / 22 x 35 x 56 cm (in Basic Economy carry-on is not allowed, only one “personal item”)N/AFree
JetBlue22 x 14 x 9 in / 56 x 36 x 23 cmN/AFree
British Airways22 x 18 x 10 in / 56 x 45 x 25 cmMax 51 lb / 23 kgFree
Lufthansa22 x 16 x 9 in / 55 x 40 x 23 cm8 kgFree
KLM21.5 x 13.5 x 10 in / 55 x 35 x 25 cm12 kgFree
Ryanair22 x 16 x 8 in / 55 x 40 x 20 cm10 kg€6 – €20
easyJet22 x 18 x 10 in / 56 x 45 x 25 cmN/AFree
*Exceptions apply. Check the airline website for specifics. This data was correct and independently researched as of October 19, 2022.

One extra (and very important!) thing to always watch out for when carrying records internationally is import taxes, as you don’t want to get hit with a bill upon landing when you go through customs.

Is it Safe to Take Vinyl Records on a Plane?

It’s a logical question, given the somewhat fragile nature of records and their vulnerability if mishandled or badly packaged. If you pack your records carefully, taking them on a plane is a safe way to transport them.

Packing Your Records To Avoid Damage

The way in which you pack your records is of great importance. For carry-on a special record bag with padding and protection is a worthwhile investment, especially if you’re planning on buying and carrying more than just a handful of records and when traveling is something you’re going to be doing frequently.

Here’s a small selection of options across different price points that could prove useful:

BagPrice LevelProsConsCapacity (12″ records)Link
Trunab Vinyl Record Bag$– Traditional record bag format.
– Shoulder strap and backpack option.
– Value.
– Doesn’t fit some airline carry-on dimension restrictions.Up to 60 records.
Magma LP Bag 40 II$$– Small and light.
– Extra pockets.
– Value.
– Some complaints over shoulder strap.
– Fits less record than some cheaper options.
Up to 40 records.
UDG SlingBag Trolley Deluxe$$$– Premium.
– Trolley design.
– Fully airline carry-on compliant.
– Fits more than just records.
– Expensive.Up to 60 records.

If this is a one-off trip though, you can just as easily purchase a cheap record mailer envelope such as this, or you can just ask the record shop where you’ve made your purchase to give you an old one as they always have some lying around.

This is a fast, easy and cheap option if you’re just taking a couple of records on board with you and are comfortable carrying the mailing envelope under your arm or in a carrier bag.

If it’s unavoidable for you to check your records in, then buffering them with bubble wrap and cocooning them within clothes and other soft items inside your suitcase is the only way to give them a chance of making it to the other side.

Ensuring they aren’t rubbing against anything (or one another), that they aren’t in contact with the sides of the suitcase and that they have something soft and that can absorb any shocks or bumps is essential. They need to be completely secure in position and unable to move.

I’ve done this with records a couple of times when I really haven’t had any other choice, and my records made it through, but I go to every length possible to avoid this and take them as carry-on.

The added risks of your checked luggage getting lost, mishandled or worse just adds to the lack of confidence in this way of carrying your records on a plane.

My advice is that if you’re dealing with a volume of records that surpasses carry-on restrictions, then looking into shipping is a more secure method. I did this when making an international move a few years ago, buying myself two Citronic CVA50 flight cases, carefully packing the part of my collection I wanted to ship inside them, locking them with TSA-approved padlocks and sending them via a carrier.

The Citronic CVA50 seems to be much harder to come by recently, but this Odyssey option looks pretty similar and at the time of writing was available on Amazon as a good alternative. Click here for a link to it.

Many airlines state that if the weight of any item exceeds 100 lbs (45kg) it must be shipped as air cargo.

One thing to remember before packing any records prior to travel, is to give them a good clean, especially if they are going to be packed or stored for a while after the journey is complete.

Airport Security Checks and Flying with Vinyl Records

Other concerns people tend to have around taking records on airplanes is possible damage relating to air pressure and security scans. Vinyl records aren’t at any risk from air pressure, and the airport luggage scanners will not damage them either.

When it comes to security checks though, expect to be asked to open your carry-on luggage if you are traveling with vinyl records as security agents may want to inspect them. For checked luggage, always use a TSA-approved lock on your bag.

Whatever your final decision or choice on transporting your records, I hope this has helped answer whatever questions you may have had around flying with records. Happy listening!

What Does a Vinyl Record Weigh?


Ever held a vinyl record in your hands as you get ready to place it on the platter, and wondered: How much does this thing actually weigh?

I’ve done it with a few discs of varying sizes and weights, noting the different stated weights of certain records and wanting to know why the weight varies between discs that appear to be the same size. So I figured I’d look into it. Here’s what I found.

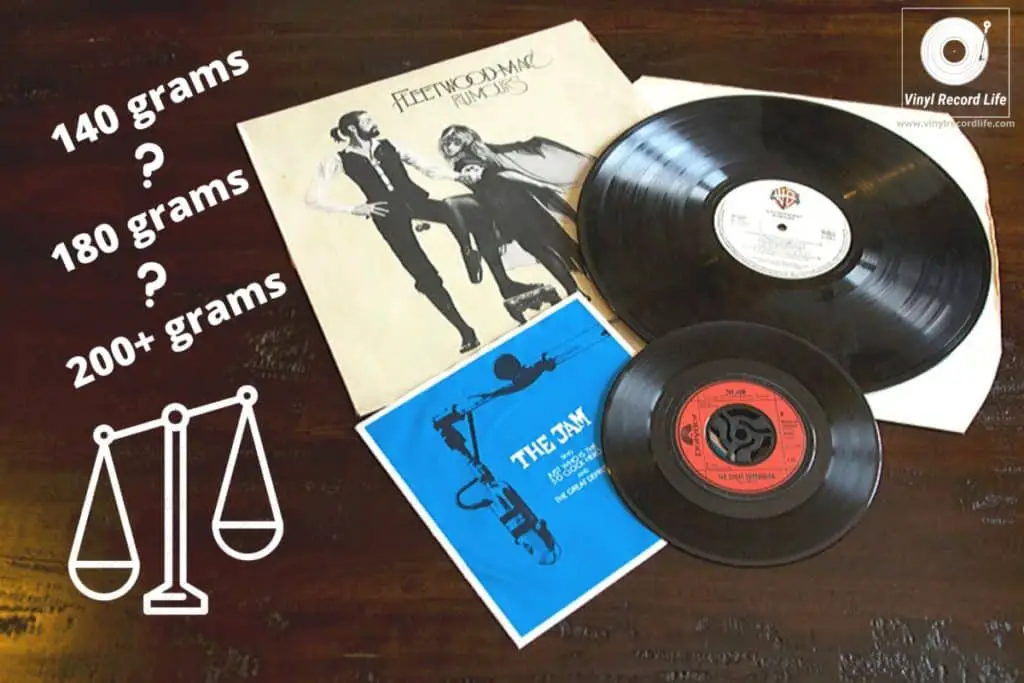
A 12” vinyl record will normally weigh between 120-150 grams, with many modern-day pressings weighing 180 grams. Some 12” discs can weigh as little as 90 grams and as much as 200 grams. A 7” vinyl record weighs between 40-50 grams.

The difference in weight between a 7” and 12” vinyl record is for obvious size reasons, but what’s the deal with a weight variation of anything from 120 right up to 180 or even 200 grams on a 12” record? What kind of impact can it have in terms of the sound of the record? And why do most modern-day 12” vinyl records now come in 180g and make a big deal of it on the record packaging?

All questions I used to ponder and which I’ve addressed here, so let’s get going.

The Progression Over Time in the Weight of Vinyl Records

Most of the records produced during the 20th century weighed between 120 and 140 grams. This was the standard normal range, although there were variations which saw the likes of RCA Records bring out their trademarked Dynaflex disc in 1969 that came in at around 80 grams, but which was discontinued by the end of the 1970s. Other records tipped the scales at as much as 200+ grams and were considered true audiophile grade pressings.

In recent years a trend towards 180 gram pressings has been notable, although the audible benefits of this are debatable and widely considered to be largely insignificant. We’ll talk more about the 180 gram development, as well as the question of whether weight impacts the quality of a record and the perceived advantages of heavier discs, later on.

Before we do, here’s a table that presents a selection of records from my own collection that I compiled, to help show the true variance and progression in the weight of vinyl records through time. I’ve tried to make the range as varied as possible in terms of record label and pressing year to give as representative a sample as possible.

ArtistAlbumYear of PressingLabelWeight
David BowieAladdin Sane1973RCA125g
Fleetwood MacRumours1977Warner Bros.120g
Marvin GayeMidnight Love1982CBS110g
Bloc PartyBloc Party E.P.2004Dim Mak135g
Mansur BrownShiroi2019C&P Black Focus190g

What Difference Does Weight Make?

It’s a logical question, because if there’s a variance in weight between records, it must be for a reason, right?

When looking into this, I found there were two main areas of focus on the question of the weight of a vinyl record. The first tended to lean towards asking what kind of impact weight had on the sound quality of the disc, and the other went more in the direction of what mechanical factors drove the variance in these weights. The two things were closely linked.

Heavier Records = Better Records?

In short, audiophiles tend to agree that (heavier) weight alone does not correlate to a better sound quality on the record. Superior sound quality is mainly down to the integrity of the master source, mastering process and the equipment that was involved. Whether a record is lighter or heavier does not make the difference to sound quality on its own. The technical standard by which grooves are modulated and cut on a record is exactly the same on all records, regardless of their weight.

A heavier record can change the vertical tracking angle of the turntable’s tonearm ever so slightly, but this difference is minimal and its impact on sound highly questionable. The impact could also be detrimental as much as beneficial to the sound, however small the difference.

A heavier record weight has been championed by some for other reasons. The heavier a record is, the thicker it is, and thicker records have been heralded as being more robust and durable. It’s also been suggested that a heavier record can have a more stabilizing effect on the stylus and cantilever suspension, which can help to provide extra protection from vibration thanks to the damping effect the extra grams can have, but the effects on sound reproduction are micro and therefore negligible.

Heavier Can Mean a Flatter Record Surface

Some record labels, such as Mobile Fidelity Sound Lab, developed technologies which incorporated pressing processes that produced a flatter record surface on records that weighed in around the 180g mark. In the case of MoFi, their tech was called Ultra High Quality Recording, or UHQR, and they pioneered it with JVC in the 1980s.

The flatness of the finished disc was due to the pressing die casts being designed in such a way as to minimize unevenness on the record’s surface, and while a flat surface does lead to benefits in the reading of the grooves, the overall relation with the finished weight of the vinyl record is dependent on too many other factors for the benefit to be credited to the heavier weight.

The Weight of a Record Is Just One of Many Factors

The truth is, there are so many factors that influence the quality of sound on a vinyl record that its weight is just one of many ingredients in a complex mix. There are records that weigh 130g and far out-perform 180g pressings for sound quality, and vice versa.

There are some myths associated with heavier vinyl too that should be dispelled, one being that the thicker vinyl on a heavier record means the grooves can run deeper. This is simply untrue.

Oftentimes, the real reason behind the differing weights of records that have the same diameter comes down to two main things; the resin mix used to make the record, and certain pressing preferences and processes of the factory making the disc.

We’ve discussed in another post the actual ingredients that go into making a vinyl record, and this has a massive influence on the final weight of the finished product.

We’ve mentioned just two labels in this post who developed their own specialized formats of record pressing (MoFi’s UHQR and RCA’s Dynaflex), and while these two trademarked formats may not be in production today, it’s still a valid example of the vastly different pressing methods and processes that labels employ, and which result in a wide range of thickness and, by default, weight.

What is 180-gram Vinyl and Is It Better?

So if weight doesn’t really make a difference to the sound quality of a record on its own, why has there been such a prevalence of 180g discs in the previous decade or so? Moreover, why is such a big deal made of it with the stickers placed on the covers of these newer pressings?

Back in the day, when 180g pressings were less common but still present, they were associated with a higher audiophile standard, partially because they were more costly to produce.

The sonic benefits of noise reduction from heavier records that we looked at earlier were also presented as benefits, and the labels that pressed the more expensive 180g records were widely viewed as taking far greater care in all steps of the process, from mastering to the quality of resin mix right through to the pressing standards in place.

Fast forward to the modern day, and while the same positive virtues about 180g records being stronger and more durable and therefore resisting warping a lot better remain true, the same rules also apply with regards to no discernible audible superiority in the recording that’s pressed onto the disc.

What has changed is that with vinyl’s 12-year run of year-on-year sales growth (as per RIAA stats), it has become a marketing technique to use the 180-gram label as a means of stating a disc’s superior quality, irrespective of whether the material used in the construction of the record or the mastering process were themselves superior.

With this weight of pressing becoming the standard, the perceived added value by a consumer spending anything from $25-$50 on a record at a retailer such as Barnes & Noble means that the slightly higher production cost of minting a 180g disc becomes a worthwhile one for the label.

Why Is My Record Player Speed Too Fast or Slow and How Can I Fix It?


You’ve gone to all the trouble of getting a sweet set-up to be able to listen to your prized vinyl record collection, but you’ve encountered an issue with your turntable. It’s spinning too fast or too slow.

It’s a problem almost all record enthusiasts will have come across at some point, but fortunately in many cases it’s something that can be fixed without too much hassle.

If your record player speed is too fast or too slow, one of these issues is likely the cause:

  • Turntable belt elasticity or tension.
  • Cleanliness of turntable motor.
  • Lubrication of turntable parts.
  • Turntable rotation speed calibration.
  • Speed selector on turntable.
  • Center hole of record.

Not all issues apply to all record players however, so when it comes to diagnosing what the problem is and what the fix may be, it’s important to first understand the different issues and to which types of turntables and record players they could apply.

If your record player sounds bad, but it doesn’t sound like it may be a speed issue, then there are a number of other possible causes. We list 11 things you should check if your turntable isn’t sounding great in our troubleshooting guide here.

Understanding How the Type of Turntable Affects the Issue of Playing Speed

To understand the root causes of a turntable playing records too fast or too slow, it’s important to first grasp the difference between belt-drive and direct-drive systems. A third system, idler-drive, was largely displaced by belt-driven turntables many years ago, so it’s most likely you have either a belt or direct-drive player.

We don’t need to go into mind-numbing detail here, but a quick overview is key to being able to recognize which issues relate to which type of turntable. That then helps apply a fix faster.

The type of drive refers to how the motor is connected to the turntable platter. The motor powers the movement of your turntable, and the type of drive it runs helps define the speed.

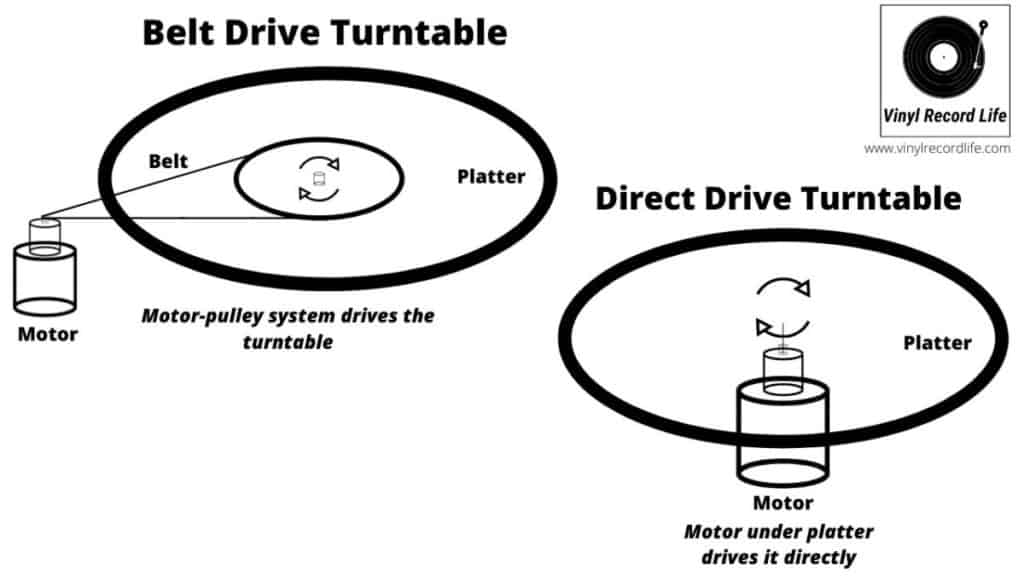
A direct-drive turntable houses its motor directly underneath the platter, and rotates the platter directly, hence its name. The speed is almost instant and there is no resistance via a belt.

A belt-drive turntable’s motor is set away from the platter, and is connected to a spindle which acts as a pulley. The belt loops around the spindle and the platter (upon which the record sits), and the whole thing acts in the same manner as a pulley system, rotating the platter.

Because of its construction the belt-drive turntable presents speed issues more often, and for this reason is the focus of the majority of the issues and fixes we’ll touch on.

A simple visual explanation of the difference between a belt-drive and a direct-drive turntable.

So Why is The Turntable Playing Too Fast or Slow?

Let’s take a look through the issues we outlined at the start of the post, and see which issue generally applies to which type of turntable and why.

Belt Tension

Belt elasticity or tension relates to, you guessed it, belt-driven turntables. Belts will stretch over time, it’s a natural occurrence and it’s unavoidable, but of course it manifests itself as a variance in the playing speed of the record.

A stretched belt, and we’re only talking millimeters here, can slip on the pulley with the result being a record that spins too slowly. Any kind of minor deformation of the belt can also lead to it rubbing in places where it shouldn’t, which will hinder the efficiency of the drive system and affect playing speed.

Another possible outcome of a worn belt is that it deposits particles directly onto the motor pulley as it degrades. This expands the diameter of the pulley, meaning the belt needs to travel a slightly further distance and the result is a disc that plays too fast.

Dirt and Friction

The motor on both direct- and belt-drive turntables is important, as any build-up of dirt or residue on the motor can adversely affect its operation and cause problems that end up affecting the record’s speed. Again, this is far more likely to occur on a belt-driven player, but can also crop up on a direct-drive model too.

As a turntable is made up of moving parts, any friction will cause a slowing down of the mechanical process, so any excessive friction can adversely affect the playing speed.

Keeping your records clean is also important, as any dirt or dust that they transfer across to the turnable can build up over time. For a detailed guide on how to do this, check out our step-by-step walkthrough on cleaning vinyl records.

Tip: If you’re looking for a good, affordable and effective record cleaning kit, my recommendation is this one. It includes a stylus cleaning brush, which is an essential piece of kit for helping keep your turntable as dirt-free as possible.

Wrong Speed Selection

Sometimes the explanation is staring us right in the face, and the wrong speed for the record is selected. It’s easy to forget to switch the speed selector from 33 rpm to 45 rpm, and vice versa, when changing from one record size to another, but this is usually quite an obvious difference in playing speed.

Find out more about record speeds and sizes here!

Speed Calibration of Turntable

For much subtler but still very audible differences in speed that are affecting the record’s sound, the fine tuning that the turntable’s rotation speed requires is often another factor in a record sounding just that bit too slow or fast. That’s why a proper set-up and calibration when setting up a turntable is so important, but minor tweaks and adjustments are still required from time to time.

Misshapen Center Hole on Record

Finally, another less common occurrence but one worth noting is a misshapen center hole in a record. Sometimes, the hole through which the platter’s spindle is placed can lose its form, and this can also affect the consistency of the playing speed.

How To Check If Your Turntable Is Playing Too Fast or Slow

A quick recalibration of a turntable’s playing speed can often solve things, and will help to figure out how far off hitting the perfect 33 1/3 rpm or 45 rpm your record player actually is.

There are two main methods by which you can check the playing speed of your turntable.

The Stroboscopic System

The first is known as the stroboscopic system and involves an optical illusion to get the turntable settled on the right speed. Some more DJ-oriented turntables, such as the Technics SL1200 for example, have stroboscopic markings (dots) on the outside of the platter and a strobe light built into the unit for this.

For turntables that don’t have this, you can download a free strobe disc, print it out and place it on your turntable platter. VinylEngine is an awesome source of info and has some free versions you can download here. Depending on where you’re based geographically you’ll need either the 60hz version for North America, or the 50hz version if you’re in Europe, Asia, or Australia. You’ll also need a strobe or halogen light to illuminate it.

From here, direct the light onto the revolving disc once the platter is up to its playing speed, and depending on which speed you are testing for – be it 33 rpm or 45 rpm – the corresponding strobe markings should appear stationary. If they do, that’s when you know the speed is good. If the markings appear to be moving clockwise then things are too fast, and if they’re moving counter-clockwise then the play speed is too slow.

Using a Mobile Phone App

A faster, cheaper and more convenient method is to use a mobile phone app. Although this approach has had its accuracy questioned by some purists, I’ve found it more than capable and can recommend ‘RPM Speed & Wow’ for Android devices or ‘RPM – Turntable Speed Accuracy’ for Apple devices.

Simply open the app, place the phone on the platter next to the spindle, and ensure the reader says 0. Start the platter and wait for it to reach full speed, let it spin for a short while, and take the stable reading as the rpm of your turntable.

If you’re hitting the speed you want, that’s great. If not, you’ll need to do some tweaking to get a fix.

How To Fix a Record Player That’s Spinning Too Fast or Slow

Here we go. Some reasonably easy fast fixes to get you spinning right on point.

Check The Belt And Do One of The Following…

First up, to make sure your belt isn’t the issue if this is what you suspect, check it’s not rubbing anywhere it shouldn’t be. You can remove the belt carefully and inspect it, giving it a clean and giving the motor pulley a once over too. It’s not unusual for dirt and grime to build up on these two components over time as we’ve discussed.

If the belt’s become too stretched and you want to try and salvage it, there is one internet-favored method that involves placing it in boiling water to shrink it back to size, but I’m not a fan of that. I’d recommend just replacing it, as it’s not an expensive part and a fresh one will benefit the whole set-up of your turntable. The guys over at LP Gear, for example, have a massive selection covering a huge variety of turntable brands so you’re sure to find what you need. Click here to see their selection of belts.

Make Sure Your Turntable is Well Lubricated

Keeping your turntable well lubricated and clean in general is a good preventative measure to avoid any undesired speed variances, so keep on top of that as a matter of habit.

Calibrate the Speed of Your Turntable

If it’s a case of the turntable’s rotation speed calibration, and you need to make any marginal adjustments in general, there is often an adjustment screw for both the 33 rpm and 45 rpm speeds.

The instruction guide or service manual of your turntable will tell you where these screws are located, and you can usually find out the specific location for your model with a dig around on Google.

Depending on their location, you can tweak the screws as you check the record speed and make on-the-fly adjustments. Always make sure the turntable is level before you do this, and start with the 33 rpm speed.

Some turntables will have knobs on their surface as opposed to concealed adjustment screws, where you can adjust this.

Overall, it’s a process that takes a little time and plenty of patience, not least because the location of the adjustment screws can be in a slightly tricky spot, and also because the tweaks needed can be marginal.

If you’re not confident with any of these fixes, my advice is to go and see a pro. Yes, there will be a cost, but if you value the listening experience it’s a worthwhile investment.